Project details
Skill
Cost
Estimated Time

In this video, This Old House technical editor Mark Powers shows you how to avoid the cost of refinishing or replacing worn planks by sprucing them up with a few coats of durable paint. You can choose whatever pattern you want (here we use a checkerboard for a cottage-style look) or color you want; all you need is a framing square and some painting tools.
Steps
1. Gently rough up the floor’s finish and level any high spots with a 150-grit sanding sponge. Wipe the floor clean with a damp cloth and allow to dry thoroughly.
2. Meanwhile, cover the space beneath doors with plastic to keep dust from blowing in.
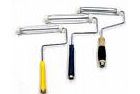
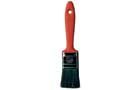
3. Beginning on the opposite side of the room from the door, paint the entire floor with a base coat of the lighter of your two colors. Cut in the edges of the floor with a paintbrush. Then coat the entire field with a roller.
4. Let the paint dry completely at least overnight. Apply second coat if needed.
5. Begin laying out pattern at most visible wall in perfect half-square triangles. Estimate the number of squares you want to fit across the wall and divide by length of the wall by that number of squares. Then mark the wall from corner to corner with the resulting measurement.
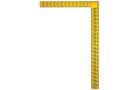
6. Extend your marks into squares with a framing square and a straightedge.
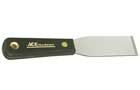
7. X off the squares you won’t paint. Tape off the squares you will. Seal the tape to the flooring by dragging a knife over the tape’s edge.
8. Clean up stray pencil lines with a damp sponge and then lightly sand the squares and wipe them clean.
9. Cut the edges of each square with a paintbrush.
10. Fill in each square with a mini-roller, starting each stroke on the tape and pulling inward. Rollin in the direction of the floorboards.
11. Remove the tape before the paint dries. Peel up and away from the paint at an angle.
12. Apply a coat of water-based polyurethane to high-traffic areas.