Project details
Skill
Cost
Estimated Time

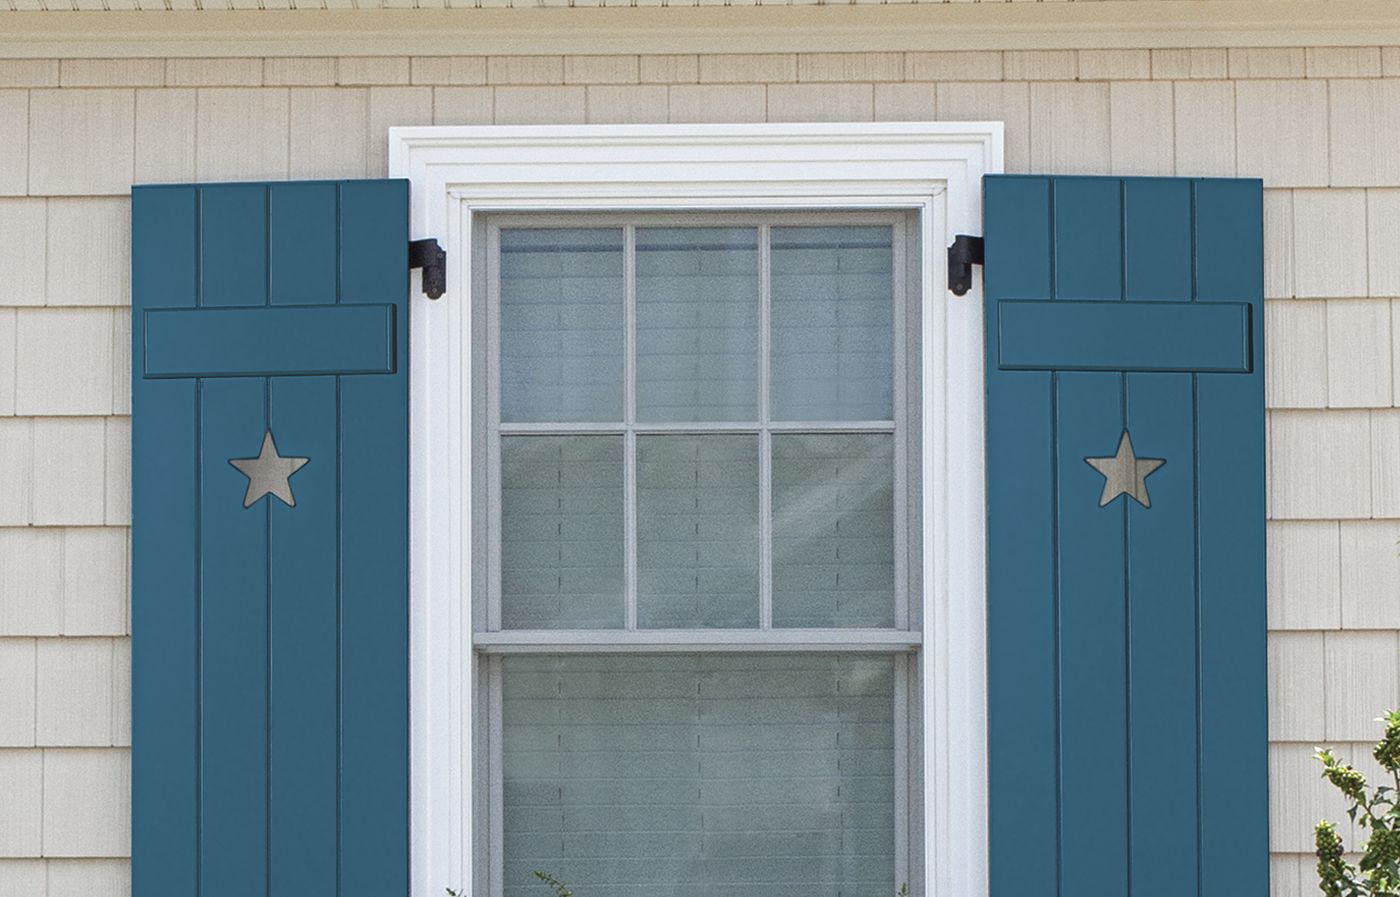
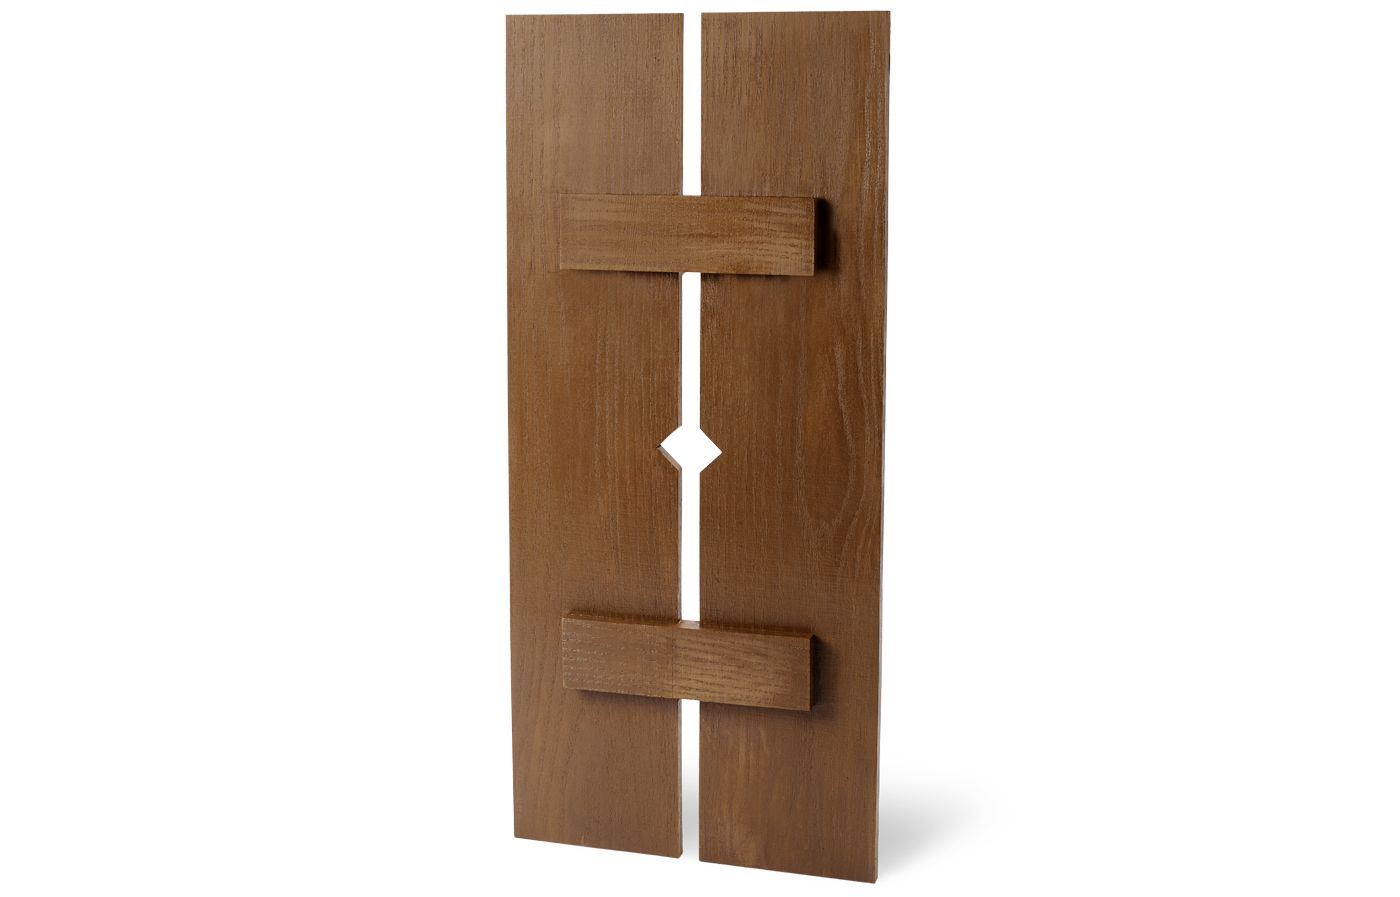
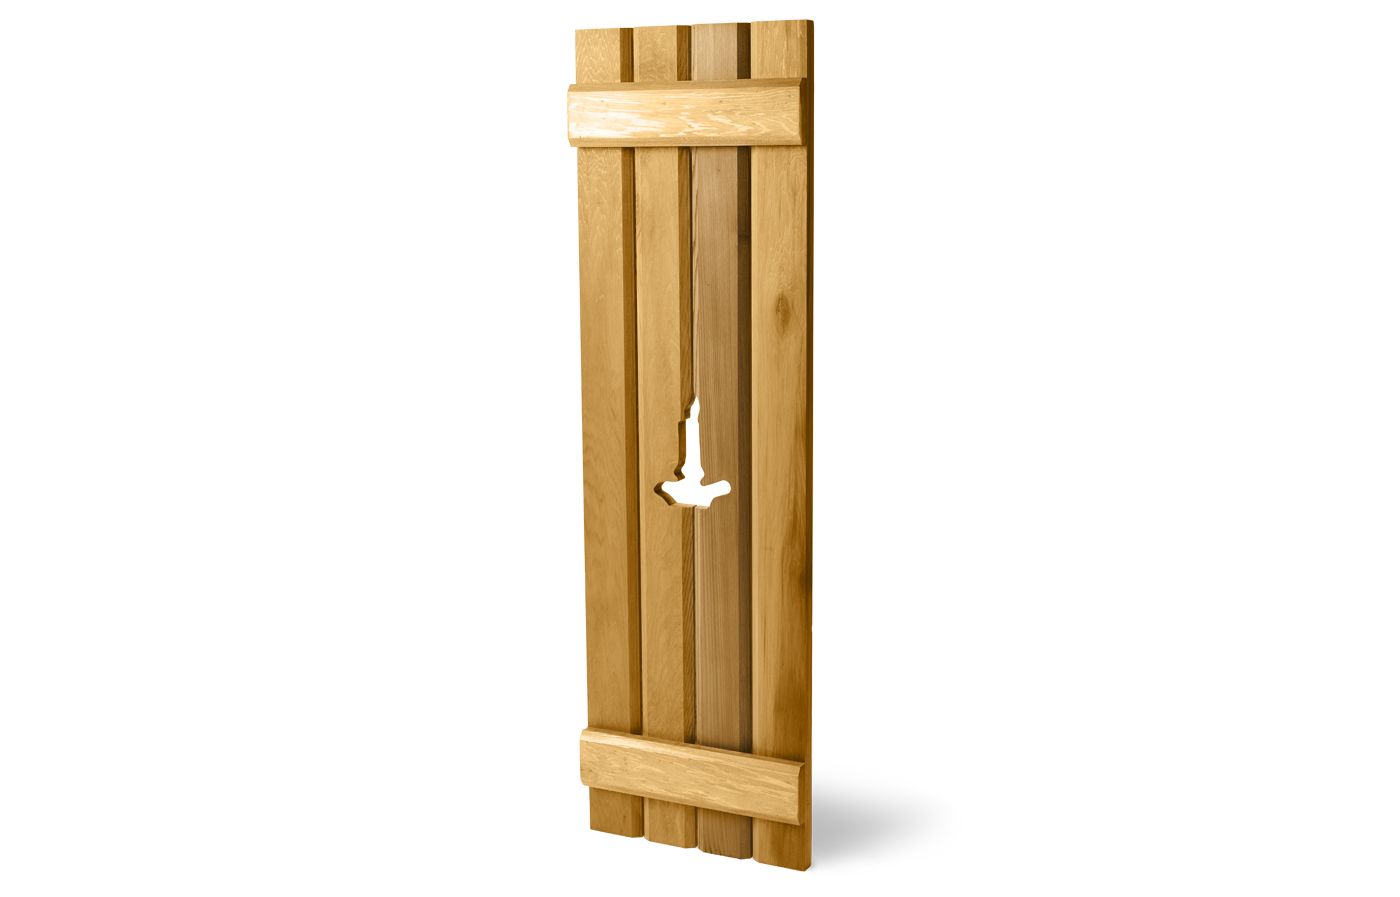
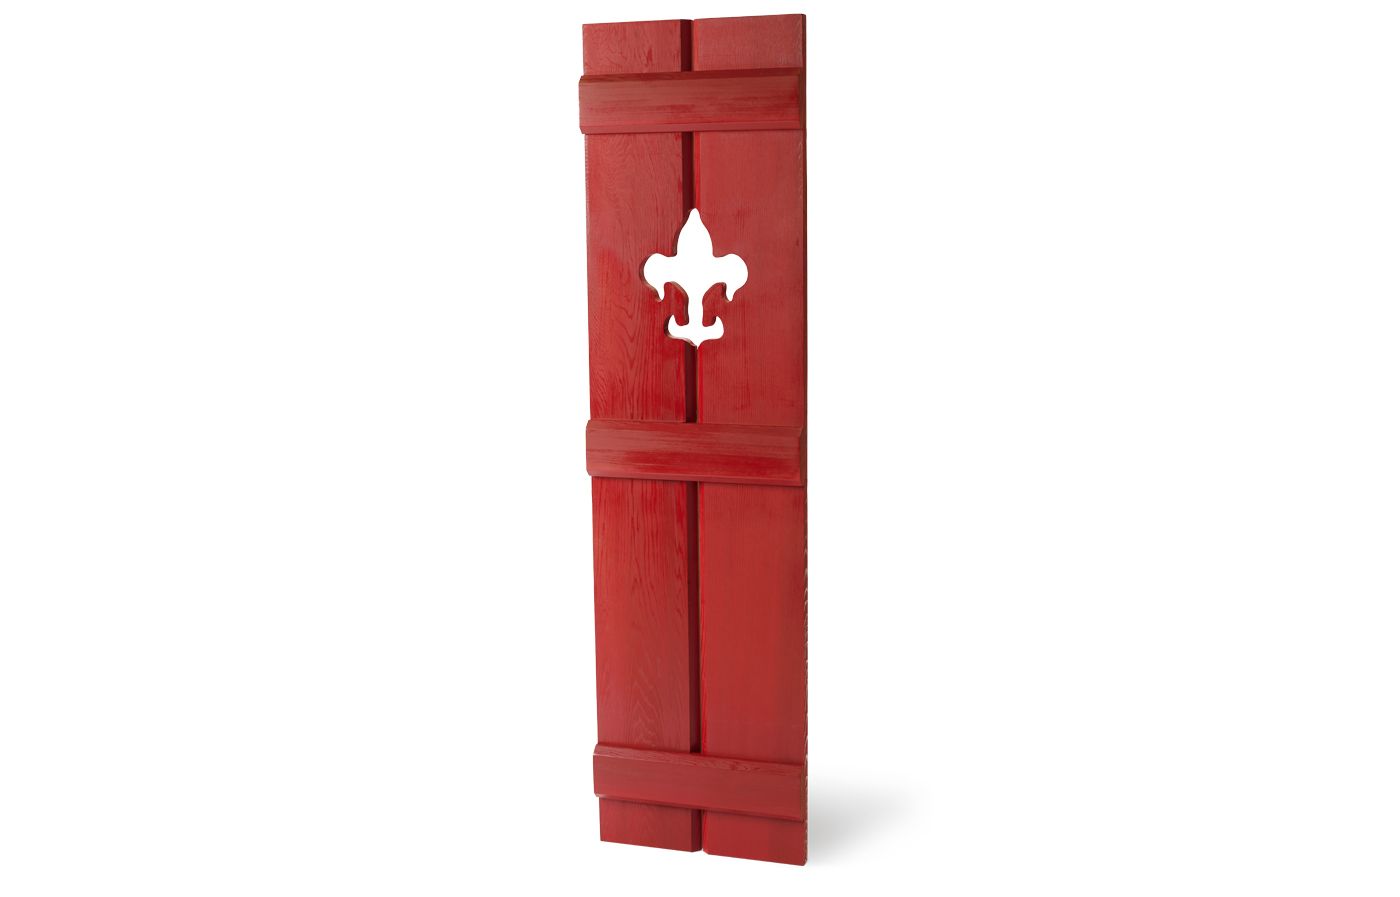
This simplest of shutter styles also happens to be one of the most versatile. You’ll find board-and-batten variations cheering up window openings on house styles from stone Colonials to stuccoed farmhouses to the shingled cottage pictured here. What’s more, compared with louvered and paneled designs, board-and-batten assemblies are easy to make. All you need to build your own is some durable wood—western red cedar is an ideal choice—as well as a few hours at a workbench. To personalize them, use a jigsaw to create a decorative cutout.
If you’d prefer to buy something already built, your choices expand to include inexpensive nonworking foam or vinyl versions that fasten to the siding, and custom wood or composite shutters sturdy enough to swing on hinges and bar the elements. Whichever way you go, your newly adorned windows will be all the more charming for your efforts.
Shown: Atlantic Premium Shutters Classic Collection, Standard Board and Batten in wood composite. Tempest Blue; about $550 for a pair of 14-by-36-inch shutters, including cutout; thetapcogroup.com
Step 1
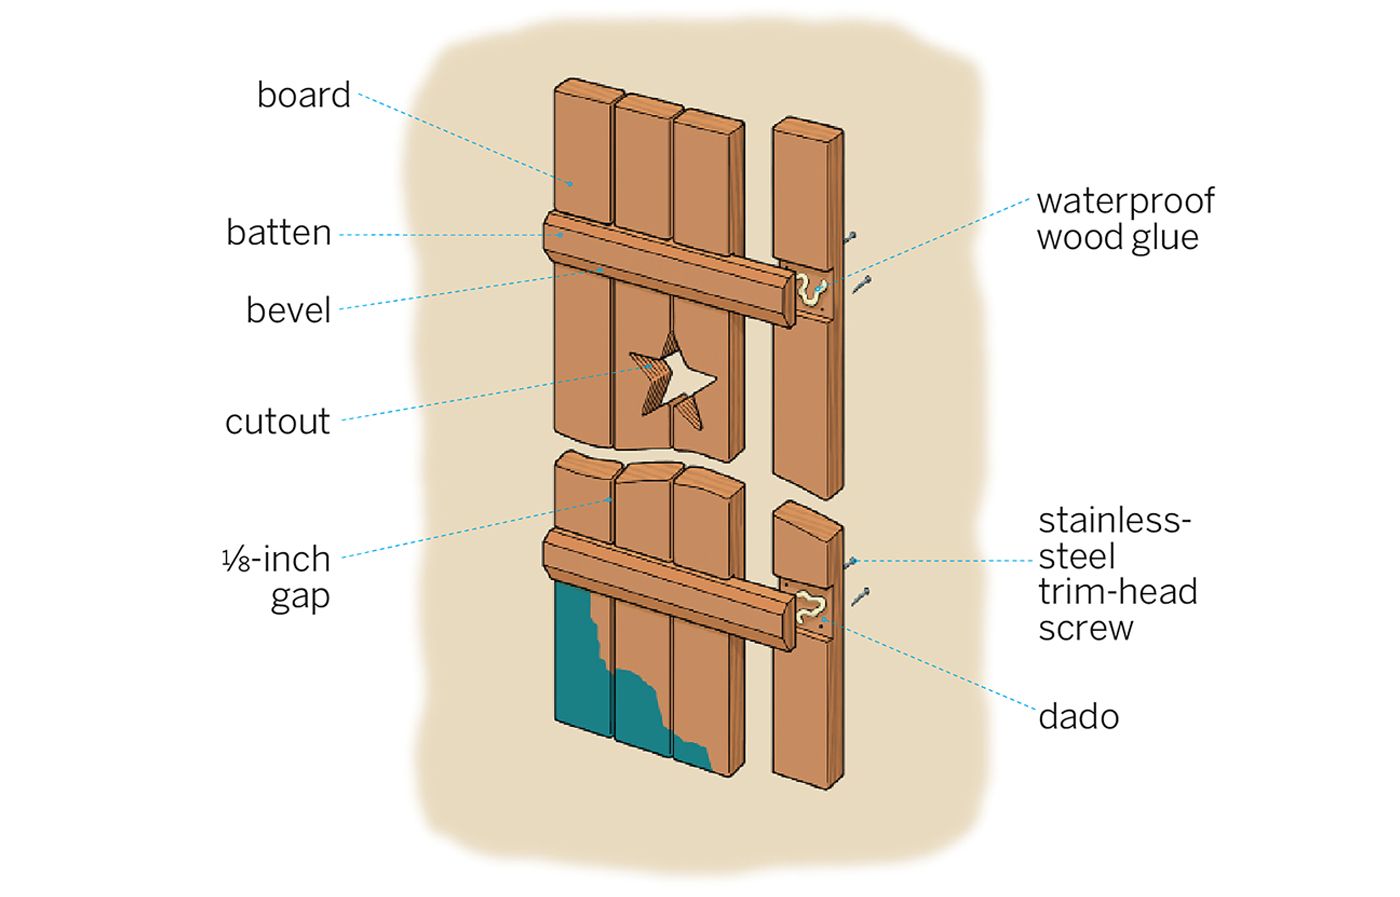
Overview for How-to Make Board-and-Batten Shutters
Cut List for Board-and-Batten Shutters
For a pair of shutters to fit a window opening 36¾ inches wide by 48½ inches high:
½x6 vertical boards: eight @ 40 inches
½x6 battens: four @ 18 inches
Step 2
Measure
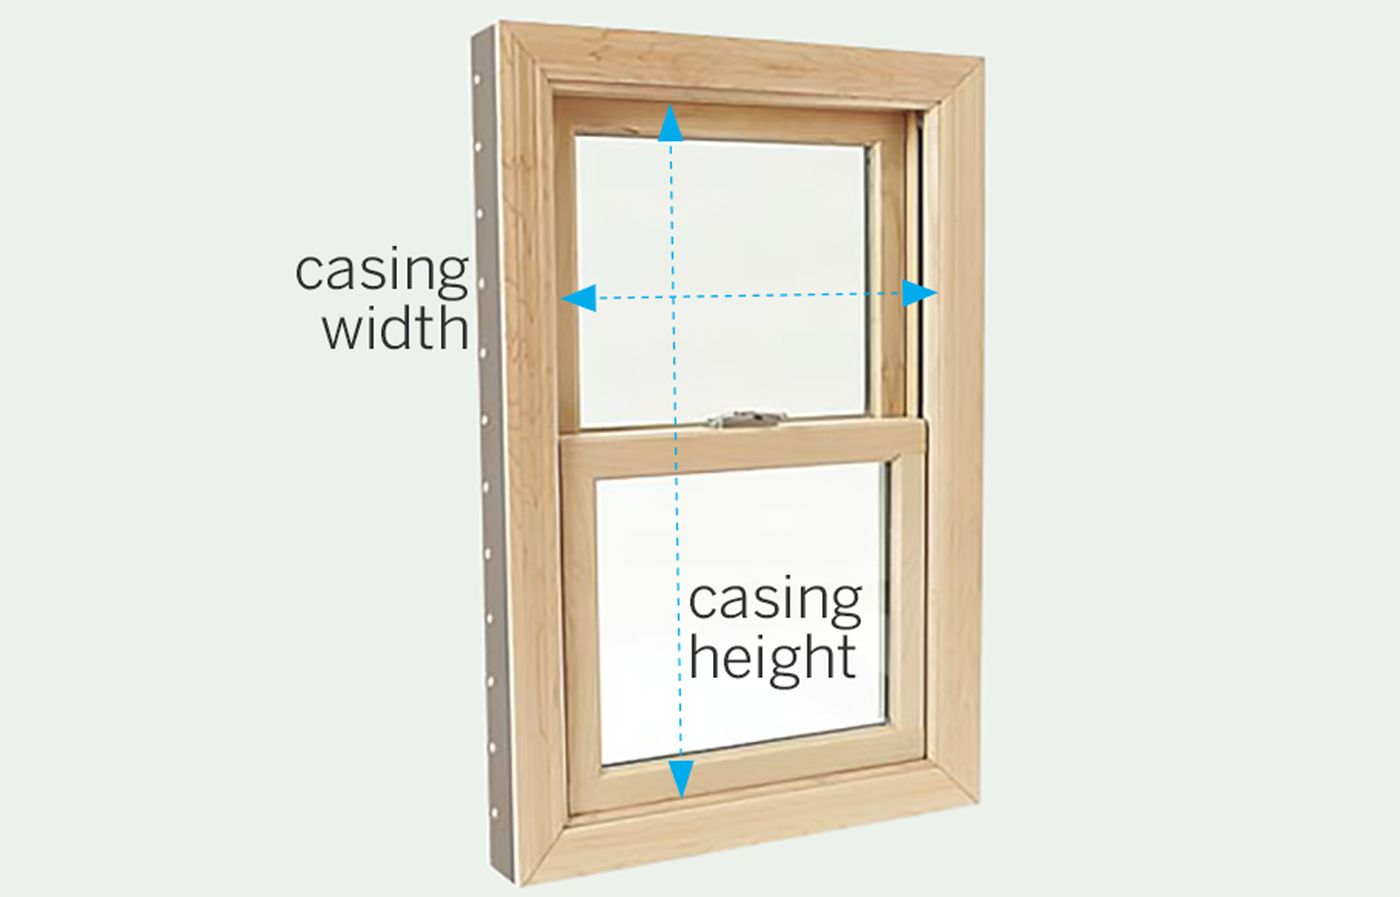
For working shutters, to find the width of each one, measure between the window’s side casings, divide by 2, and subtract ½ inch for clearance. Then, to find the width of the boards, subtract ⅛ inch for each gap and divide by the number of boards—four in our case. To find the shutter’s height, measure between the head casing and sill and subtract ½ inch for clearance.
Step 3
Cut the Pieces
If necessary, rip the boards to width using a circular saw or a table saw. Rip the batten stock to the same width, then rip 45-degree bevels into the long edges of one face. Cut the boards and battens to length.
Step 4
Make the Dadoes
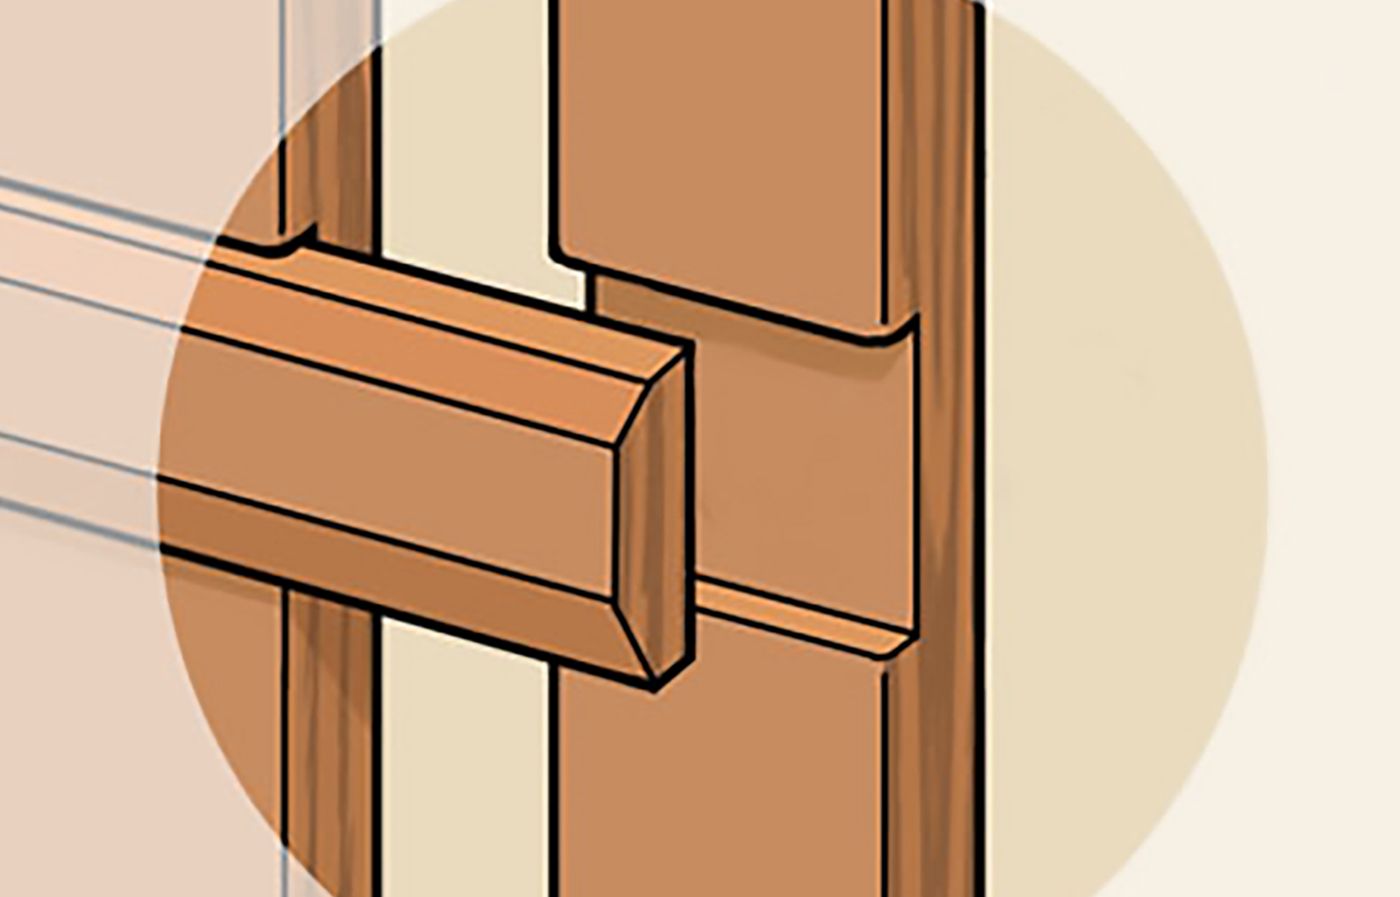
Clamp the boards edge to edge and use a straightedge to mark the batten locations, top and bottom. Set the saw-blade depth to ⅛ inch, and make repeated crosscuts between the marks. Use a chisel and mallet to smooth the bottoms of the dadoes.
Step 5
Make the Cutout
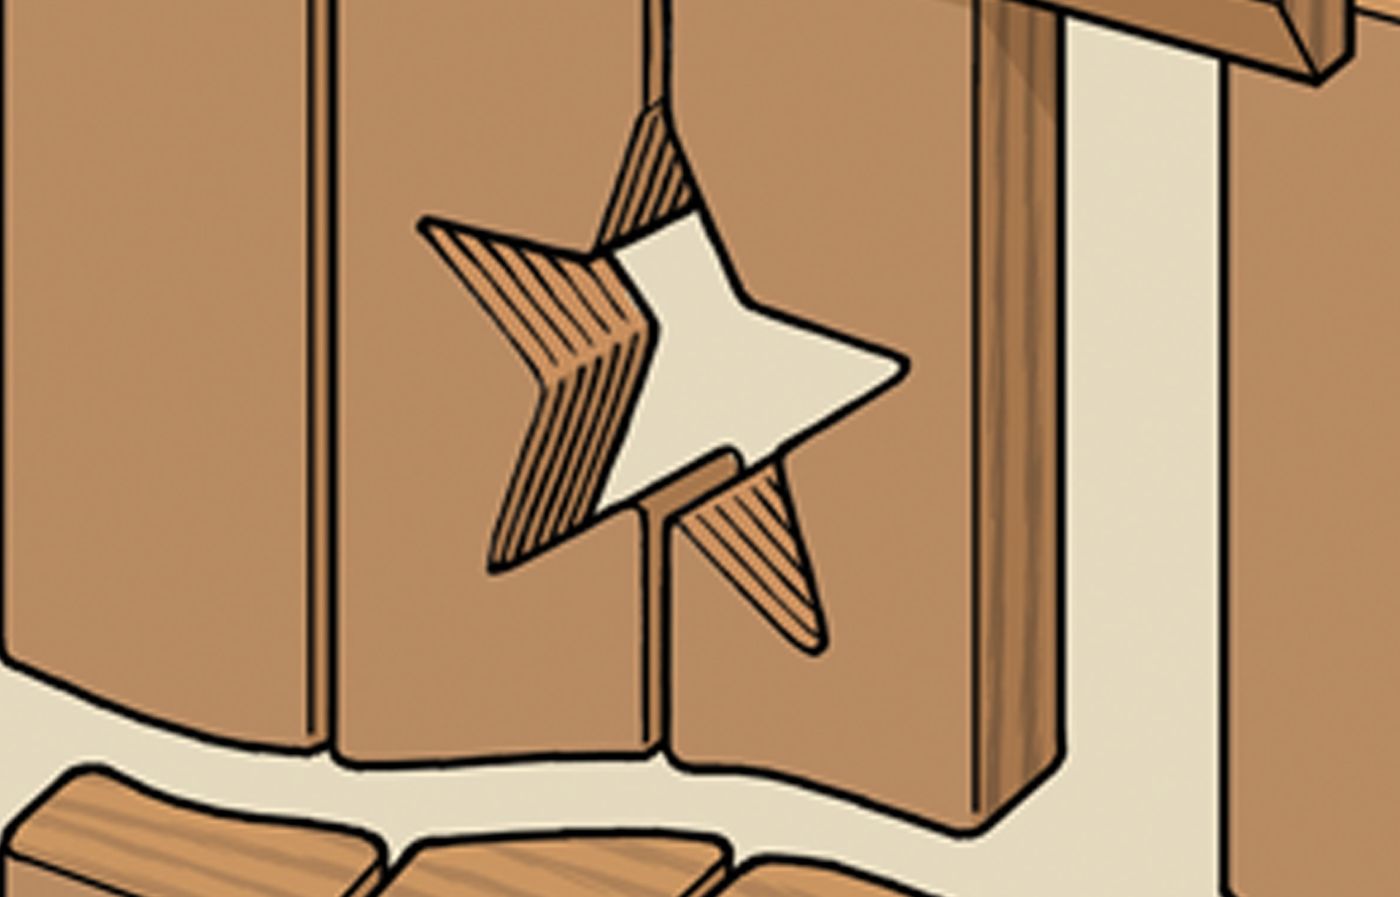
Cut out your template, and make sure its widest point extends only a little more than halfway into a board. Resize the pattern with a photocopier if necessary. Dry-assemble the shutter facedown on a table, using 16d nails to maintain the gaps between boards. Clamp everything together, center the template over the middle gap, and trace its design onto the two middle boards. Now disassemble the shutter, and use a jigsaw to cut out the shape. Sand the cut edges smooth.
Step 6
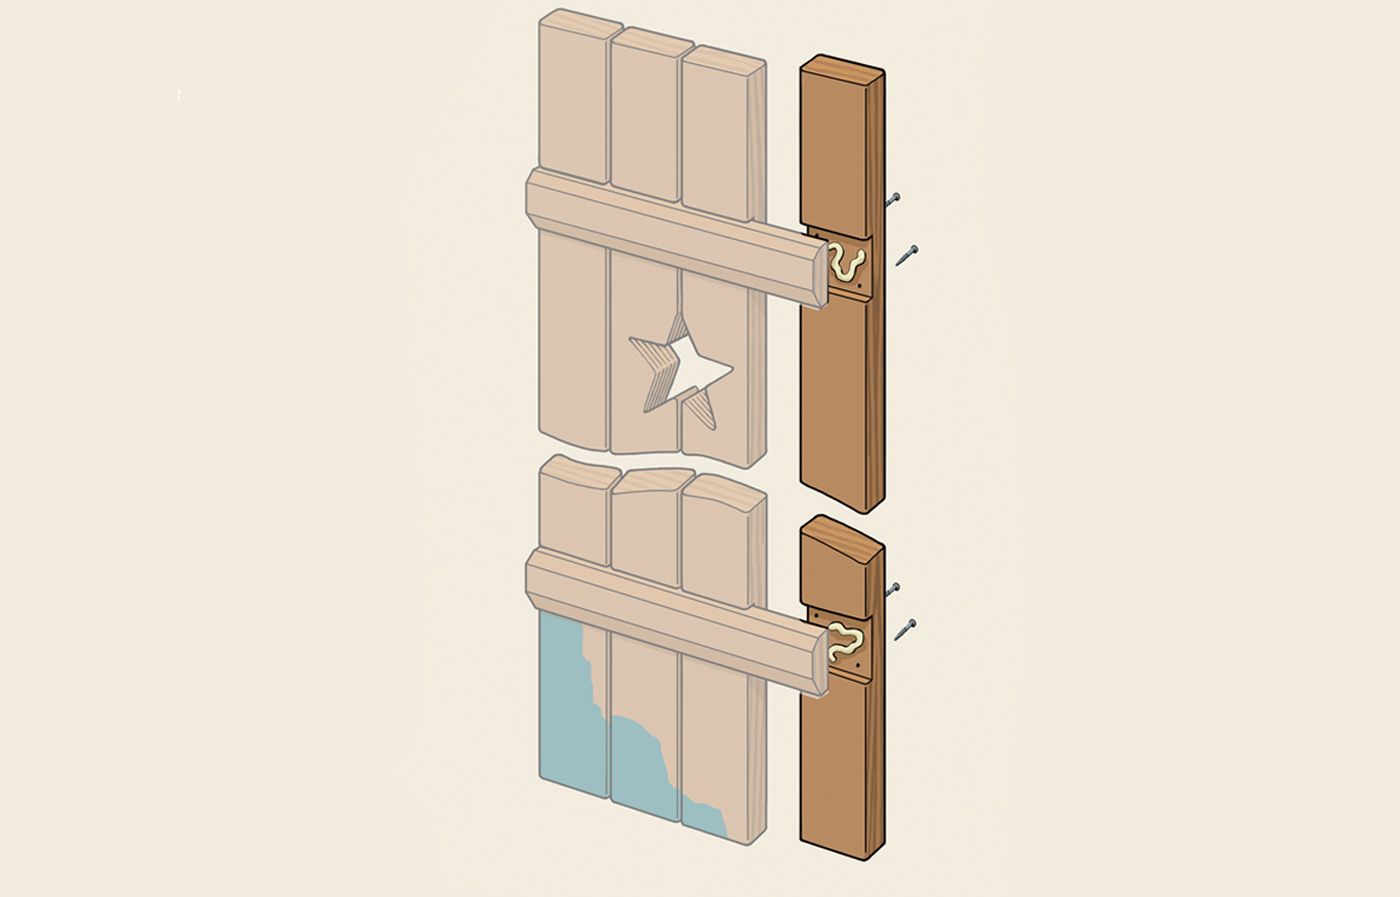
Assemble
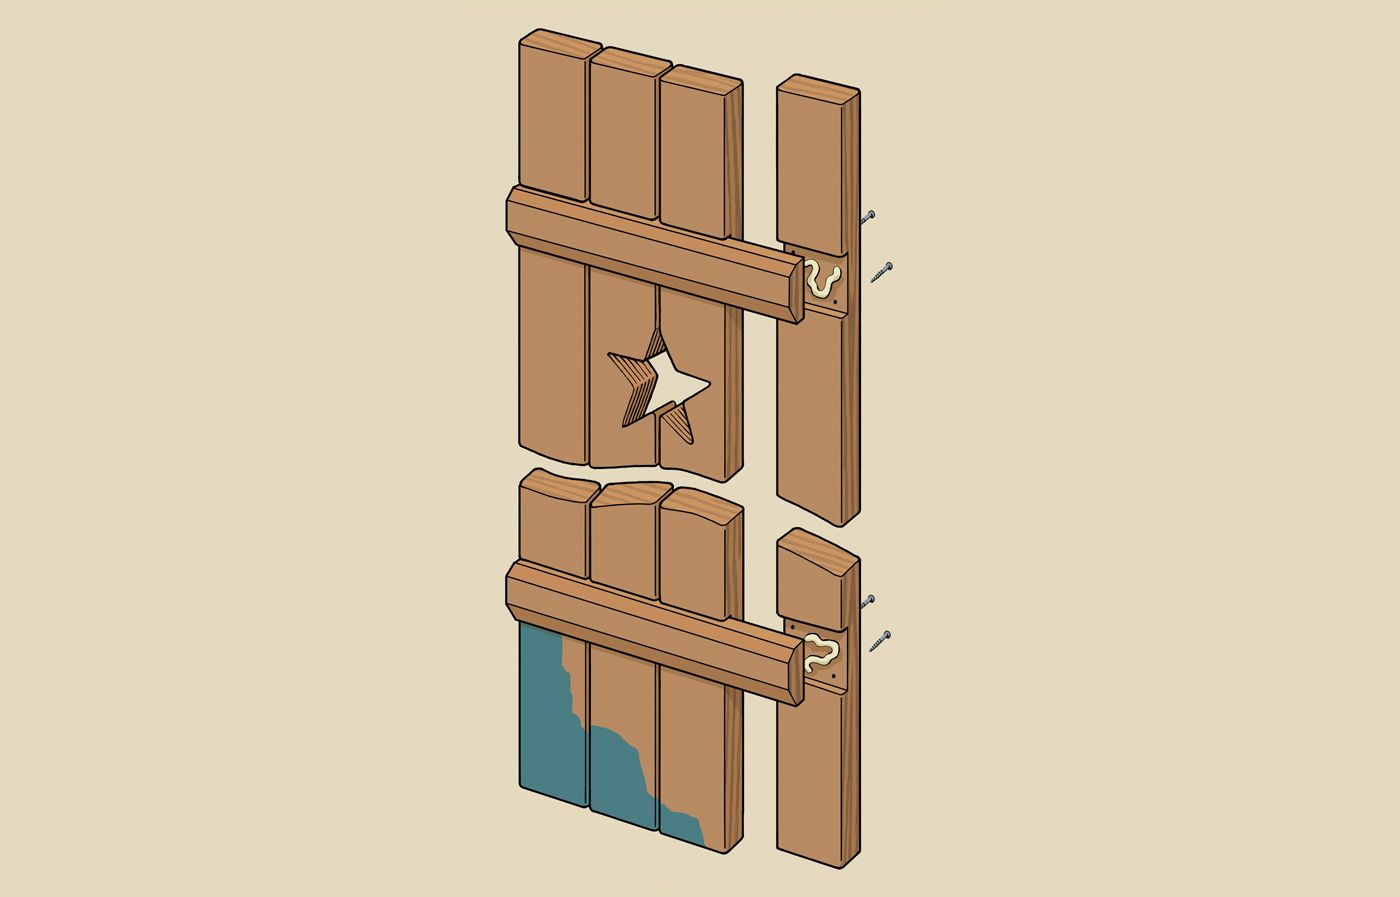
Place the battens bevel-down. Apply waterproof wood glue to the dadoes of the outside boards (no cutout) and fit them on the battens, flush at the ends. Drive two staggered 1⅝-inch stainless-steel trim-head screws through the back of the boards and into the battens. Fasten the center boards the same way, with gaps on both sides. Build the matching shutter the same way. To learn how to hang them on your house, go to thisoldhouse.com/jul2015.
Step 7
Or Buy It: The Basic Model
The tougher the material, the higher the price per pair.
The Basic
Lightweight cast foam has a weathered-wood texture. You apply the stain and protective topcoat.
About $147 for a pair of 18-by-40-inch shutters; fypon.com
Step 8
Or Buy It: The Mid-Range Model
Western red cedar shows off its fine, natural grain when treated regularly with a deck oil.
About $326; shuttercraft.com
Step 9
Or Buy It: The Luxury Model
Solid African mahogany takes paint wonderfully and is three times harder than western red cedar.
About $511; southernshutter.com