Project details
Skill
Cost
Estimated Time


Skylights have been used to brighten up interior spaces for centuries—think of the Pantheon in Rome—and today they’re more popular than ever as more homeowners convert unfinished attics and bonus rooms into home offices, exercise studios, guest quarters and playrooms. There are a couple of other reasons to put in a skylight. Installing one is much easier and more affordable than building a dormer, and modern energy-efficient skylights are completely leakproof—if they are properly installed. Most manufacturers offer a complete line of optional sunscreening accessories, such as roller shades, venetian blinds and pleated shades. And some vented models even have automatic electric openers that work by remote control or a wall-mounted keypad.
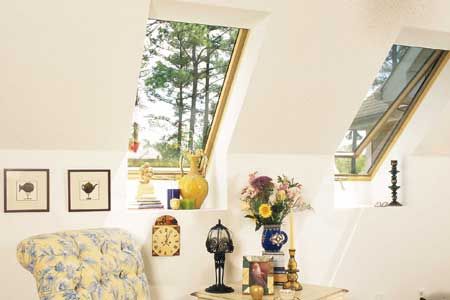
In an attic or bonus room, a skylight is typically installed in the sloped ceiling, just above the knee wall. That puts the sill about 5 to 6 feet above the floor, perfect for capturing natural light. To gain an expansive view of the world—or at least of the neighborhood—we contacted Wayne Quarles, product applications supervisor for Velux, a unique “eye-level” installation method for skylights that offers the comfortable, wide-angle sight lines of a roof window. Unlike a typical installation, Quarles positions the skylight lower on the roof, about a foot below the top of the knee wall. That not only puts the window center at eye level, but it also creates a deep viewing shelf at the sill. The model installed in this project measures about 30-inches-wide by 55-inches-tall. It took 1 day to install, and 3 days to tape joints, prime, and paint.
Note: Building codes require an emergency egress in case the primary exit—typically a stair—is blocked by fire. Because skylights don’t open wide enough to provide a means of escape, the room must have an exterior window or door large enough to permit egress. If none exists, you’ll have to install one. Check with the local building inspector for specific requirements.
Step 1
Mark and cut a rough opening
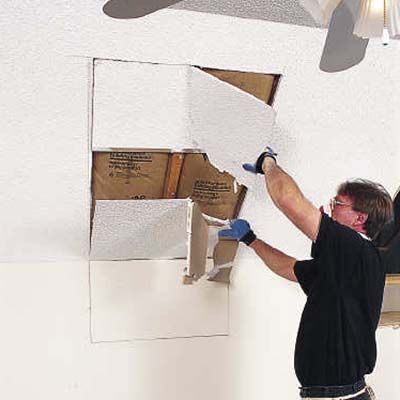
Start by marking the rough opening of the skylight on the ceiling and knee wall. Position the bottom of the sill 38 to 44 inches above the floor. Align the side of the opening with the inside edge of a rafter. Cut along the lines with a drywall saw and pull the drywall from the rough opening.
Step 2
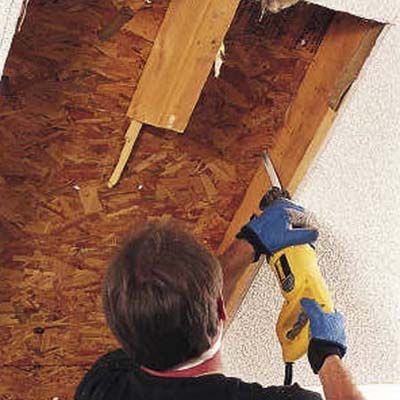
Prep for skylight install
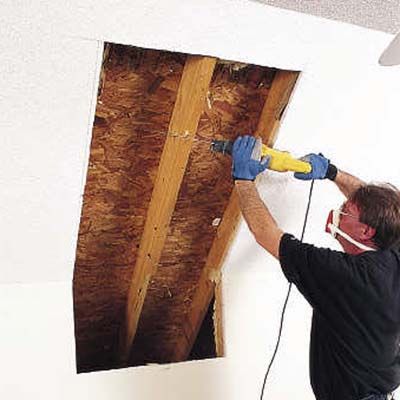
Carefully remove the insulation, then use a reciprocating saw to cut out the top plate of the knee wall. Also saw out the rafter from the center of the opening; cut it flush with the bottom, but leave it long at the top.
Step 3
Install support frame

Build a perimeter frame around the sill area with 2x4s. Drive nails through the plywood roof sheathing in each of the four corners of the rough opening. Then go outside onto the roof and carefully remove all the roof shingles from around the opening. Save the shingles for nailing back around the skylight after it’s installed.
Step 4
Cut rough opening from inside
From inside, cut out the rough opening with a reciprocating saw. Guide the blade along the rafters for the side cuts, then remove the severed plywood or roof sheathing to expose the rough opening.
Step 5
Start rooftop installation
Remove the sash before passing the frame through the rough opening and onto the roof.
Step 6
Reinstall sash and install the frame
Set the frame in place, then reinstall the sash to hold the frame square. Fasten the frame to the roof with 2-inch screws driven through the metal brackets on the sides of the frame. Be sure the screws go into the rafters.
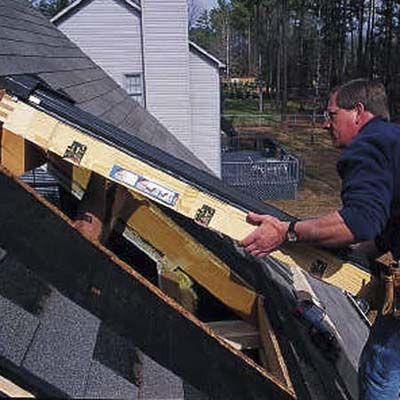
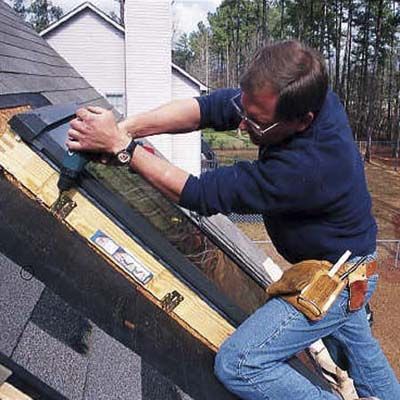
Step 7
Install flashing
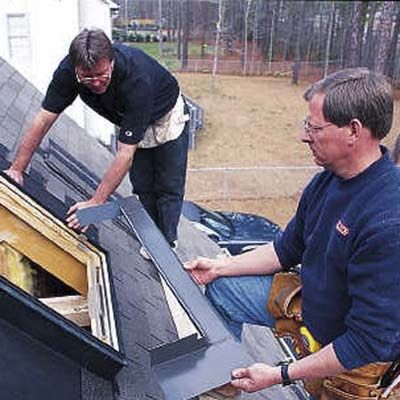
Staple 18-inch-wide strips of 15-pound roofing felt around the perimeter of the skylight frame. Then install the sill flashing along the bottom of the skylight. Next, nail step flashing and roof shingles up each side of the skylight. Cover all four sides of the sash frame with the aluminum counter-flashing provided. Then install the head flashing, slipping it under the course of roof shingles immediately above the skylight. Screw the head flashing to the sides of the frame. Cover the head flashing with roofing felt and nail back all the remaining roof shingles.
Step 8
Install inside header
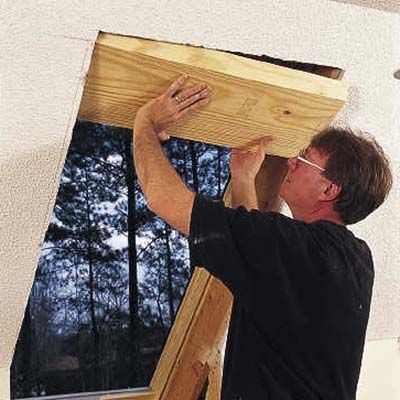
From inside, cut a 2×12 header to fit into the space above the skylight. Be sure that it’s parallel with the floor.
Step 9
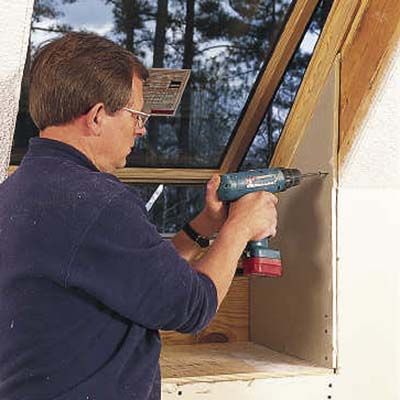
Finish the viewing area
Cover the viewing shelf with 1/2-inch plywood followed by a layer of drywall. The plywood adds structural support and keeps heavy objects and sharp elbows from breaking through the drywall. The shelf can also be finished with wood, marble or solid-surface material. Cover the exposed framing around the inside of the skylight with 1/2-inch drywall. Protect the drywall corners with metal corner bead, finish the surfaces with paper tape and joint compound and then apply a fresh coat of paint.