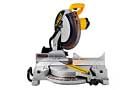
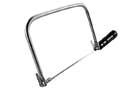
In this video, This Old House expert Tom Silva shows you how to cut crown molding. The easiest way to do this is to use a power miter and a coping saw. Use a 45-degree angle to cut crown molding for a scarf joint and an outside corner. For an inside corner cut, you’ll need to measure the exact angles.
Watch the video above for his tips to get a perfect cut and follow the instructions below as you do this yourself.
How to Cut Crown Molding in 9 Steps
- To make a scarf joint in the middle of a long run, start by placing the crown molding upside down on miter saw table; hold the molding at the same angle as it will be installed.
- Set blade at 45 degrees and make cut in two lengths of molding to create a scarf joint.
- To form an outside corner joint, set the saw blade at 45 degrees to the left; cut the first length of molding.
- Rotate saw to 45 degrees to the right and cut the second mating molding piece.
- For an inside corner joint, square-cut the first piece of molding and butt it tight into corner.
- Miter-cut the second piece to 45 degrees.
- Highlight the leading edge of the molding with a pencil.
- Cut along leading edge with a coping saw.
- Smooth the cut edge with 100-grit sandpaper to create a tight joint.
Tools and Materials
Tools & Materials