Project details
Skill
Cost
Estimated Time

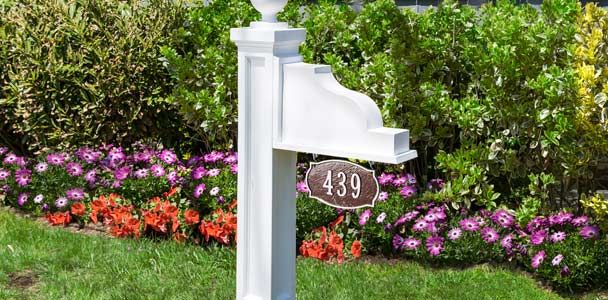
Sure, you could mount your house’s numbers next to the front door and call it a day. But to us, a handsome address plaque deserves a display of its own, and reader Lisa Camesano of Newton, Massachusetts, agrees. When Lisa told us she’d like to brush up on some tool basics, we paired her with TOH general contractor Tom Silva to put together a decorative signpost that could stand proud in any yard. This piece uses off-the-shelf materials and requires just a few simple cuts, plus glue and screws. “It looks harder to build than it actually was,” says Lisa. Perhaps best of all, the hollow prefab post simply slips over a pressure-treated 4×4 that’s bolted to a twist-in ground screw, so it doesn’t need a concrete base. Read on to see how Tom and Lisa put it all together.
Shown: Mayne Polymer Mailbox Post, about $111; Amazon. Cambridge Ornate Address Plaque, about $55; 125West.com. Wirral Bracket, about $55; architecturaldepot.com. Standard Premier Ball Finial, about $45; The Sign Bracket Store.
Not shown: Mayne No-Dig Ground Screw, about $30; Lowe’s
Step 1
How to Build an Address Plaque Post Overview
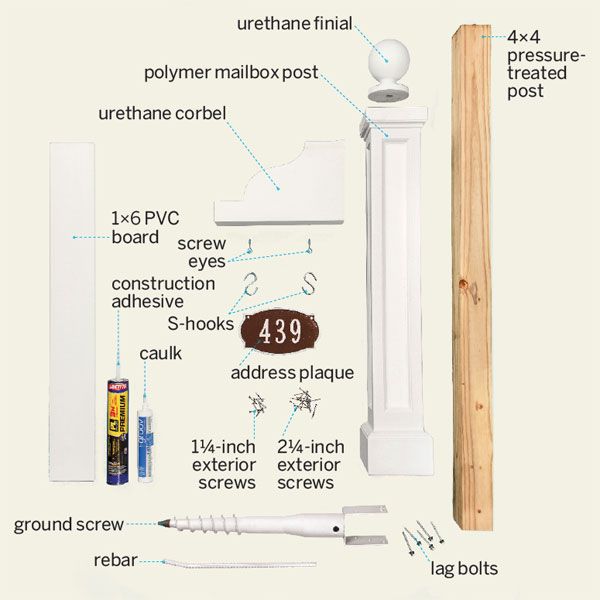
We used a 6-inch-square hollow prefab post. To make the arm
for the plaque, we padded out a corbel with 1×6 cellular PVC board. Screws and a strong-bonding polyurethane adhesive
hold the pieces together. Be sure to call 811 before twisting in the ground screw, to make sure you won’t hit any underground utilities. And after you slip the finished assembly over the pressure-treated 4×4 post, drive a 2¼-inch screw through the top of the corbel assembly and into the 4×4 to secure things firmly
Step 2
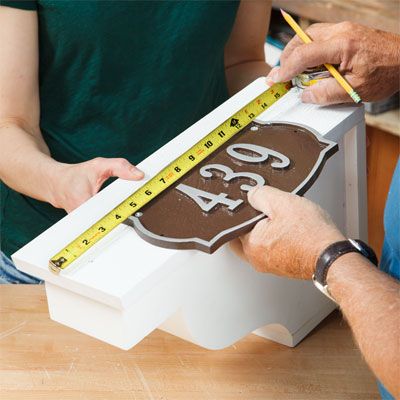
Measure the Corbel and Mark a Cut on the PVC Board
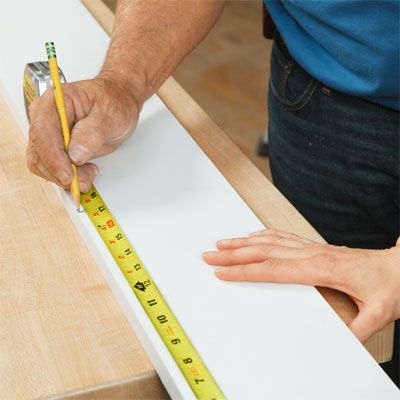
Measure the short and long sides of your corbel. Add ¾ inch to the short dimension, and mark this length on the PVC board. Add 1½ inches to the corbel’s long dimension; write this length down for use in Step 3.
Step 3
Cut the Short and Long Boards
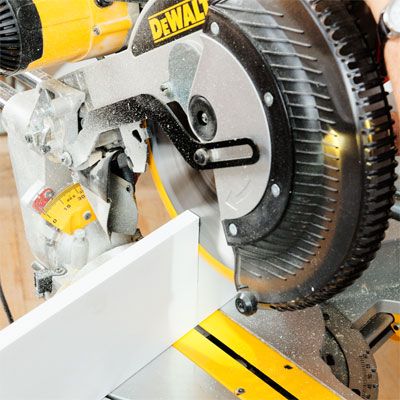
Place the board against the miter saw’s fence with the marked side facing out and the marked length on the left. Set the saw blade at a 30-degree left bevel and cut at the mark, as shown. On the remaining board, measure from the bevel’s short point and mark the length you wrote down in Step 2. Make a straight cut at this mark. You’ll now have two boards, one long and one short, each beveled at one end.
Step 4
Build an L Shape From the Boards
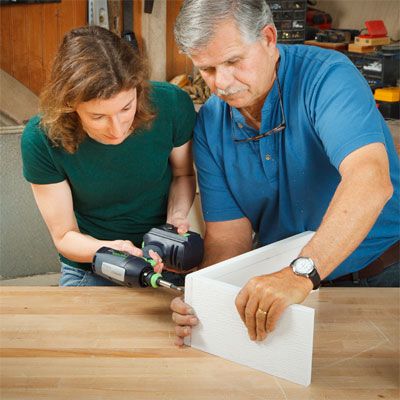
Lay the boards on edge in an L shape on your work surface, with the square end of the short board butted against the face of the long board, as shown. Make sure that the bevels face the inside of the L. Drill pilot holes, and fasten the long board to the short board using three 2¼-inch exterior screws.
Step 5
Create the Corbel Assembly
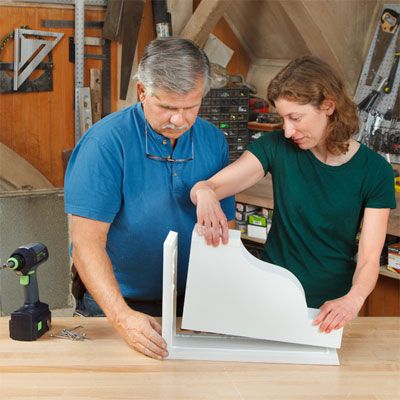
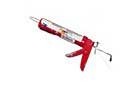
Center the corbel on the L, and trace along the corbel’s edges so that you know where to apply adhesive. Remove the corbel. Using a caulk gun, run a heavy bead of polyurethane construction adhesive inside the lines you traced on the boards. Then set the corbel in place, nestling it into the adhesive for good coverage.
Step 6
Prep the Assembly for Hanging the Plaque
Set the assembly with the long board facing up, and center the plaque using Tom’s method: Measure the distance from the sign’s right hole to the board’s left edge, then measure from the left hole to the right edge and adjust the plaque until the measurements are equal. Mark the hole locations and drill pilot holes for screw eyes. Twist in the screw eyes by hand.
Step 7
Drill Countersinks Into the Assembly
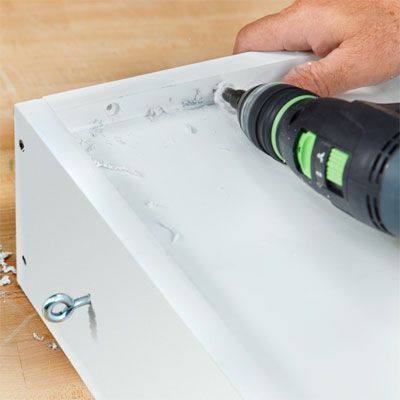
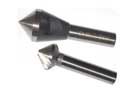
Using a ⅜-inch countersink bit, drill three evenly spaced countersinks about ¼ inch deep on each side of the short board, for attaching the corbel assembly to the mailbox post.
Step 8
Fasten the Assembly to the Post
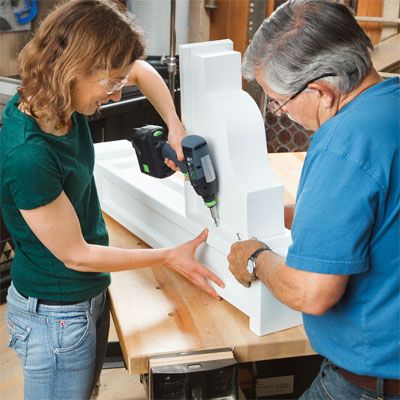
Dry-fit the assembly on the post, and mark where its top and bottom edges fall. Set the assembly aside, and use a caulk gun to apply adhesive between the marks. Place the assembly within the marks on the post and press into place. Drive 1¼-inch screws through the countersinks in the assembly and into the side of the post.
Step 9
Finish and Install the Post
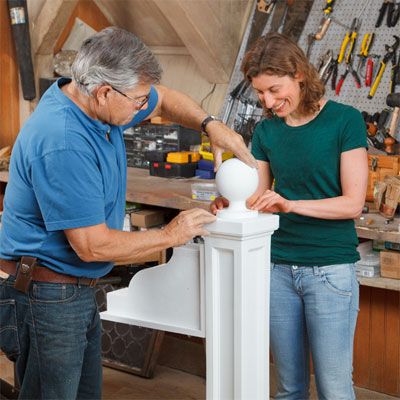
Use adhesive to affix the finial to the post top. Cover the screwheads and fill the seams with paintable caulk. Coat the piece with acrylic paint. Pick a safe spot to install the post, and twist in the ground screw with the rebar. Cut the pressure-treated 4×4 to length, and use the lag bolts to fasten it to the ground screw. Finally, slide the finished post over the 4×4 and hang the plaque with S-hooks.