Project details
Skill
Cost
Estimated Time

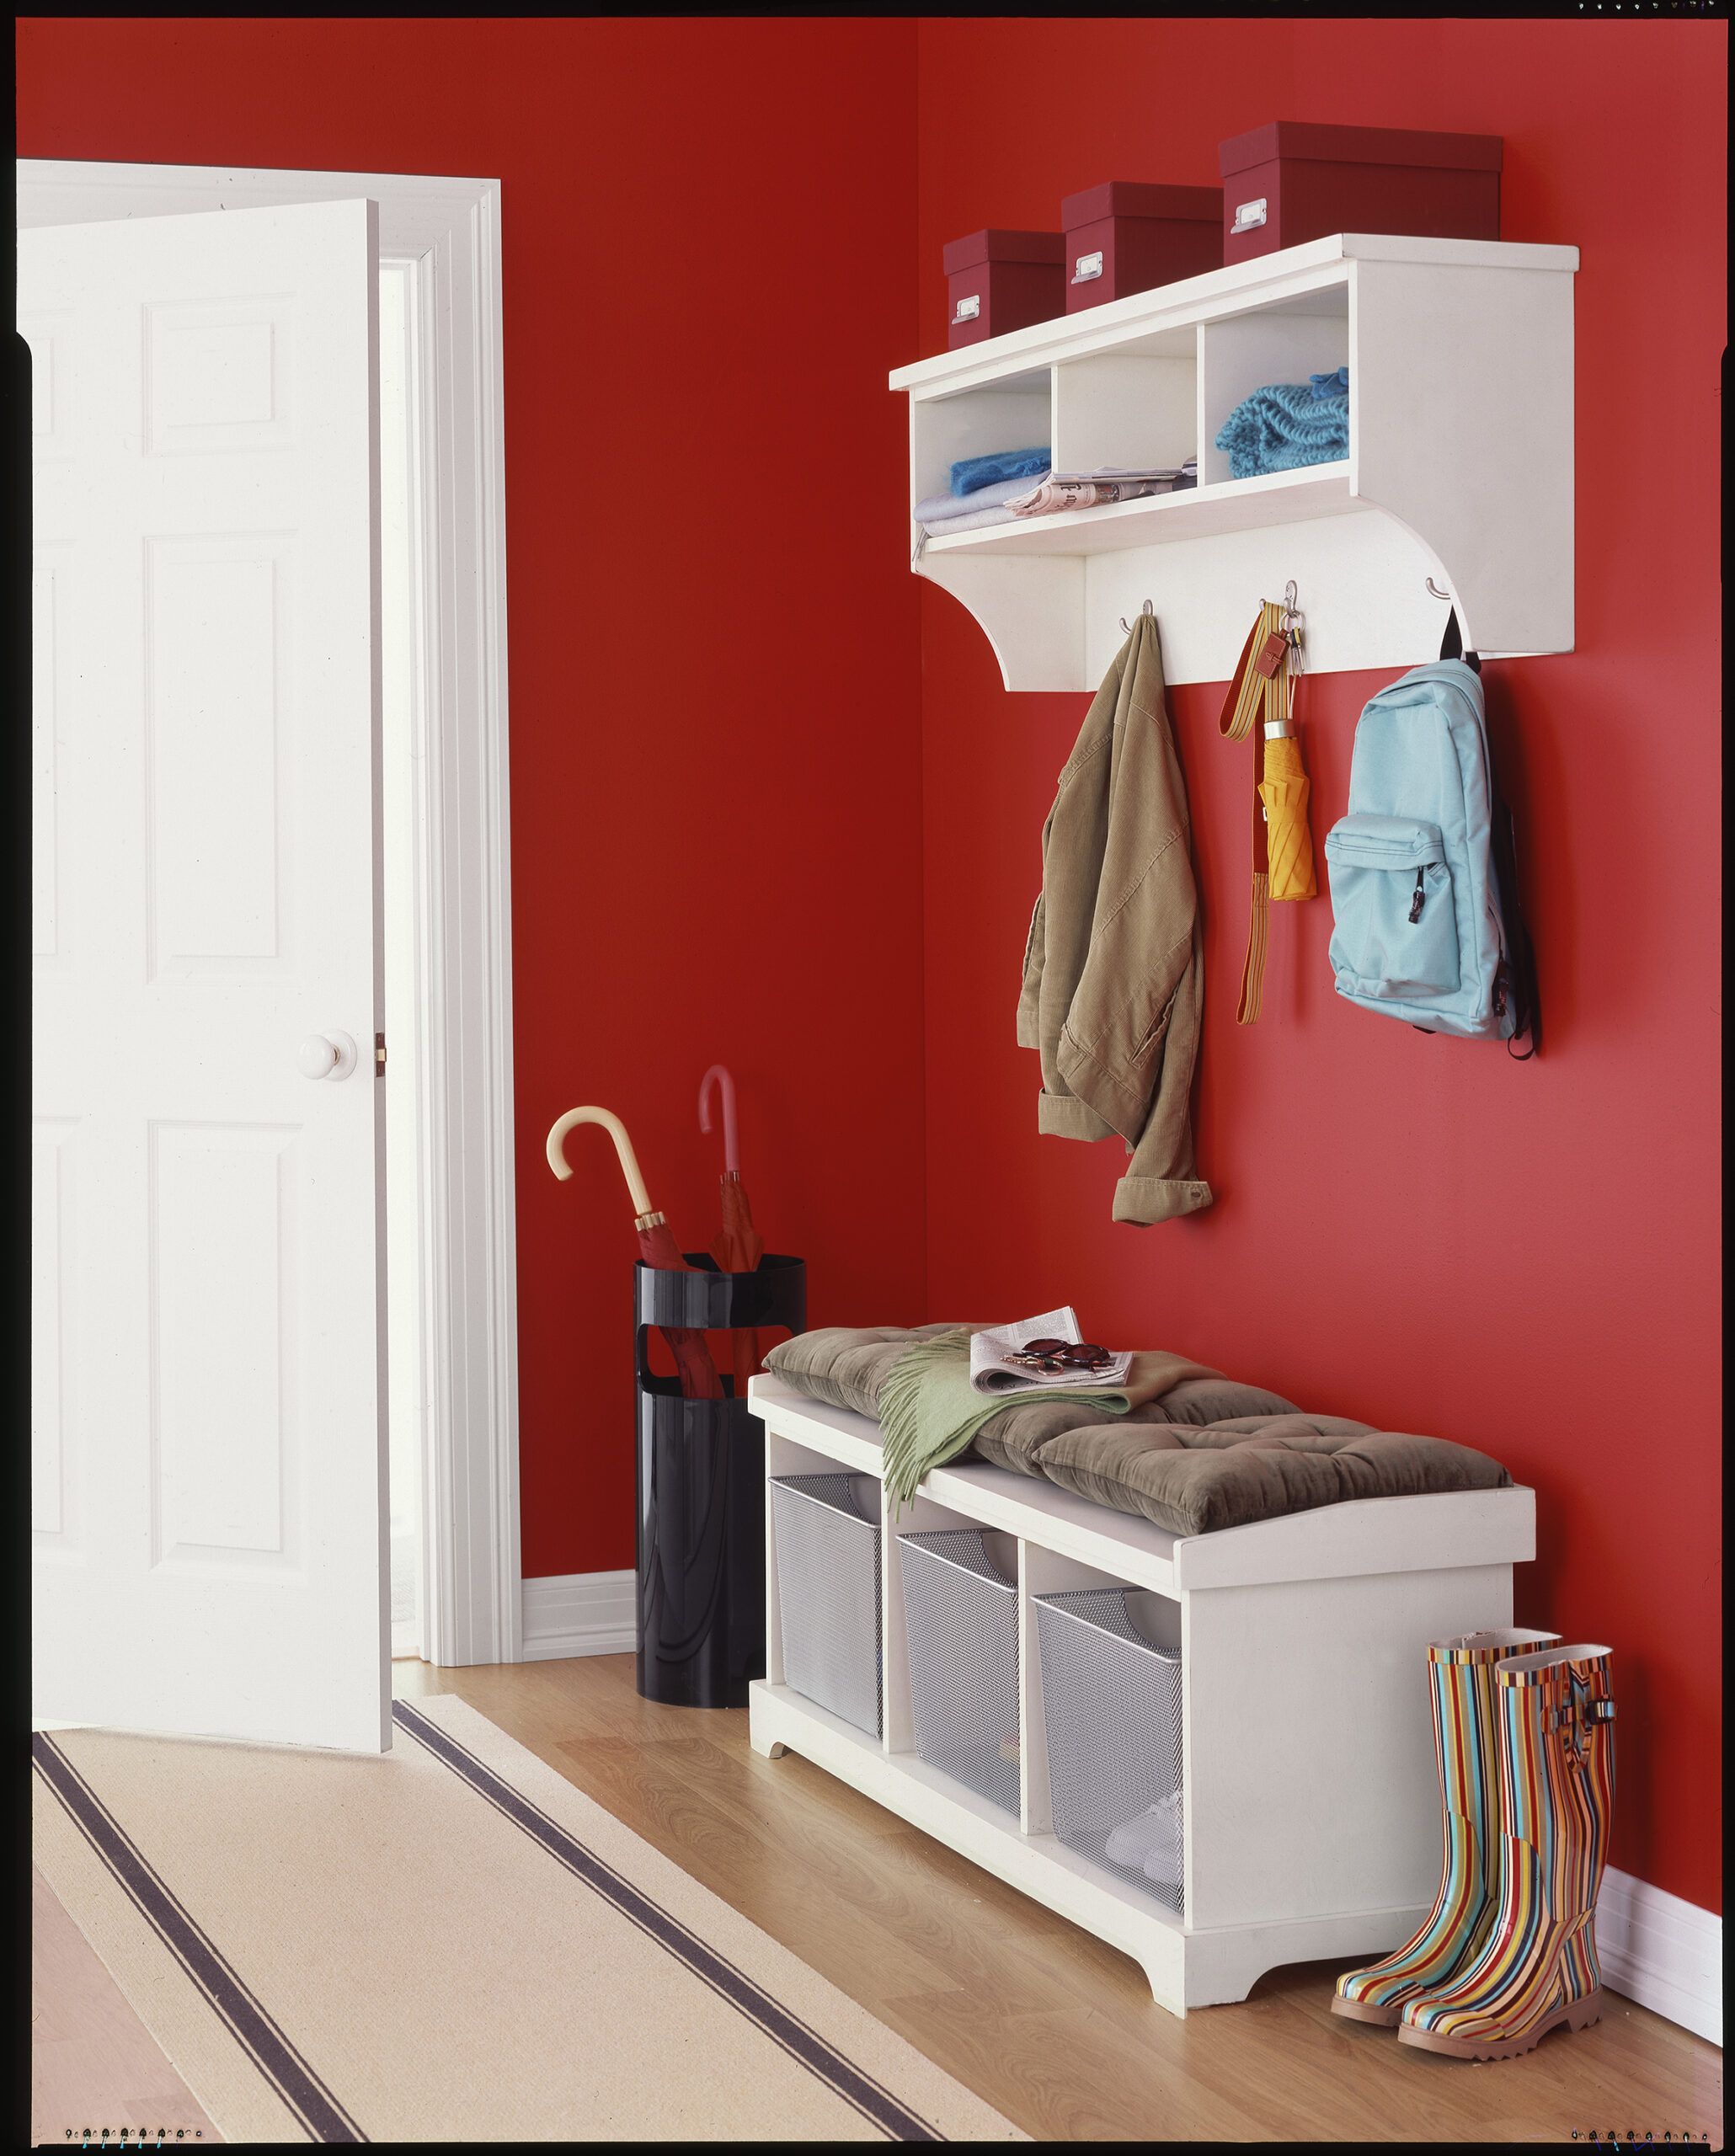
Not lucky enough to have an entryway with a closet or a guy named Jeeves waiting for you when you get home? Then you know how quickly the front hall disappears under heaps of jackets, backpacks, and hats, and how frustrating it is to have to hunt for what you need before heading out. But with a wall-mount organizer standing ready to corral your stuff, you just might get the kids to school on time.
A simple cubby shelf like the one here, with nooks above for loose items and hooks below for hanging things, makes a tempting DIY project. It uses only eight pieces of wood and needs no fancy joinery—everything is held together with screws and glue.
If you’d rather have someone else build one for you, you’ll find plenty of ready-made options at a variety of prices available online. Some are in a plain Shaker style, like the one shown here; others are more dressed up, replete with crown molding, hand-forged hooks, or beadboard backs.
Plain or fancy, your cubby shelf will prove every bit as helpful as that Jeeves fellow.
Similar to shown: Monterey entryway shelf by Prepac, available at about $118; Wayfair
Download the cut list
Step 1
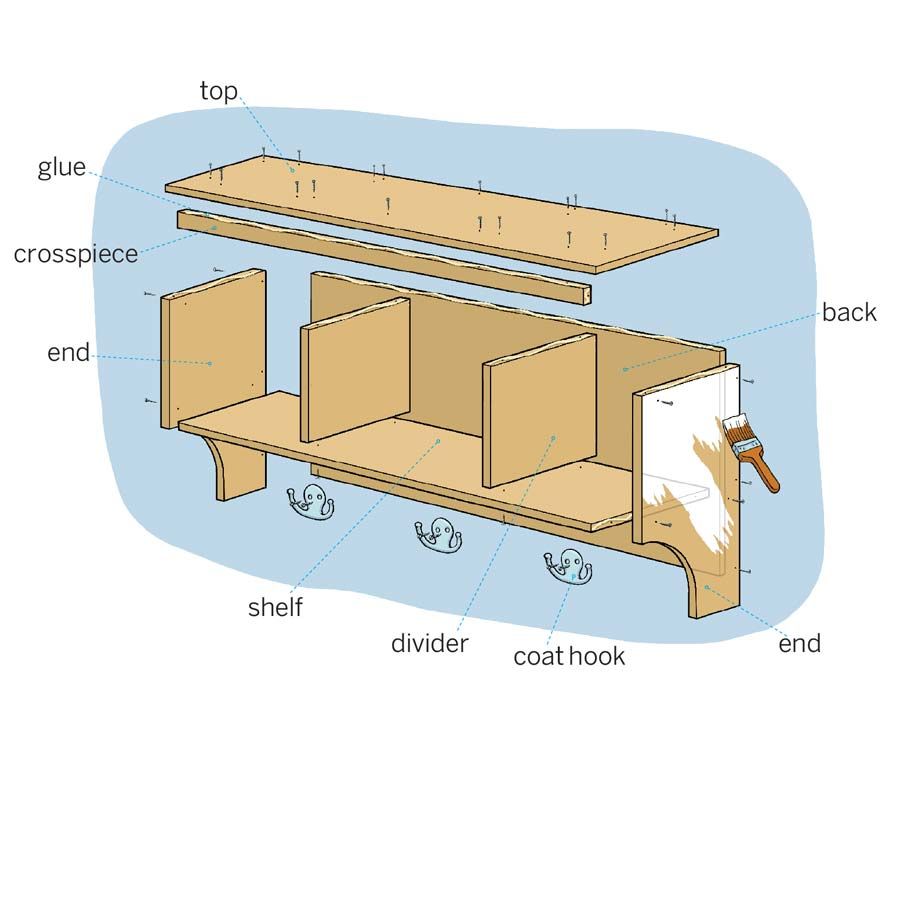
Overview to Build a Wall-mounted Cubby Shelf
Download the cut list for how to build a cubby shelf
For a shelf 39 inches wide by 17¾ inches high by 10 inches deep:
1×12 poplar board for the top: one at 39 inches, ripped to 10¼ inches wide
1×10 poplar board for the ends: two at 17 inches
1×10 poplar board for the shelf: one at 36 inches, ripped to 8 inches wide. (Use the piece left over from the rip cut as the crosspiece, below.)
1×10 poplar board for the crosspiece: one at 36 inches ripped to 1⅛ inches wide. (This is the piece left over after ripping the shelf to size.)
1×10 poplar board for the dividers: two at 9½ inches, ripped to 8 inches wide
¾-inch by 18-inch edge-glued pine panel for the back: one at 36 inches, ripped to 17 inches wide
Step 2
Cut the Boards and the Curves
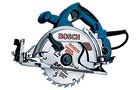
Use a circular saw to size all the boards according to the downloadable cut list
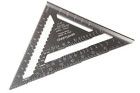
On one end piece, make a mark on the long edge 6 inches from one corner and on the short edge 5¼ inches from the same corner. Place the edge of a large pot lid at both marks and draw an arc. With both end pieces clamped together, cut along the arc with a jigsaw; unclamp, then sand the curves smooth.
Tip: Poplar is a good wood for this project because it’s inexpensive, readily available, and takes paint beautifully.
Step 3
Create the Cubbies
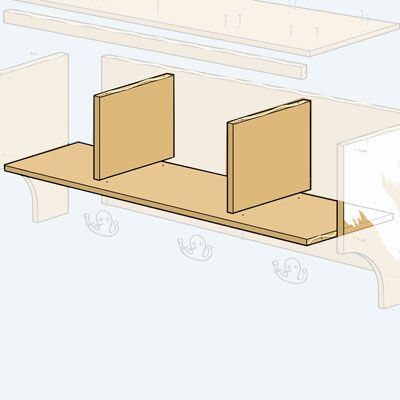
Divide the shelf into three equal segments along its length. Using a rafter square, mark each segment with a line on one face and edge. Clamp a divider piece against the shelf’s unmarked face, flush with the marked edge and centered on the mark. Use the rafter square to square the divider front to back. Then, using a combination countersink bit, drill two pilot holes through the dividing line and into the divider. Glue and screw the pieces together. Do the same with the other divider.
Step 4
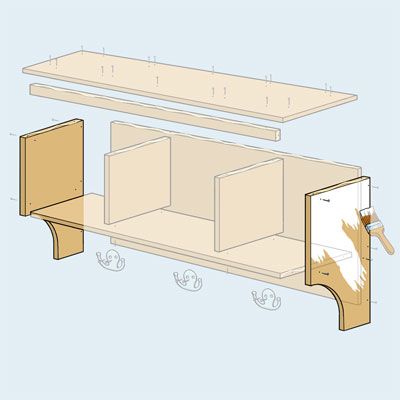
Attach the Back and Ends
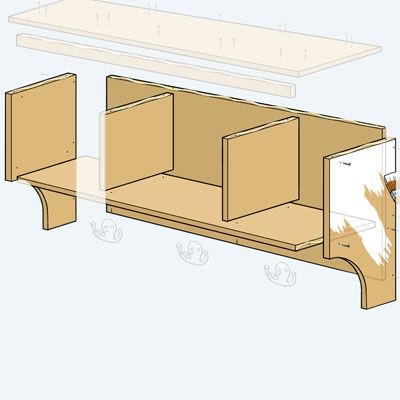
With the cubby assembly facedown, line up the edges of the back piece with the tops of both dividers and the ends of the shelf. Square the dividers with a rafter square hooked to the back’s top edge, and drill pilot holes through the back and into the dividers and the shelf. Glue and screw the back in place. Align the end pieces flush with the back’s top edge and capture its side edges. Glue and screw the ends to the shelf and back.
Step 5
Attach the Top
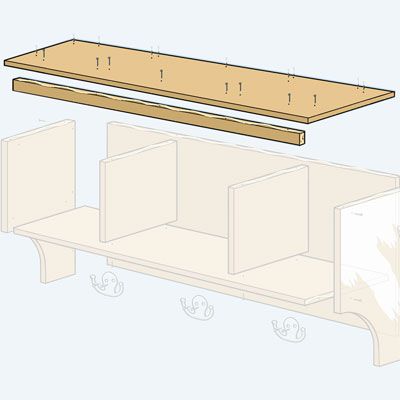
Position the top with a ¾-inch overhang at the ends and front (flush with the back). Glue and screw the top to the ends, dividers, and back. Glue and screw the crosspiece to the end pieces and to the underside of the top, snug against the dividers.