Project details
Skill
Cost
Estimated Time
When we told reader John Klei recently about this project, he exclaimed, “You guys must have been reading my mind!” No, John, just your letter—the one in which you asked for plans for the storage bed we featured in the January/February 2012 issue. Sorry it took a while to get back to you, but there were no plans. So we asked This Old House contributor and furniture maker Christopher Beidel, owner of Pernt, in Brooklyn, New York, to re-create the bed from the photo using DIY-friendly construction techniques. Follow along on the next pages to see how to build a bed every bit as practical as it is handsome.
“I cut out the picture of the bed and put it in my workshop. It’s been on my to-do list ever since.”
—John Klei, Gordonsville, Virginia
Modern Weave Storage Collection, Underbed bin, about $59, West Elm
Overview
Day-to-day timeline
SATURDAY Build the platform and make the bed frame.
SUNDAY Install the trim and beadboard, and paint.
Storage Bed Cut List
Large Storage Carcasses
¾-inch medium-density fiberboard (MDF) tops and bottoms: 4 @ 21 x 82 inches
¾-inch MDF backs: 2 @ 10½ x 82 inches
¾-inch MDF dividers: 8 @ 10½ x 20¼ inches
Small Storage Carcass
¾-inch MDF top and bottom: 2 @ 21 x 27½ inches
¾-inch MDF sides: 2 @ 10½ x 26¾ inches
¾-inch MDF back: 1 @ 10½ x 21 inches
Bed Frame
¾-inch MDF headboard: 1 @ 48 x 63 inches (cut to fit)
¾-inch MDF side panels: 2 @ 8½ x 82 inches
¾-inch MDF footboard: 1 @ 8½ x 61½ inches
All Trim and Beadboard Panels: Measure and cut to fit.
2×4 Support Frame: Measure void and cut to fit.
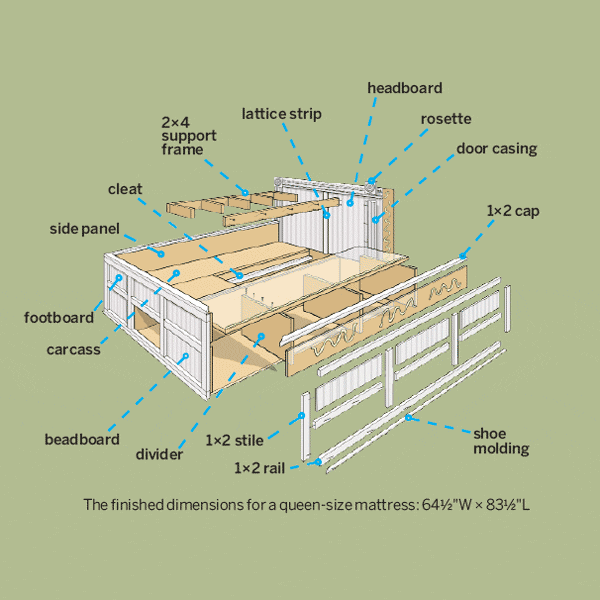
The finished dimensions for a queen-size mattress: 64½”W 83½”L
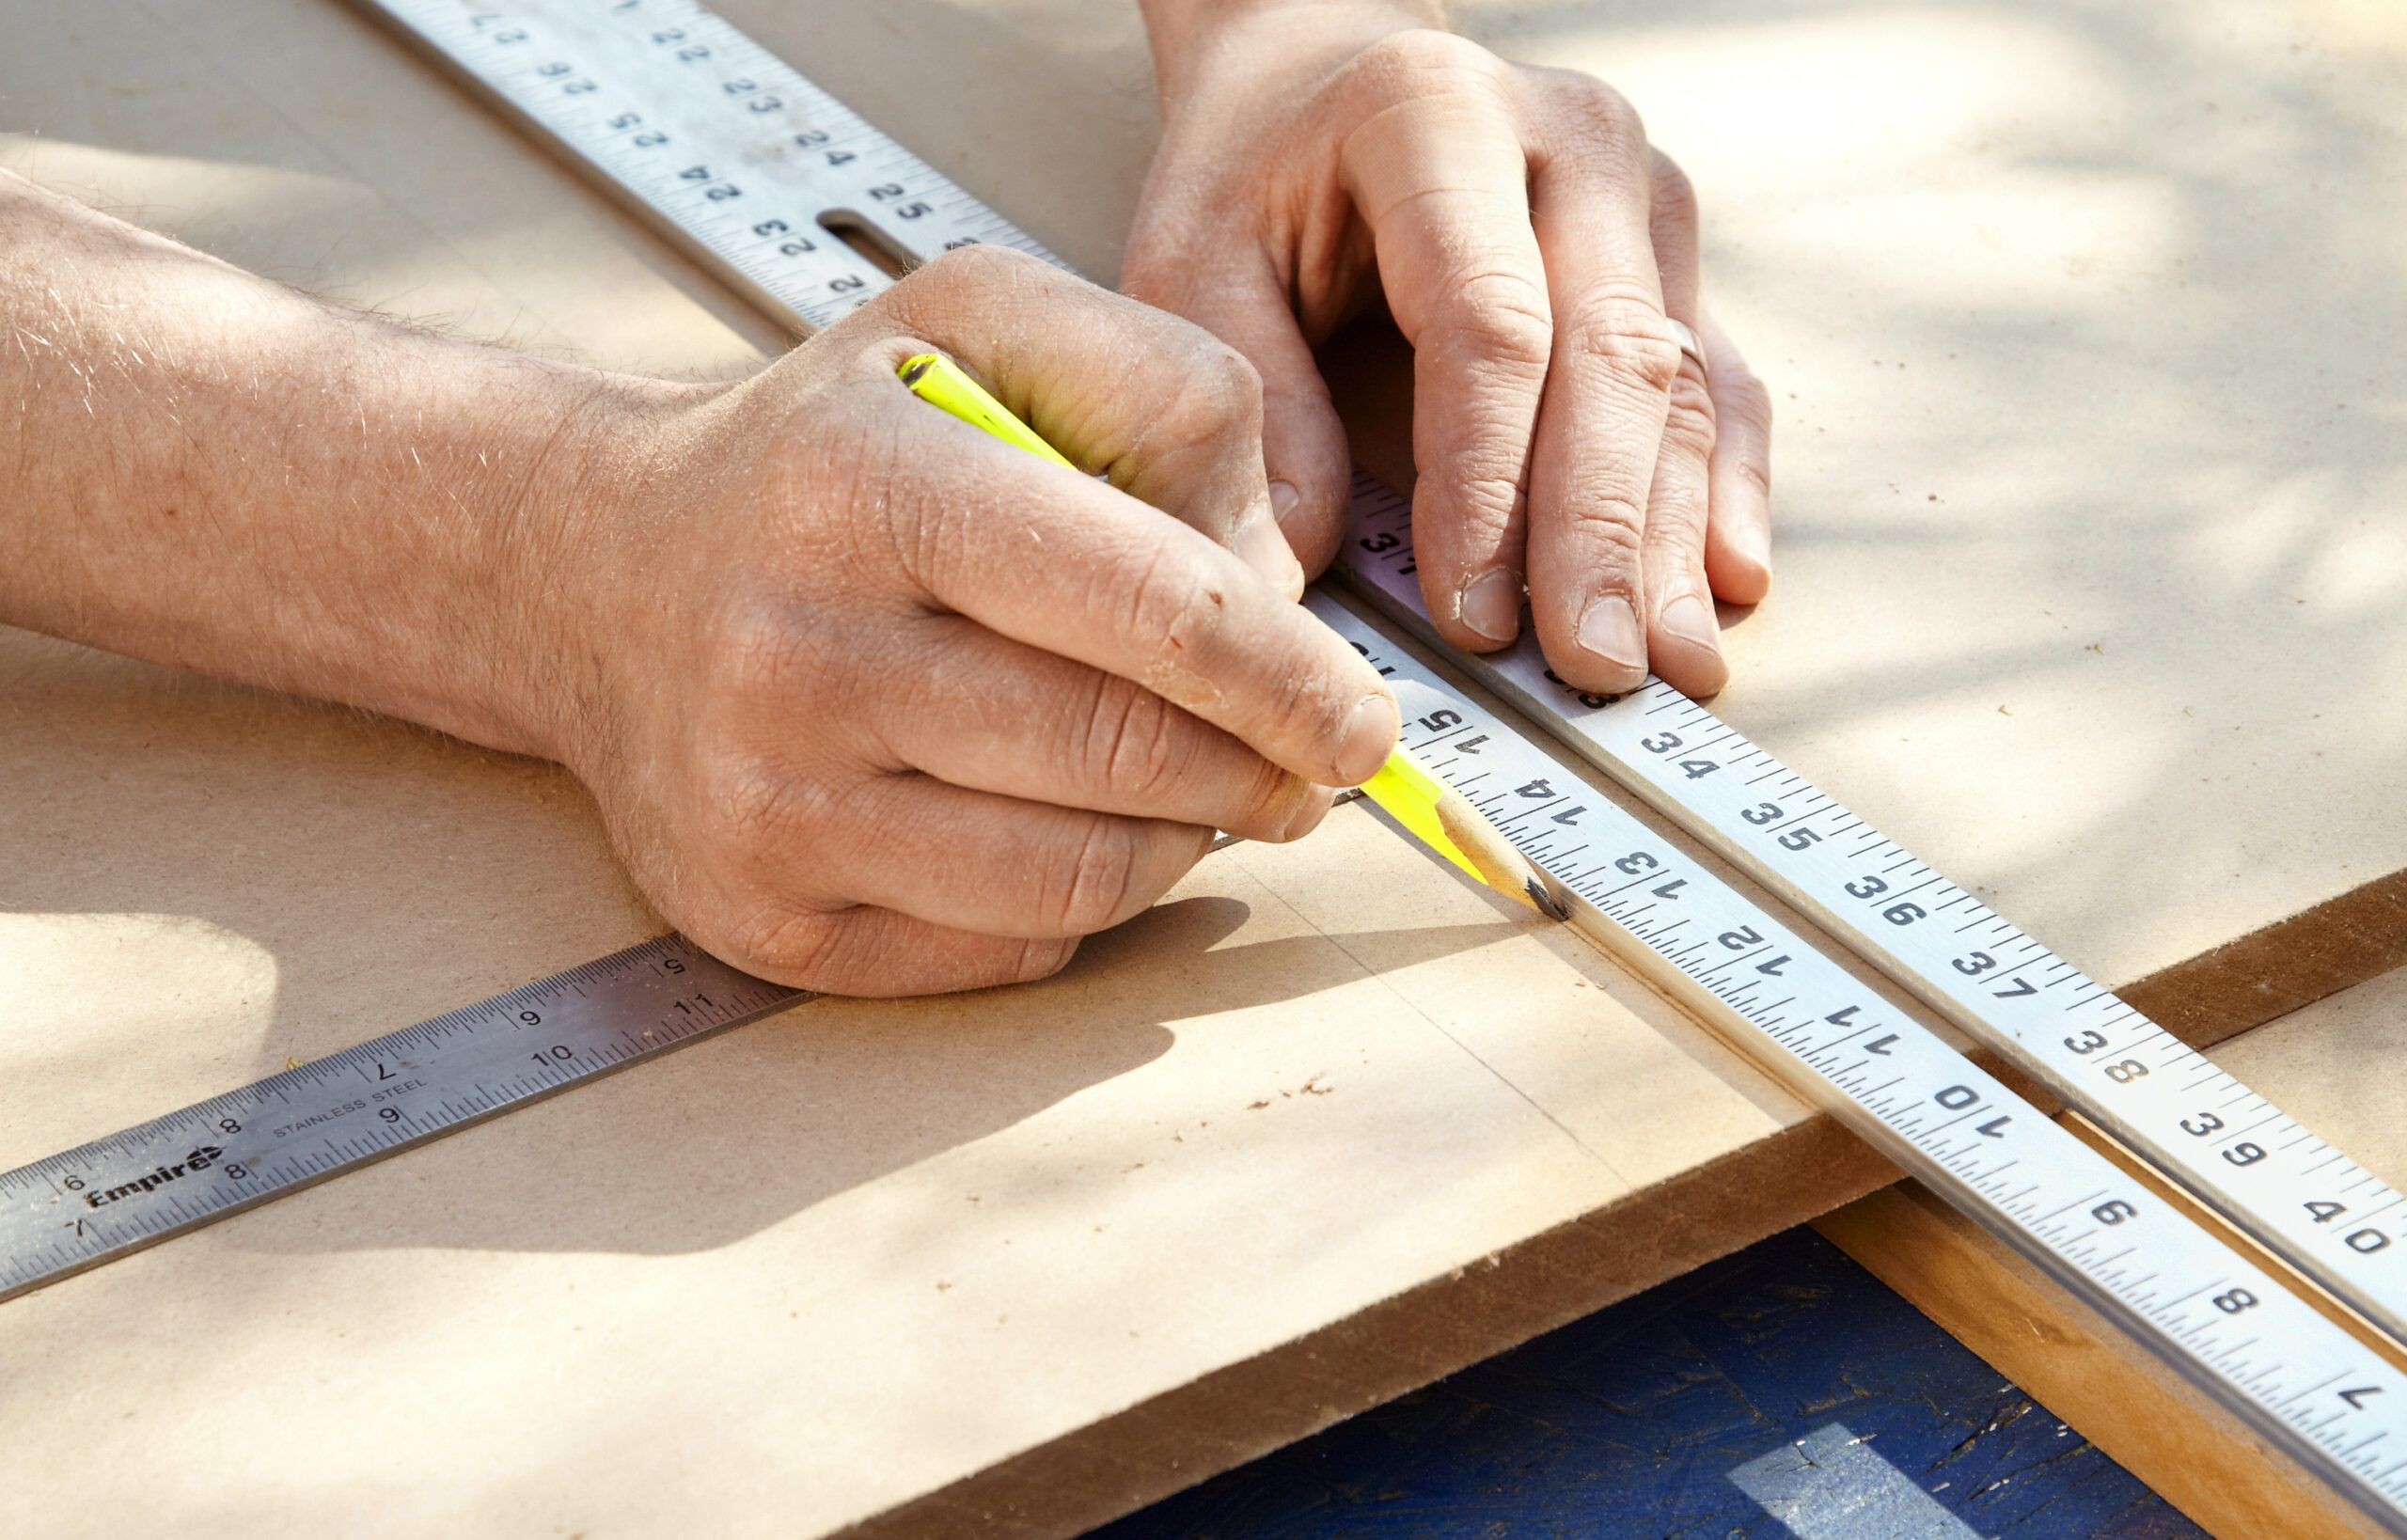
Step 1: Cut the MDF Pieces
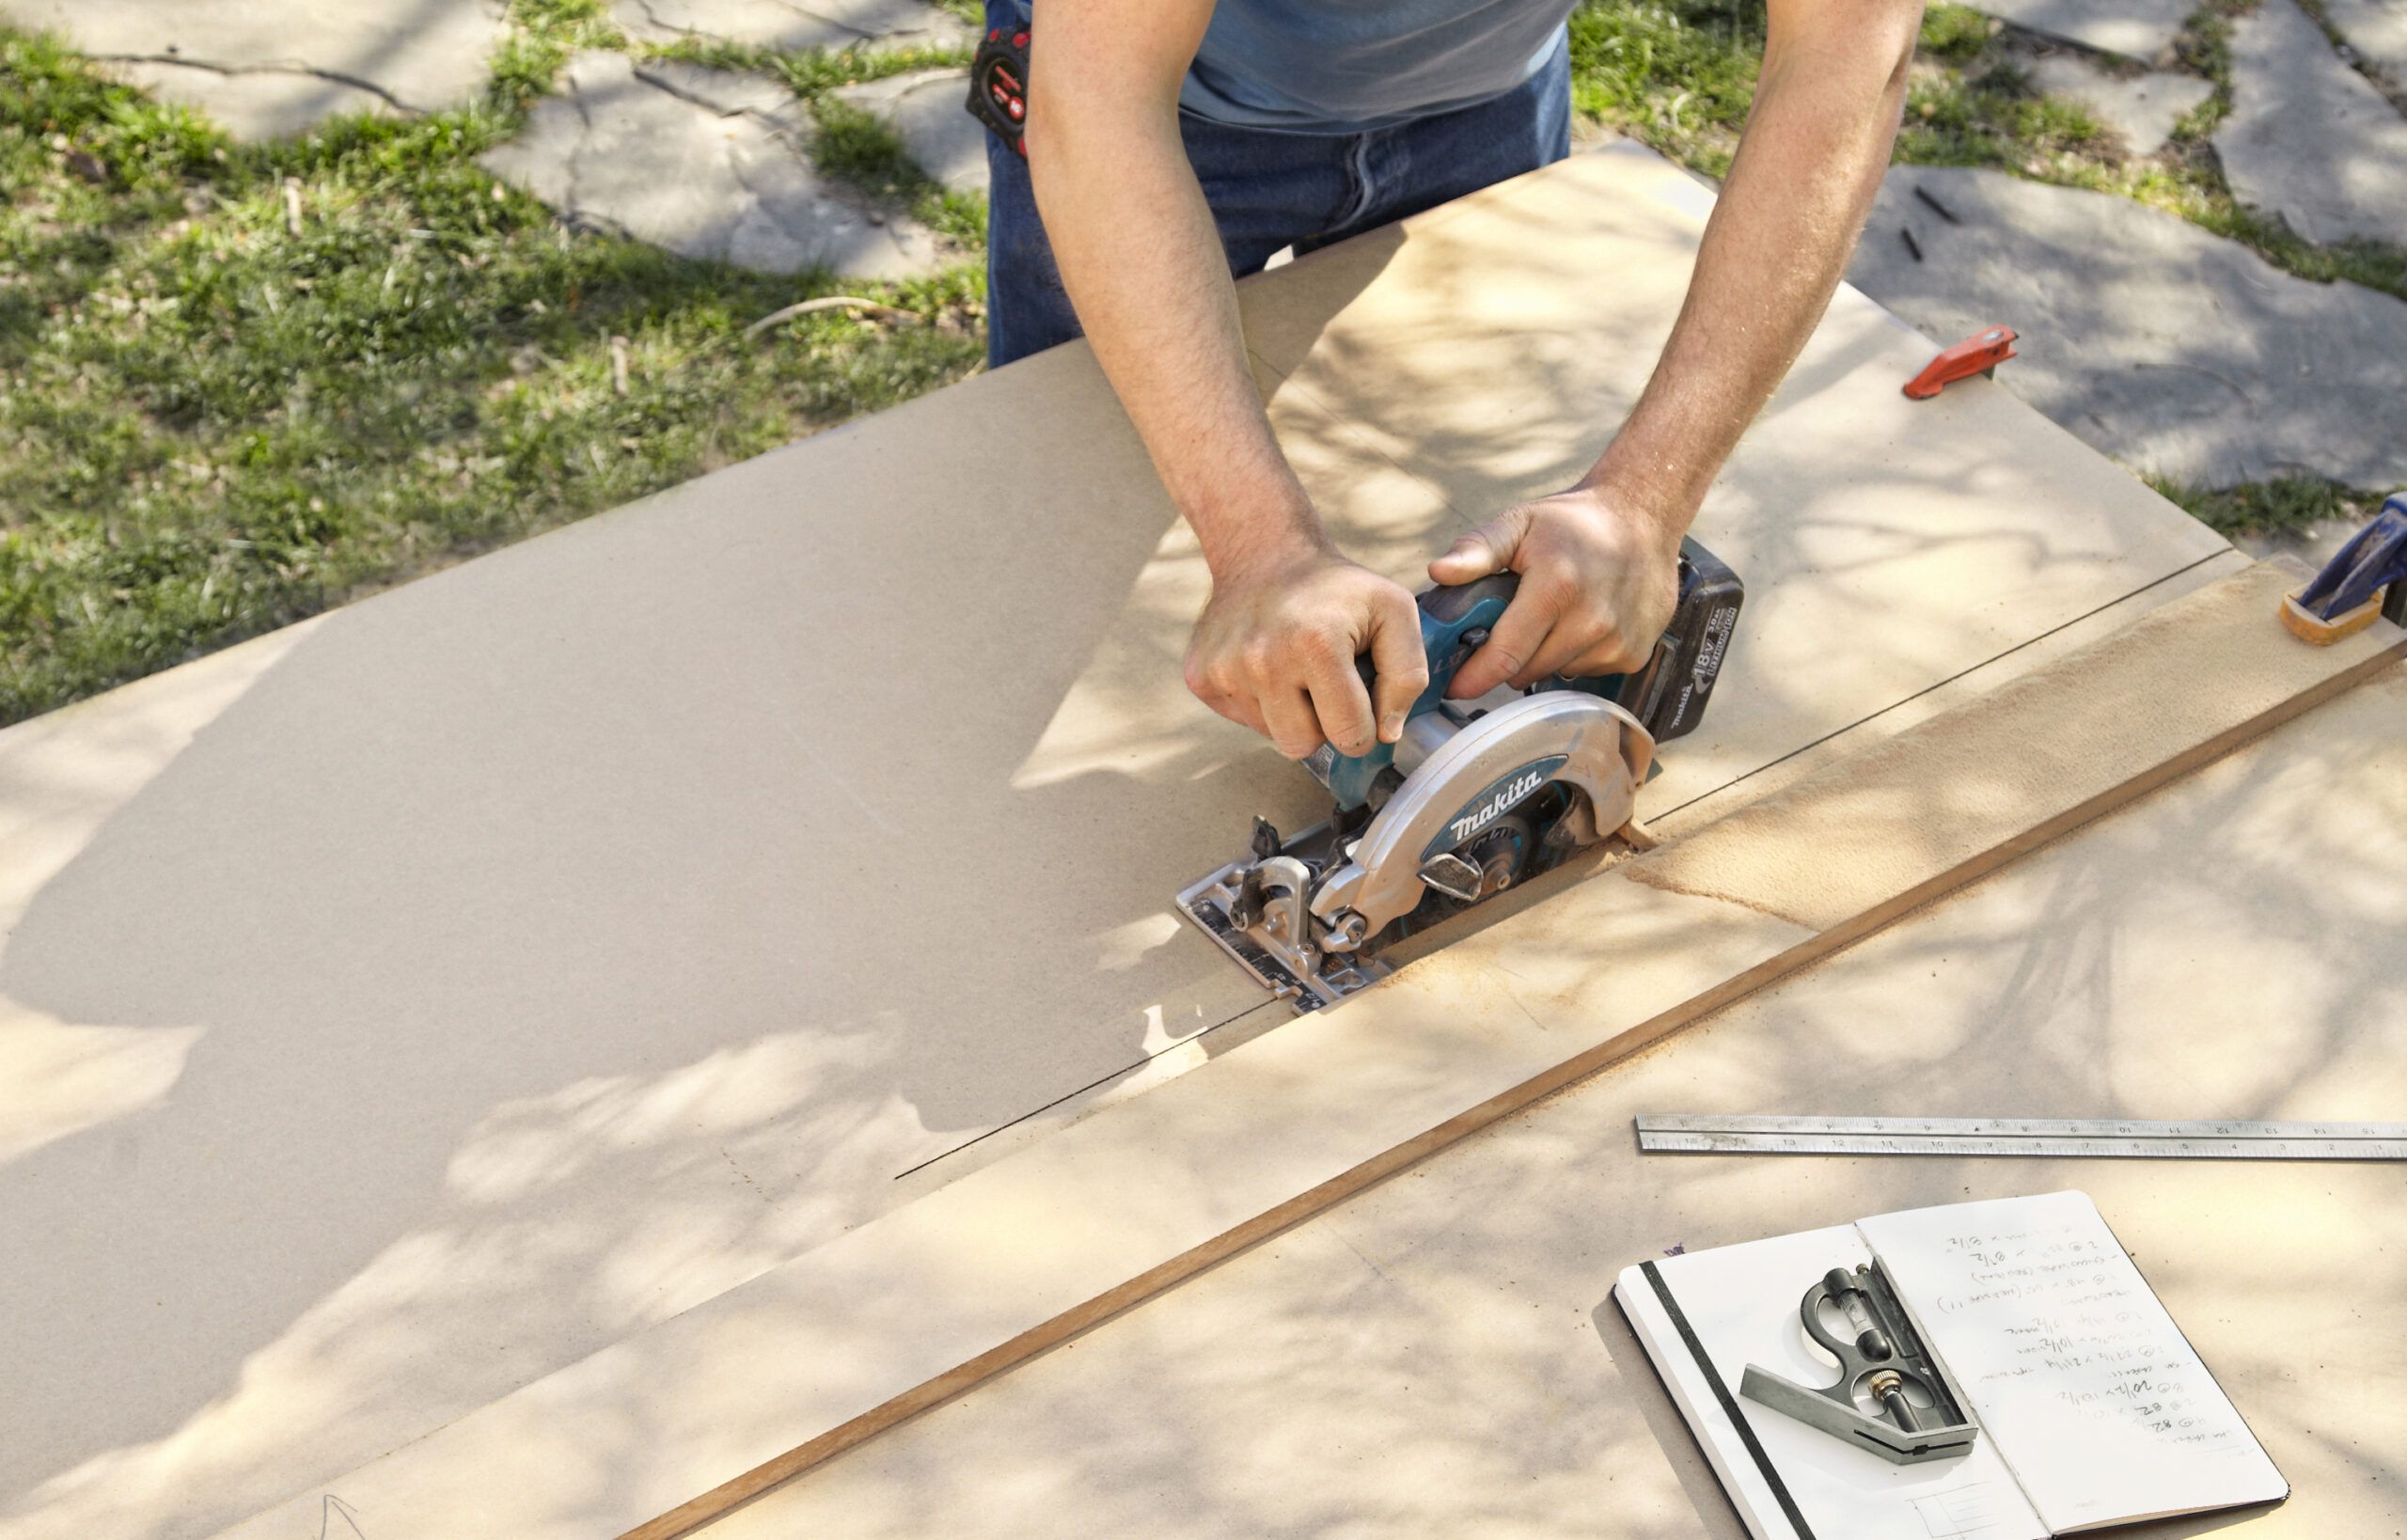
The mattress platform is made up of three storage carcasses: one along each side with three bays, and another one-bay box that fits between those two, at the foot of the bed. Take the sheets of MDF, clamp a straightedge in place, and use a circular saw to cut the pieces per the cut list.
Step 2: Assemble the Storage Carcasses
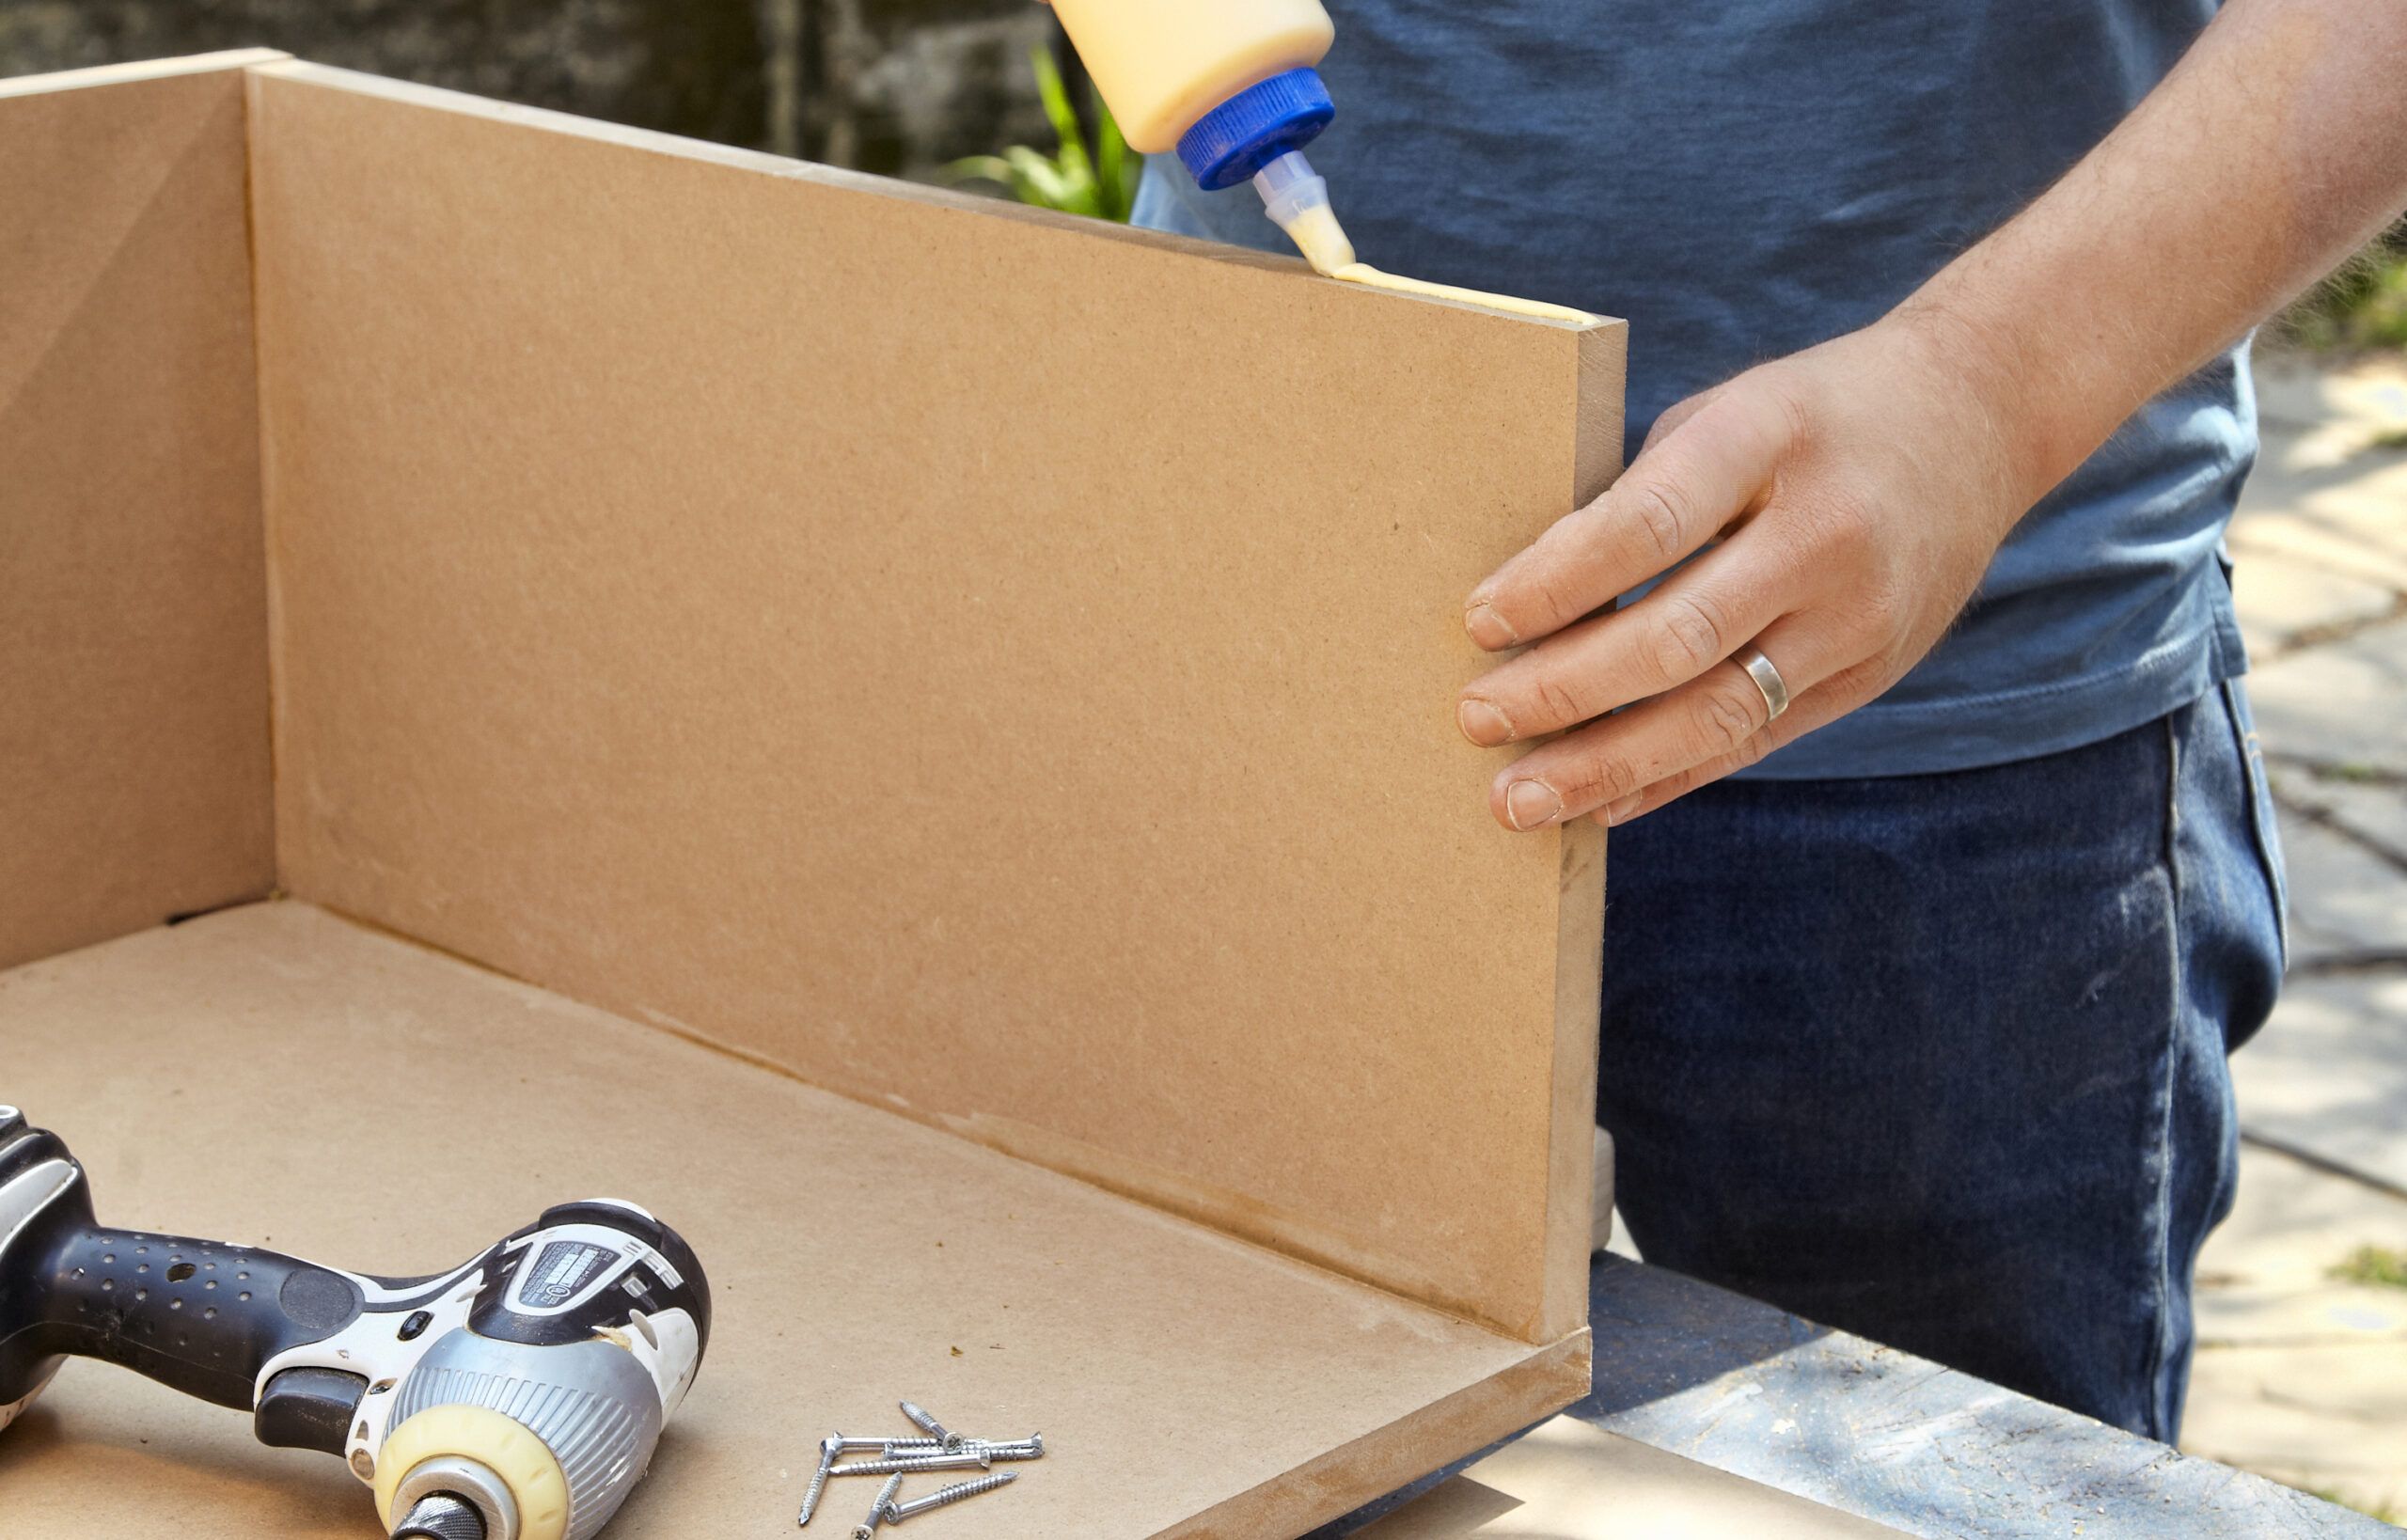
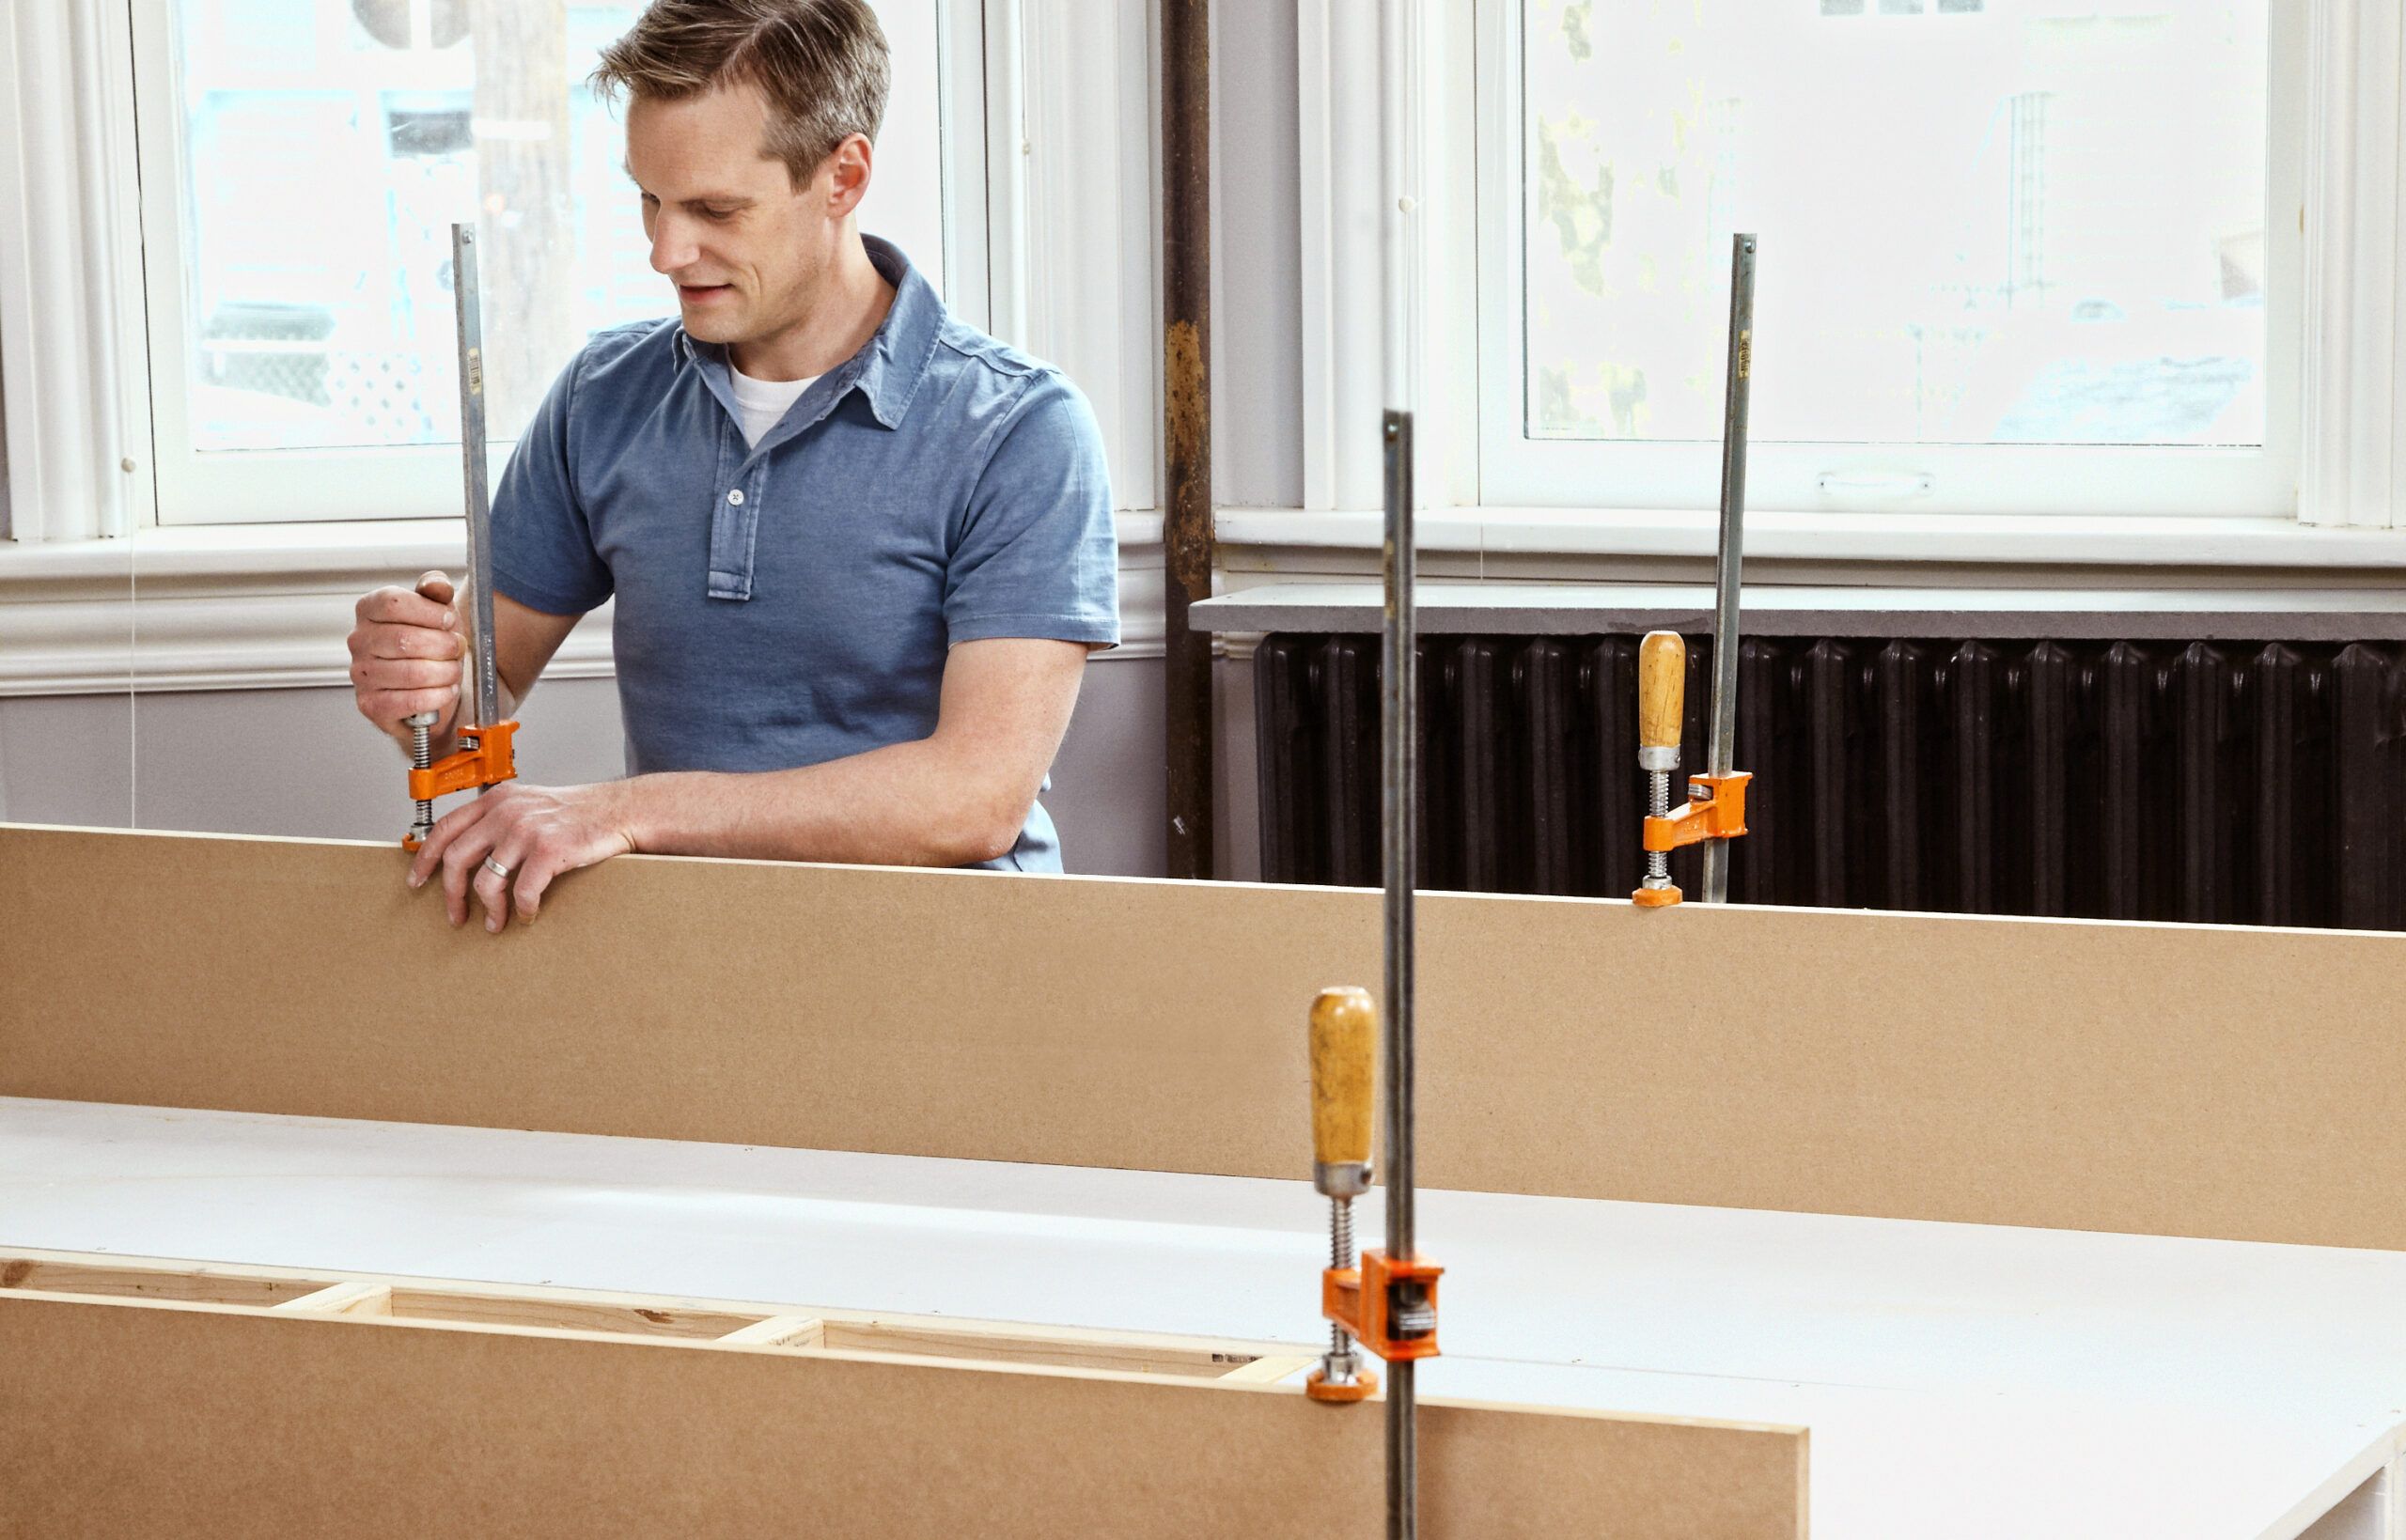
The back piece and dividers get sandwiched between the top and bottom. Lay a bottom piece flat and run a bead of wood glue atop its back edge. Stand the back piece on edge on the glue line, and use four bar clamps to hold it upright. Once the back is clamped down, get a partner to help tip up the L-shaped assembly, and drill pilot holes through the bottom and into the edge. Screw the pieces together with 1½-inch MDF screws. Evenly space the four dividers along the length of the assembly. Glue, clamp, and screw them in place, then do the same for the top piece. Build the other two carcasses the same way.
Step 3: Dry-Fit the Carcasses
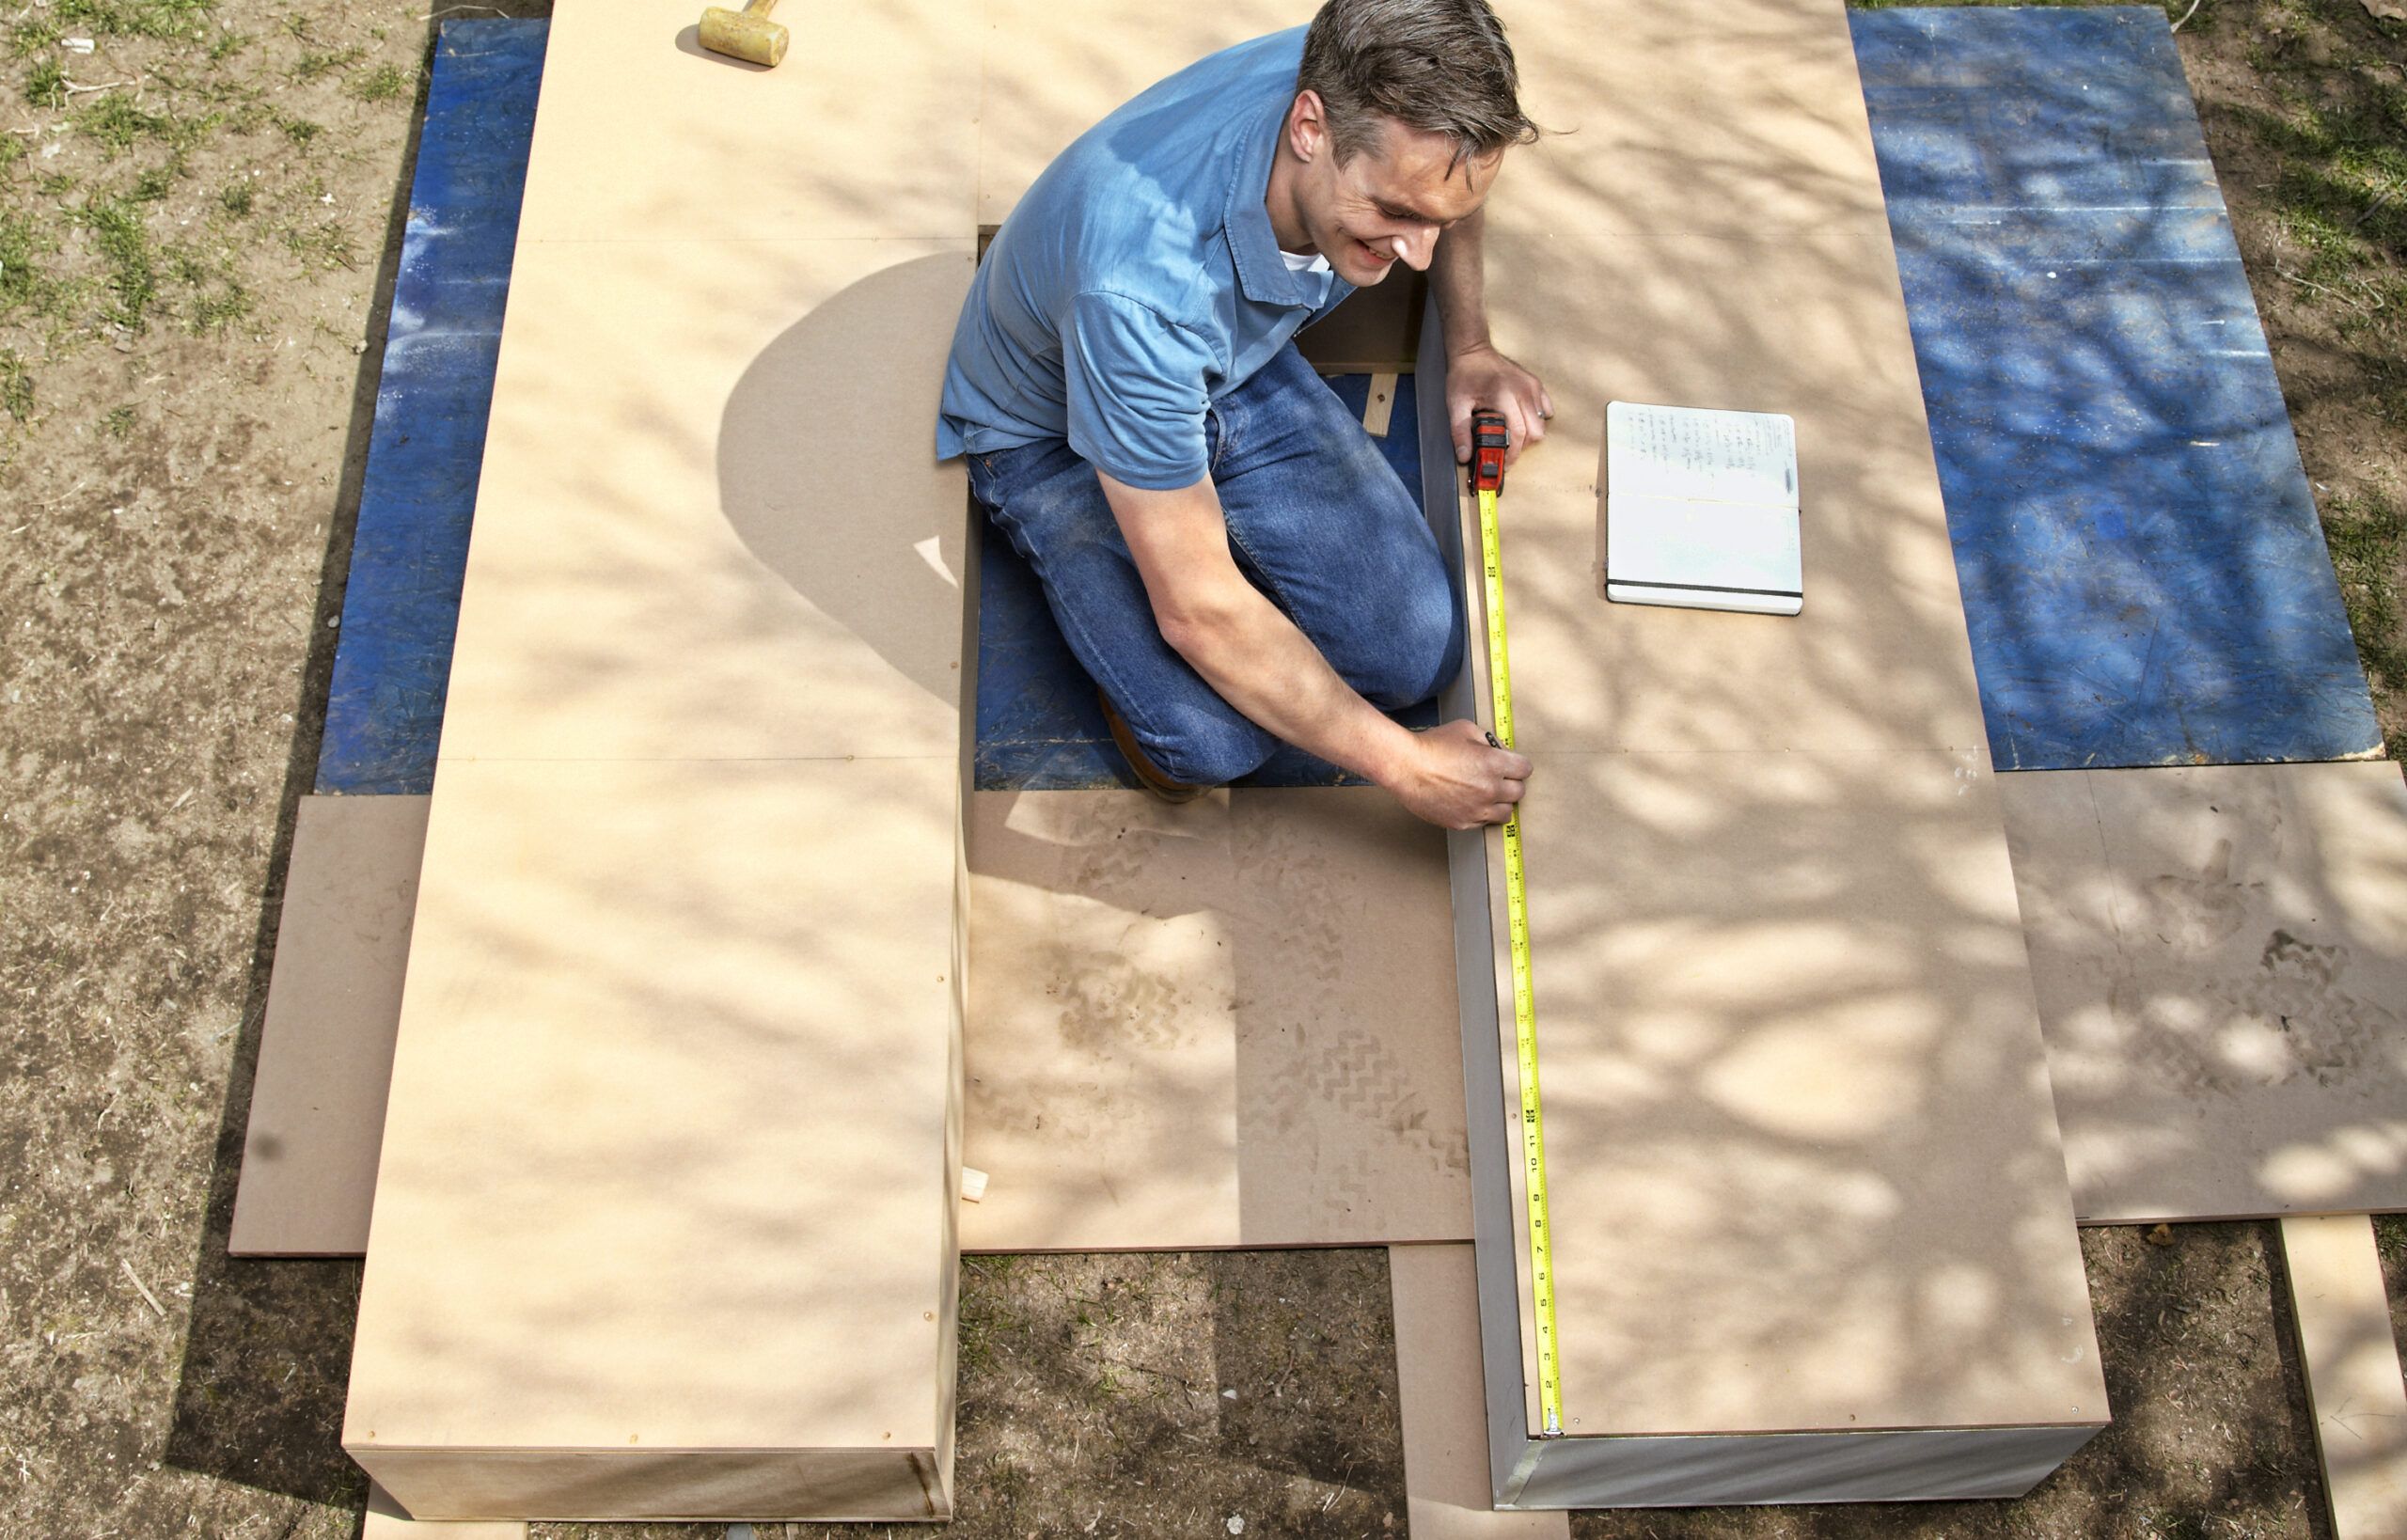
Arrange the three carcasses as they will be assembled, and clamp them together at the foot. Measure the length and width of the void between the carcasses, as shown. Unclamp them and prime all surfaces.
Step 4: Join the Carcasses
Grab a partner and move the carcasses into the bedroom. Place them on 1×2 furring strips so that the bottom rails will be flush with the storage openings, and clamp them back together. Using 1¼-inch MDF screws, go through the wall of the small carcass and into the adjacent ones, as shown.
Step 5: Install the 2×4 Support Frame
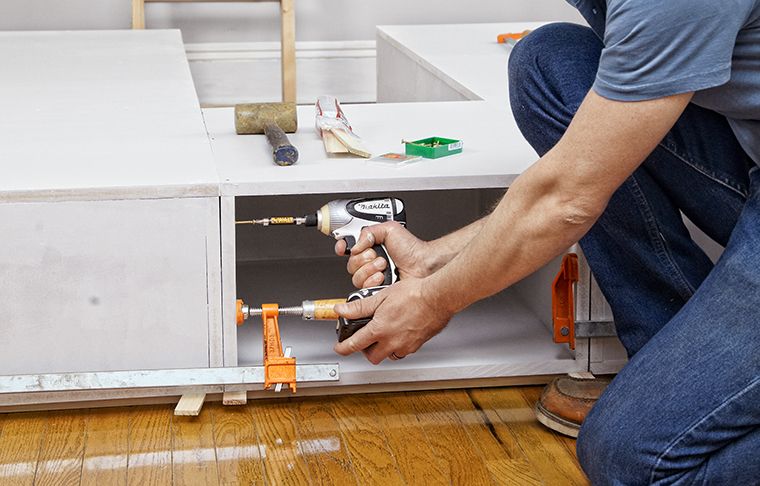
Use a miter saw to cut 2x4s to length to build a support frame for the void between the carcasses. Use deck screws to go through the long boards into the ends of the five crosspieces. Install 1×2 cleats around the platform opening, 3½ inches down, to hold the frame flush with the platform, and set the frame in place, as shown. Use 2-inch MDF screws to fasten it to the carcasses, tying together the entire assembly.
Step 6: Cut the MDF Bed-Frame Pieces
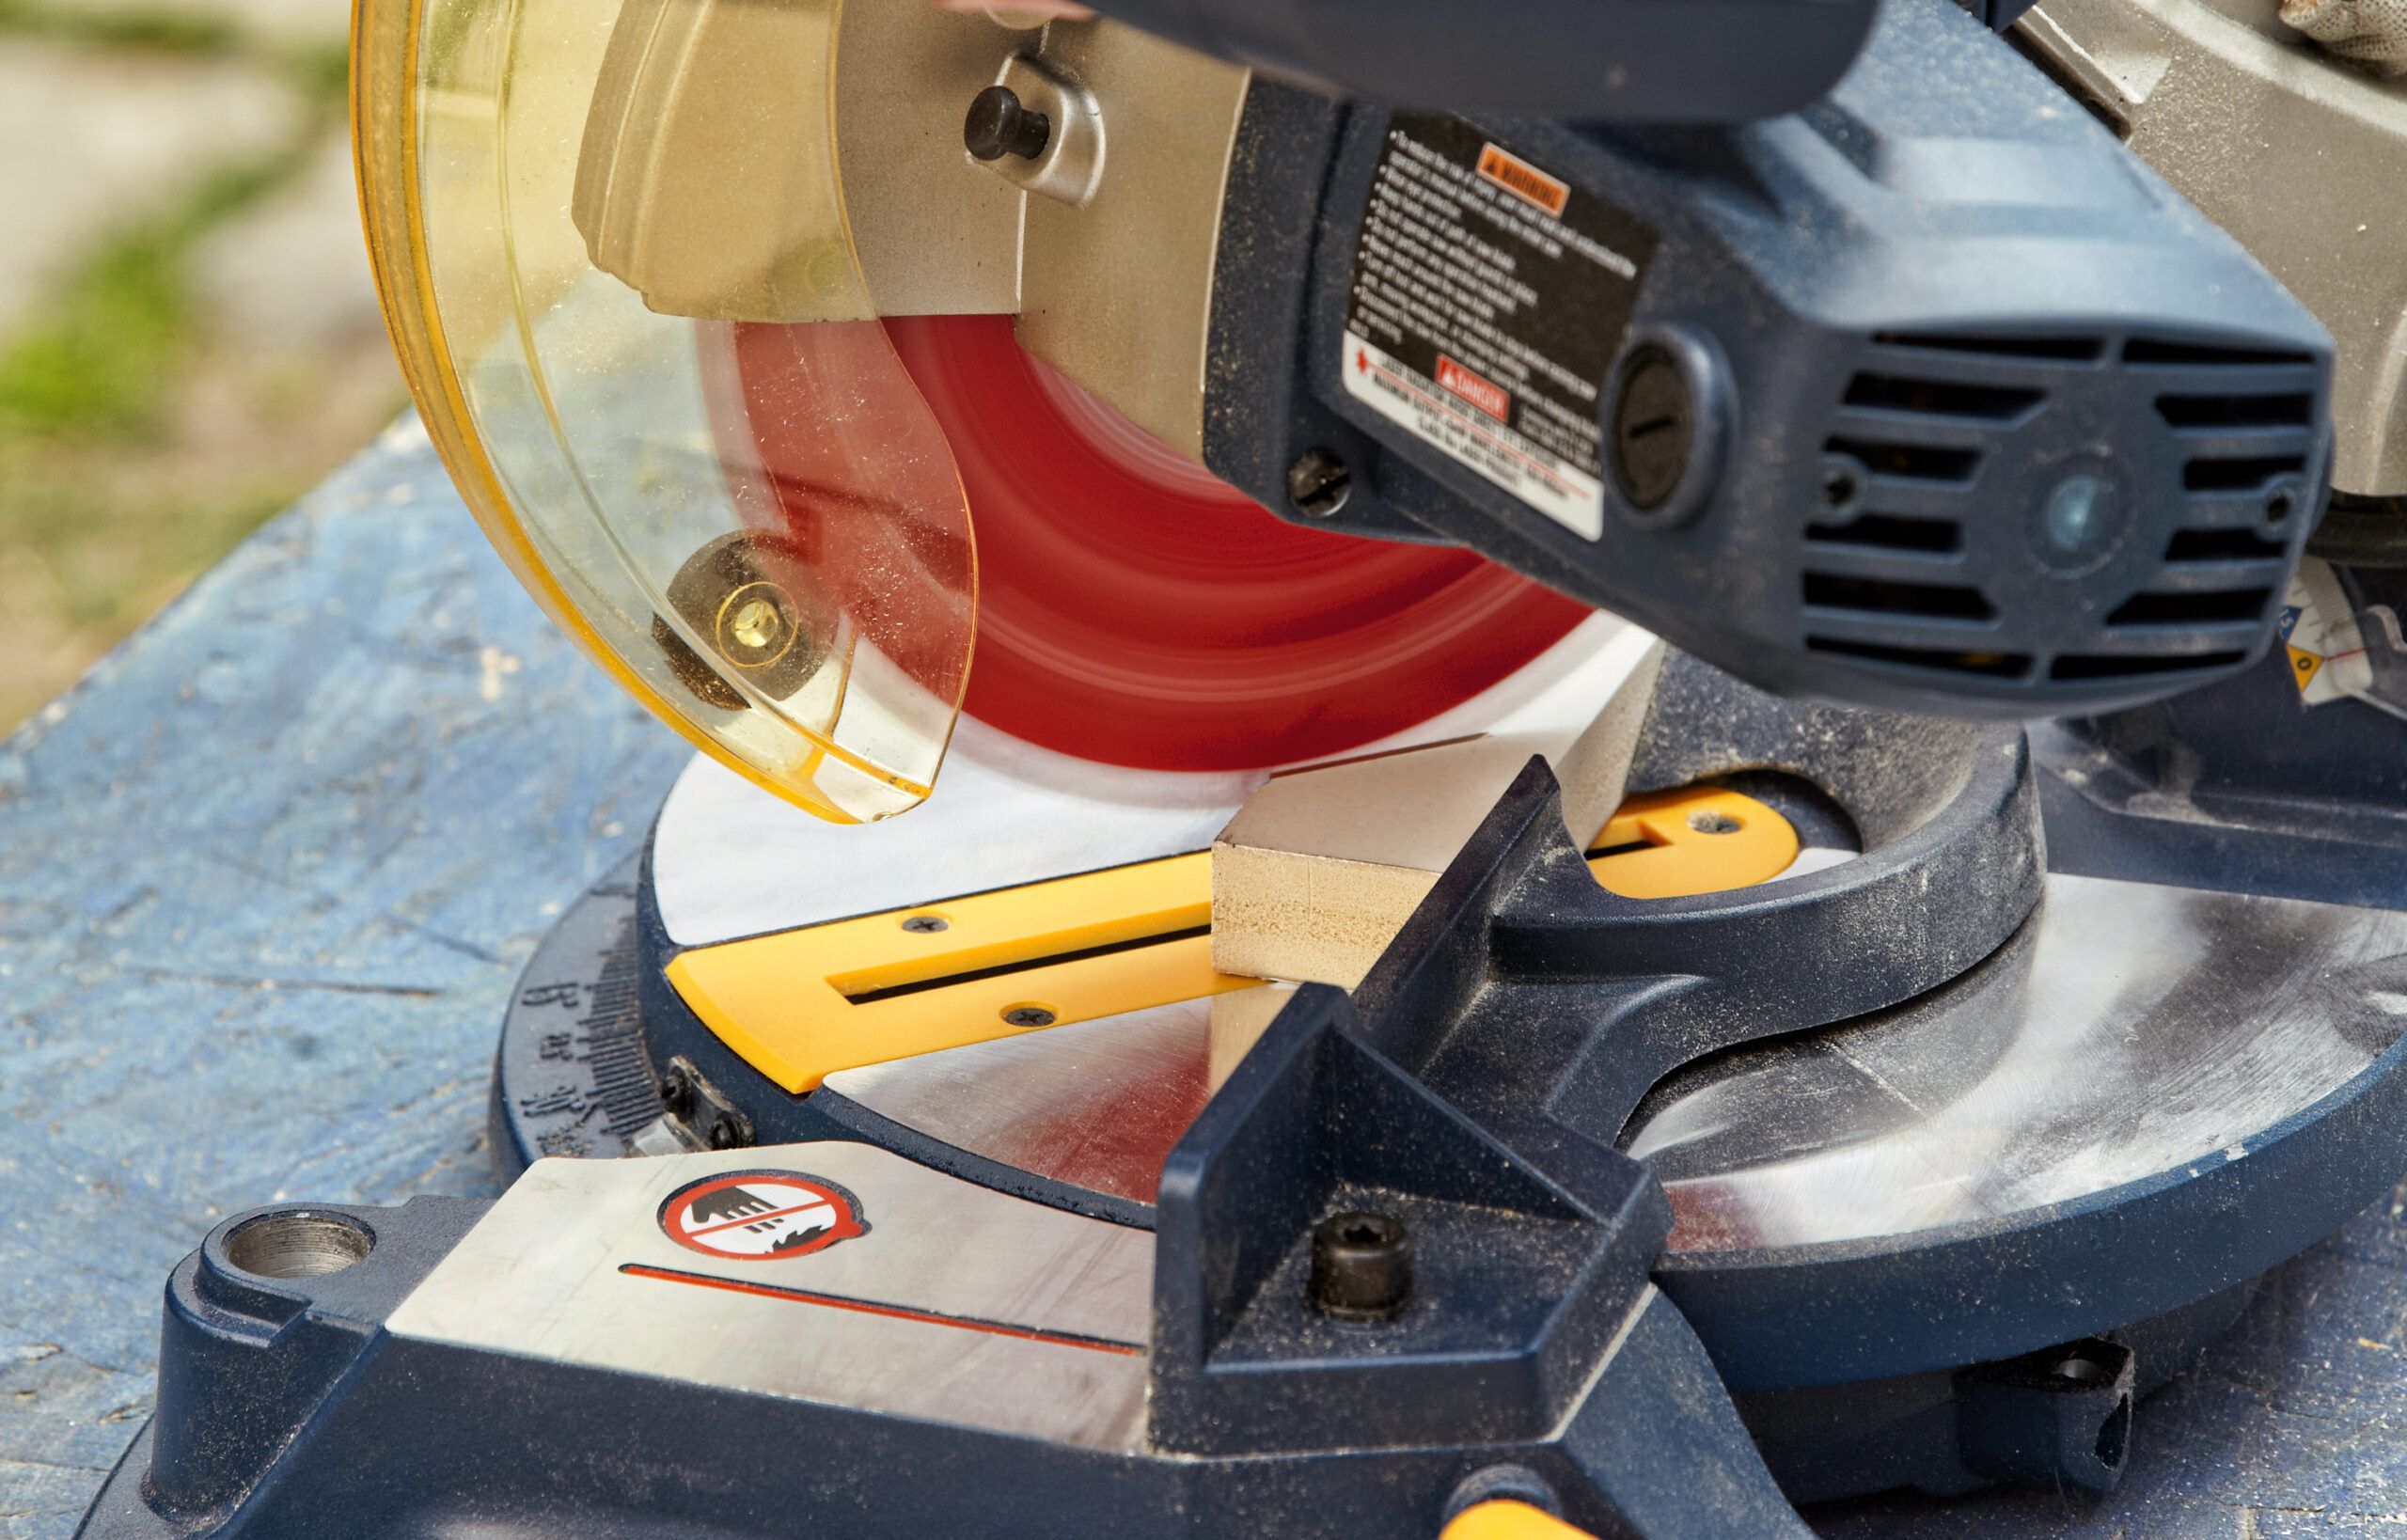
Use a straightedge and a circular saw to cut the side panels and footboard to size. The side panels overlap the footboard (and will butt into the headboard, in Step 8).
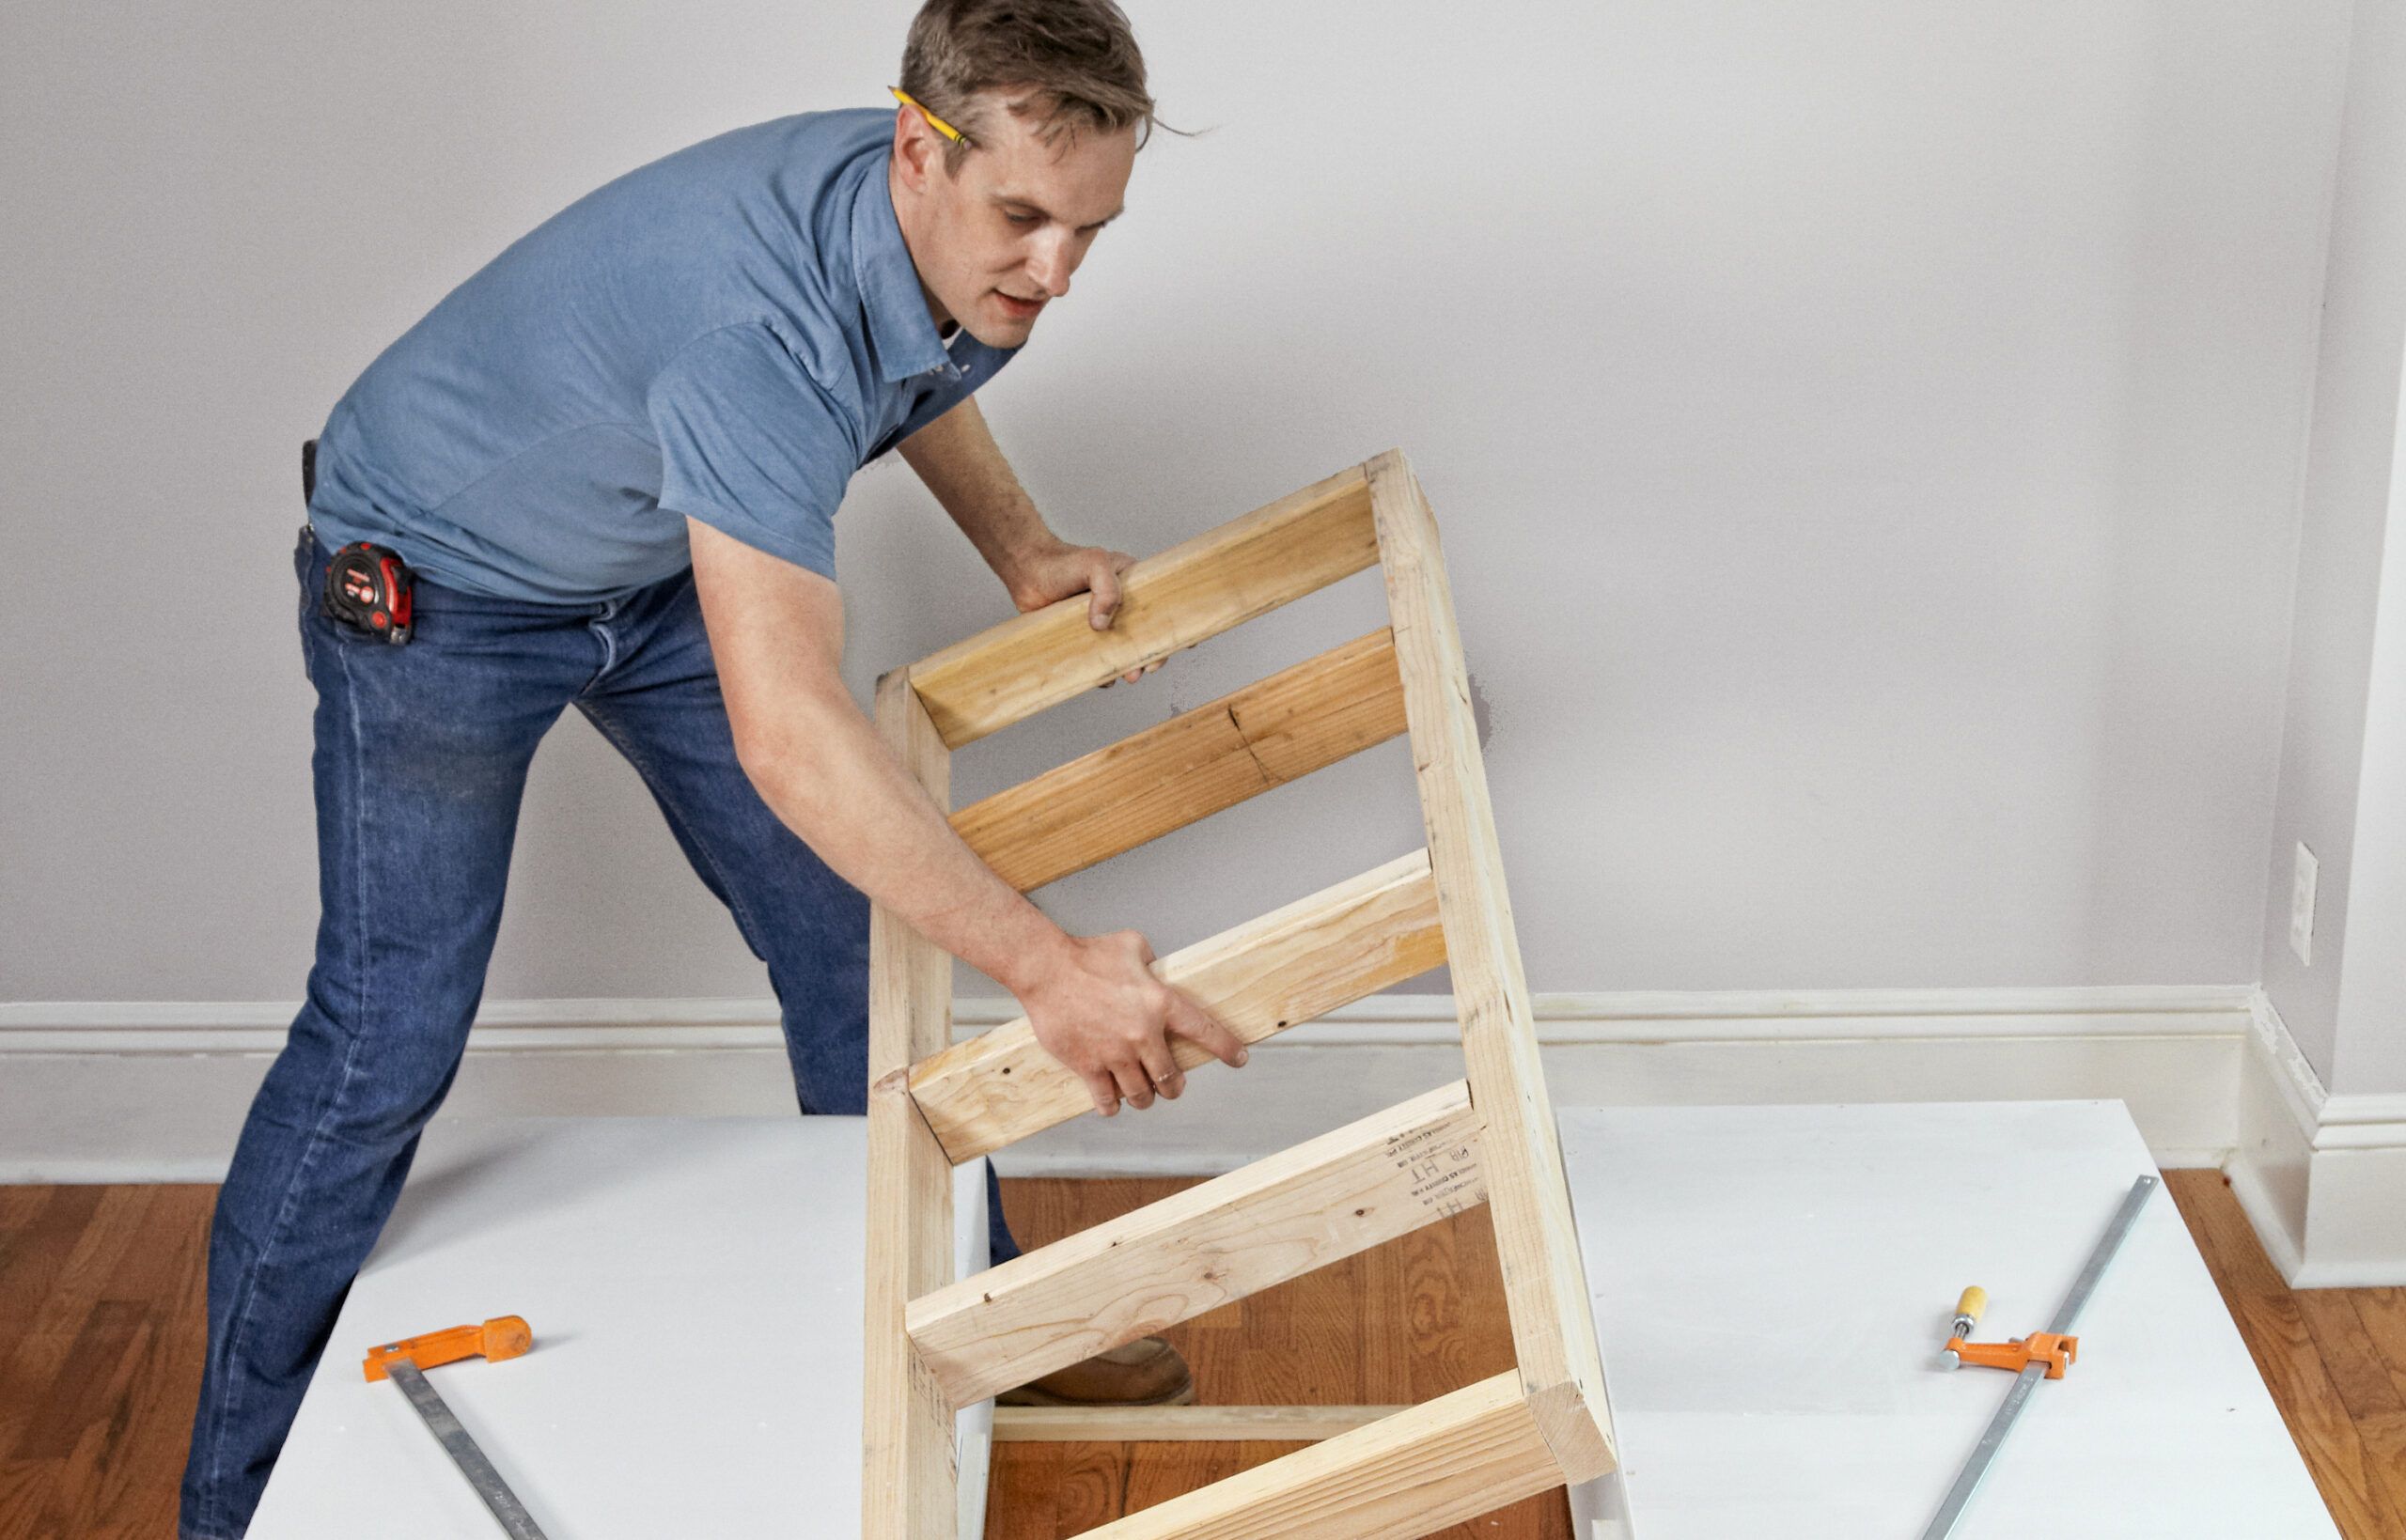
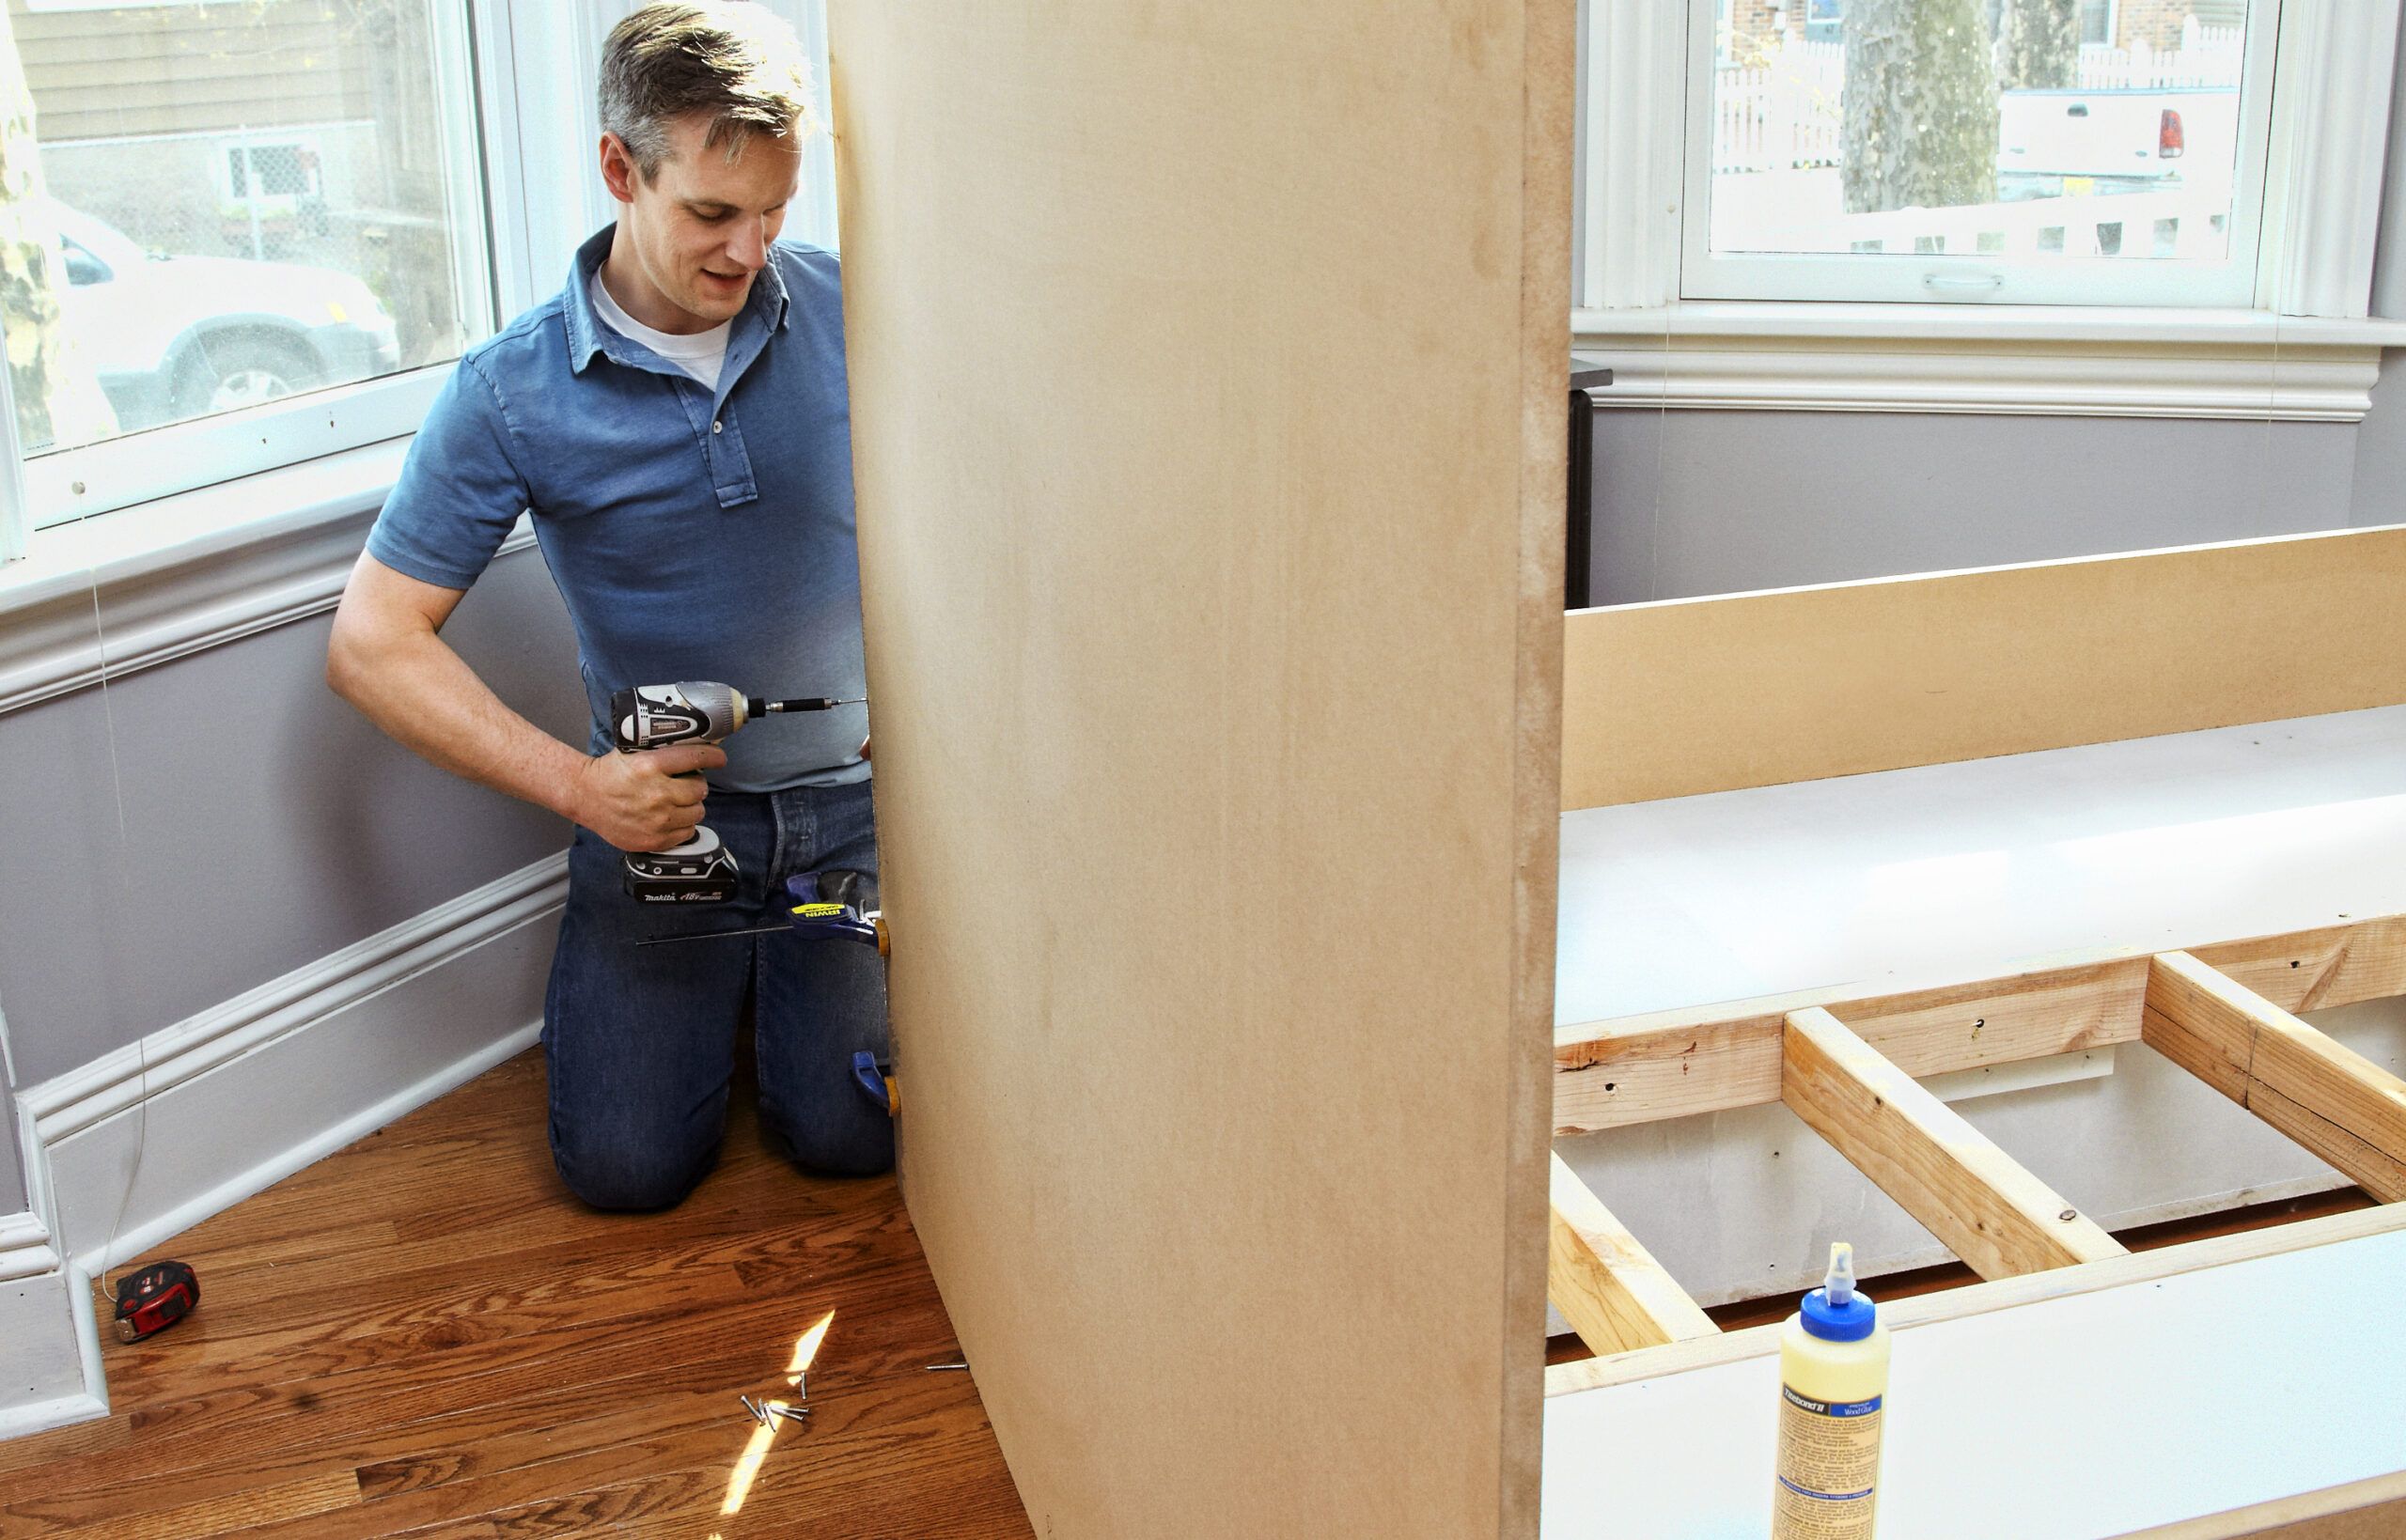
Step 7: Install the Panels
Run a bead of wood glue along the perimeter of the top of the platform, one side at a time for each panel. Place each panel on edge in the glue, and clamp it in place, as shown. Check that the face is square and flush with the platform, then drill pilot holes up into the edges from the storage bays and install 1½-inch MDF screws. Screw through the side panels and into the edges of the footboards, too.
Step 8: Attach the Headboard
Measure the width of the bed, and cut the headboard to size. Use 1¼-inch MDF screws to attach it to the carcasses and the 2×4 support frame. Don’t use glue if you ever plan to move the bed.
Step 9: Install the Face Frames
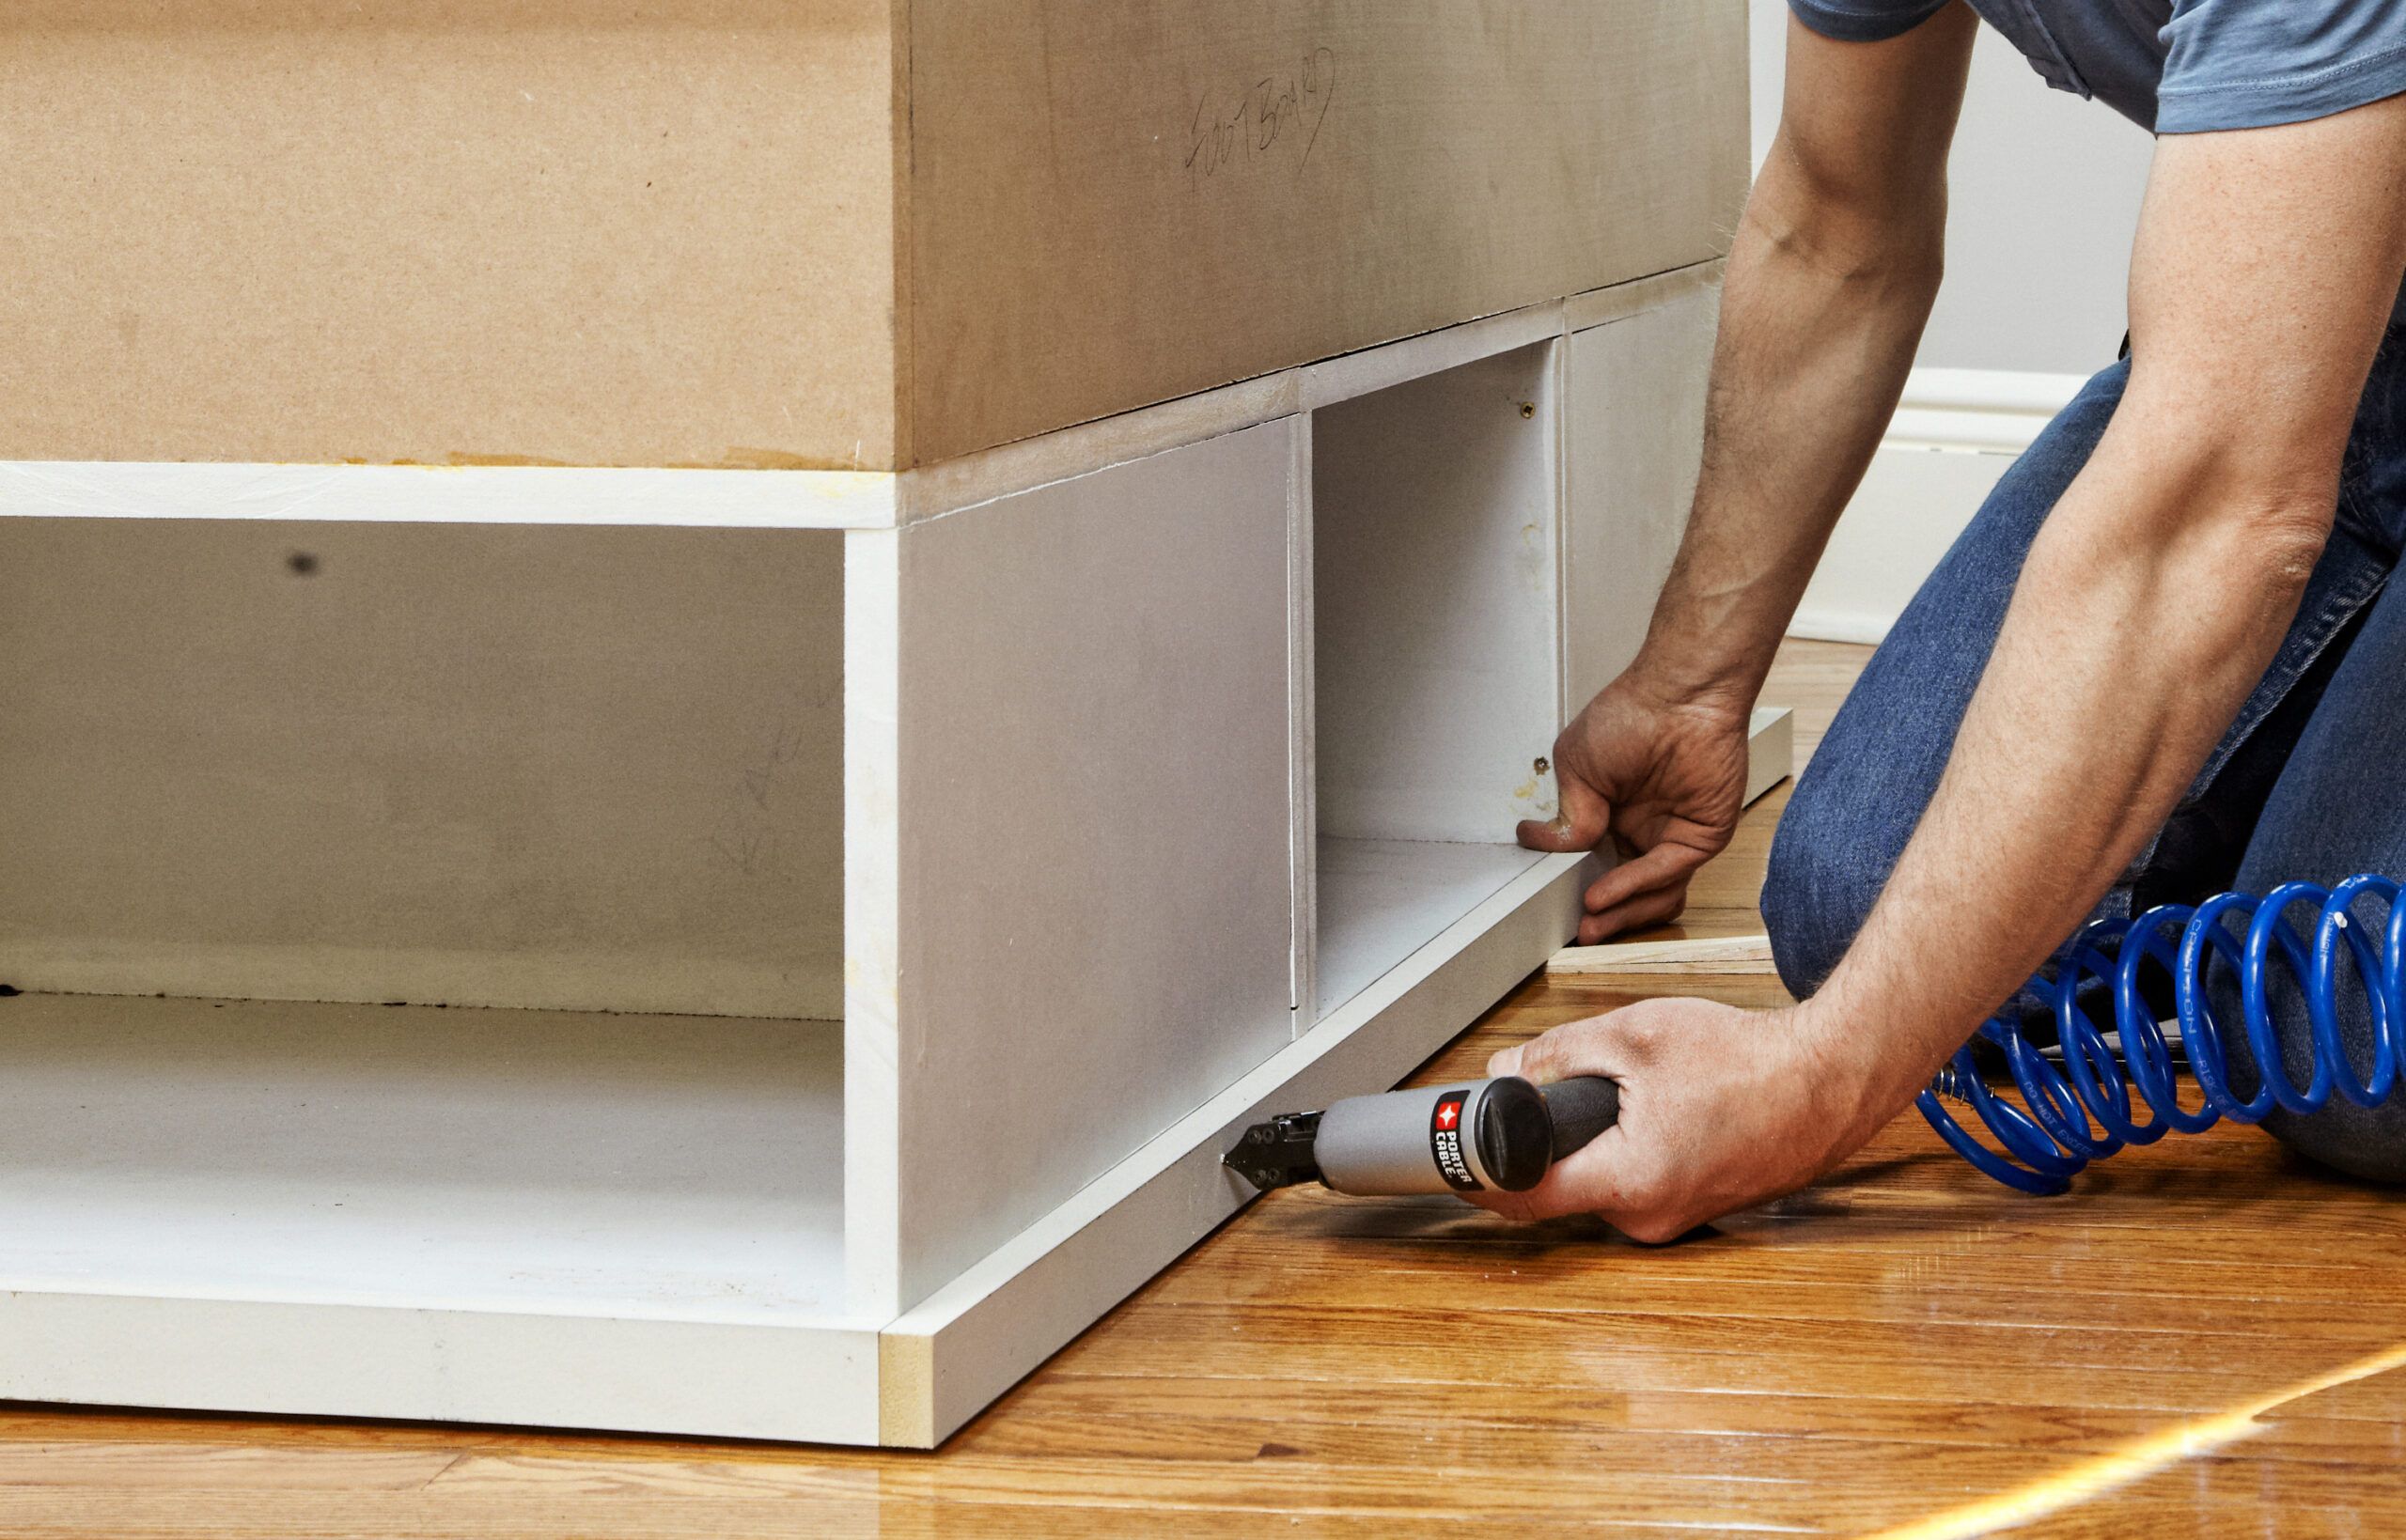
For the best fit, measure and cut the 1×2 trim as you go. Starting with the top and bottom rails on the sides, glue them in place, then use a brad nailer to tack them down. Measure, cut, and install the top and bottom rails at the foot of the bed. Next up: all the stiles.
Step 10: Install the Cap Trim
Set a miter saw to 45 degrees, and cut the footboard ends of the two 1×2 pieces that cap the sides. Measure and cut the other ends at 90 degrees. Glue and nail the side caps in place. Next, measure for the footboard cap, set the saw back to 45 degrees, and miter both ends of the cap to fit. Glue and nail it in place.
Step 11: Install the Headboard Trim
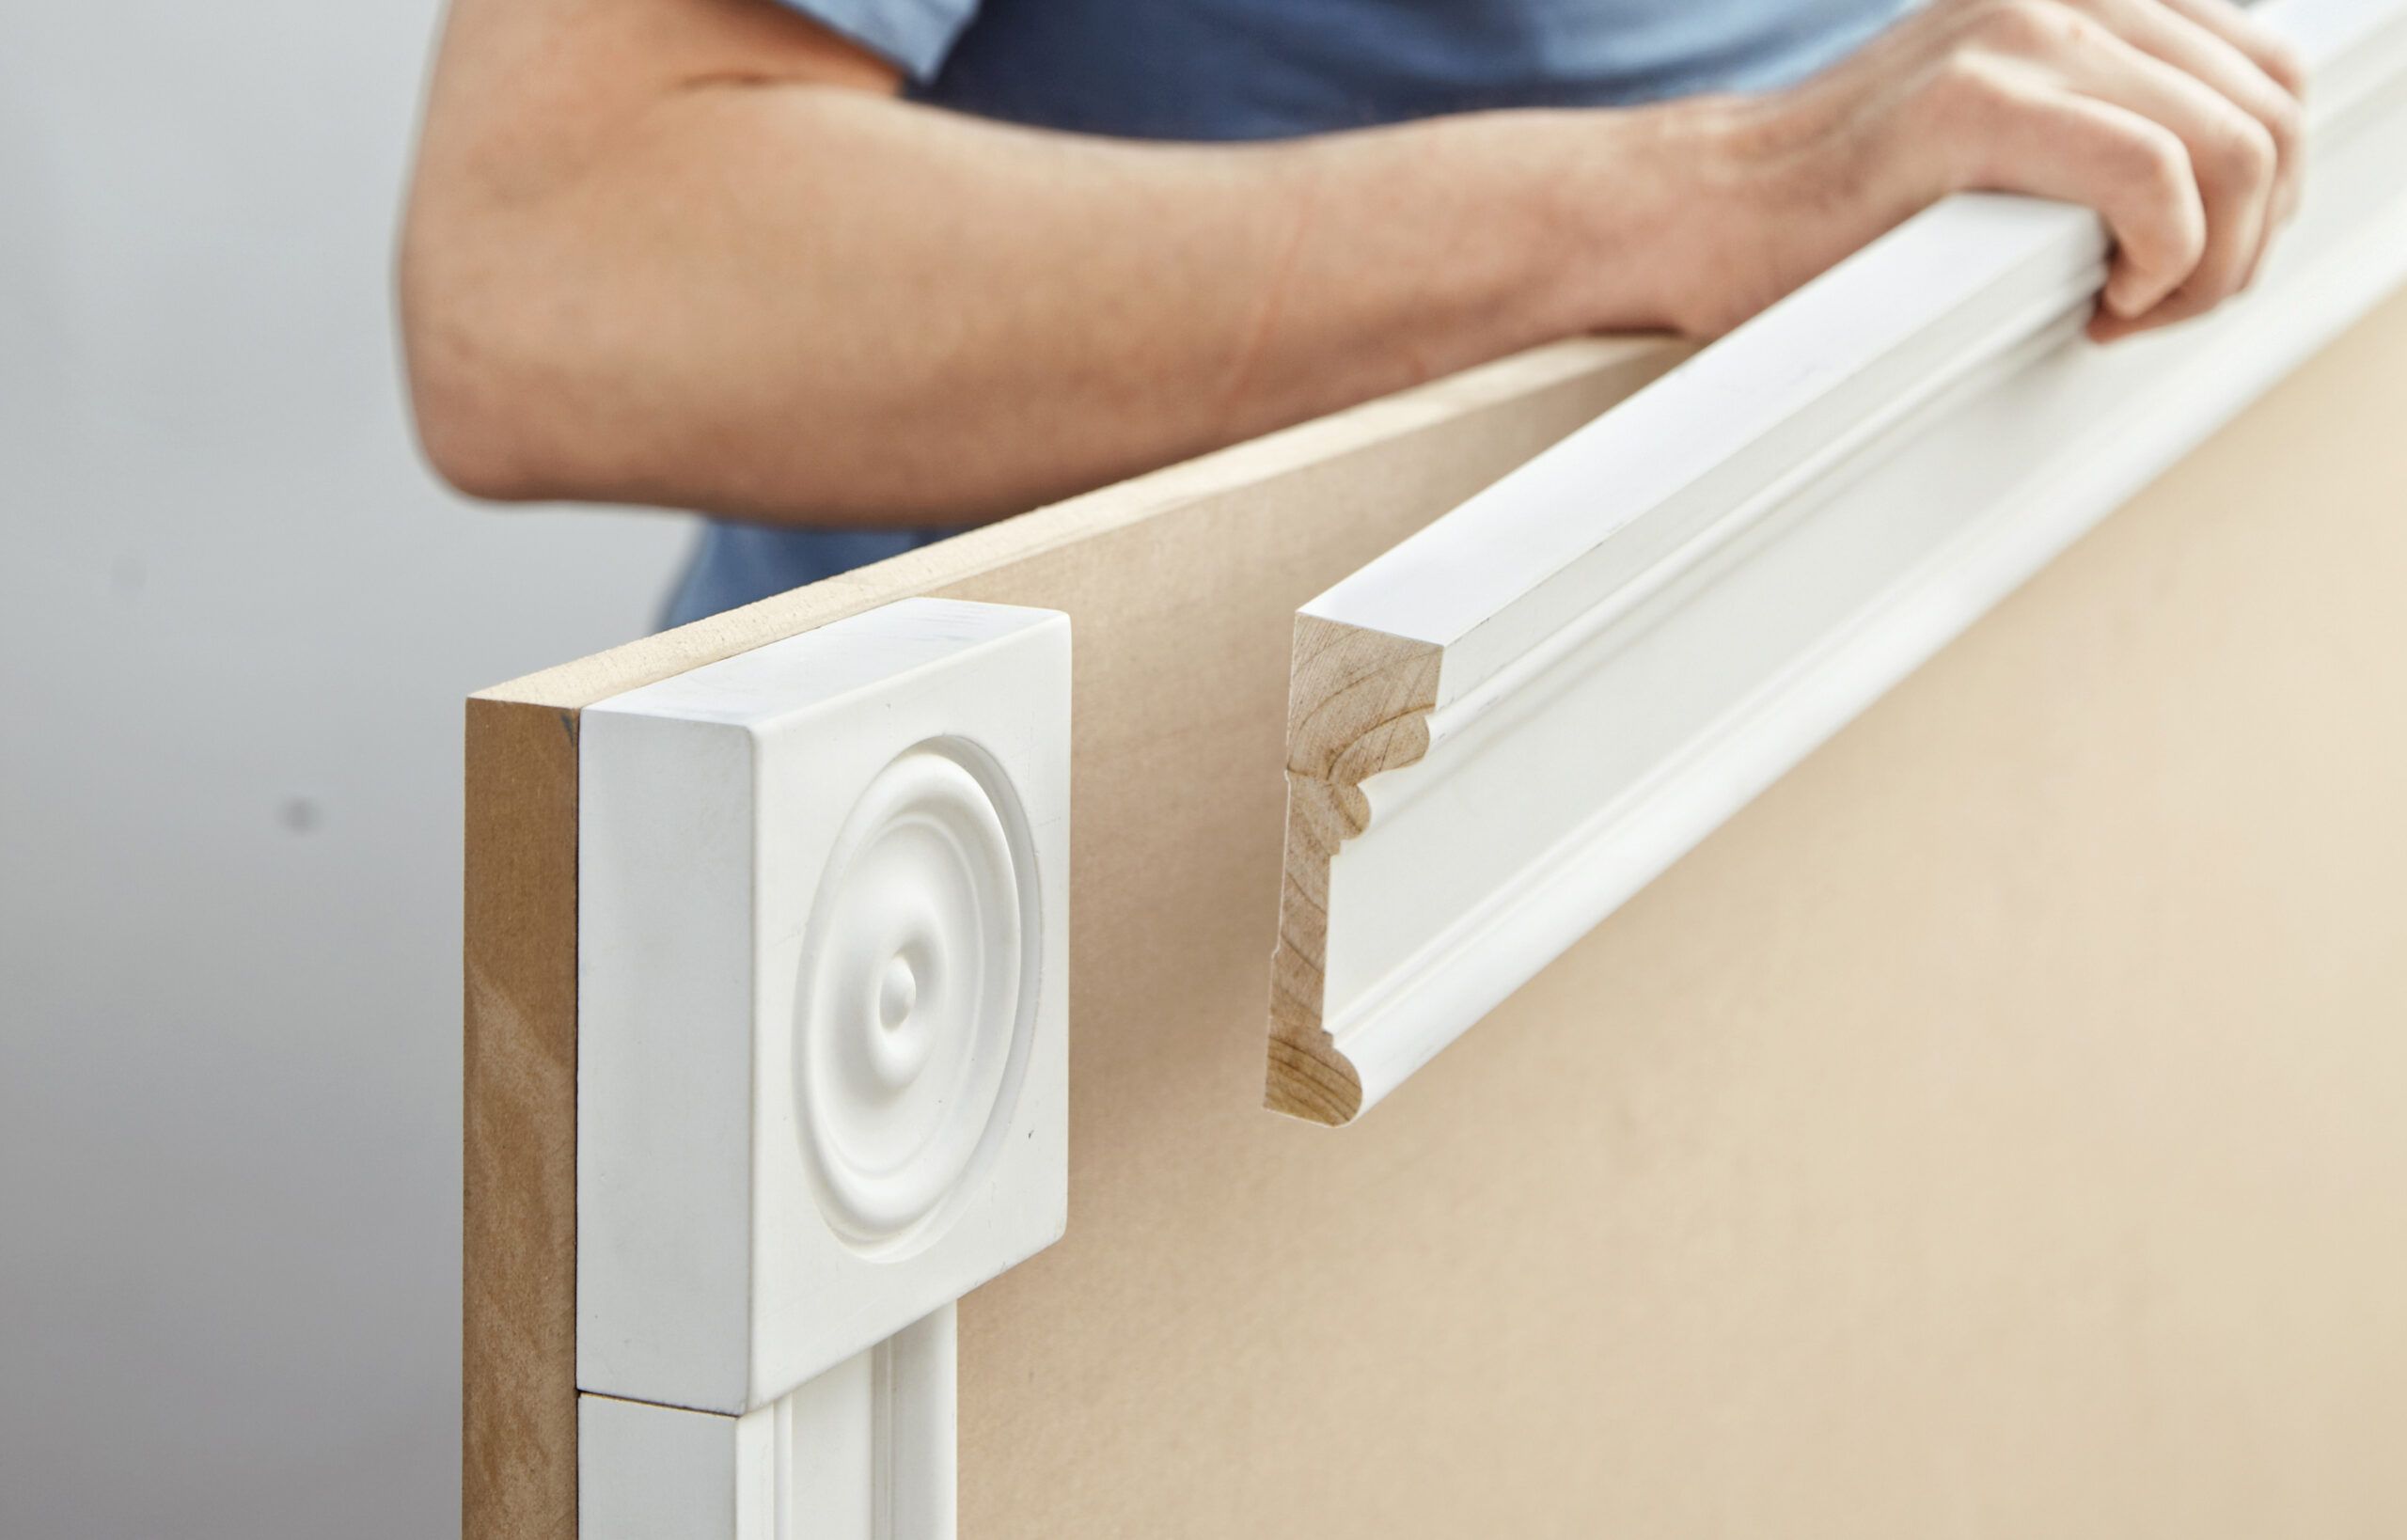
Glue and tack the rosettes in place at the corners. Measure the distance between each one and the platform, and cut the door casing to length. Use a jigsaw or a Japanese handsaw to notch the casings around the side panels, and glue and nail them in place with a brad nailer. Then install the horizontal piece of casing between the rosettes. Finally, cut a ½x3 lattice strip to fit between the platform and the horizontal casing, center it side to side, and glue and nail it in place.
Step 12: Install the Paneling
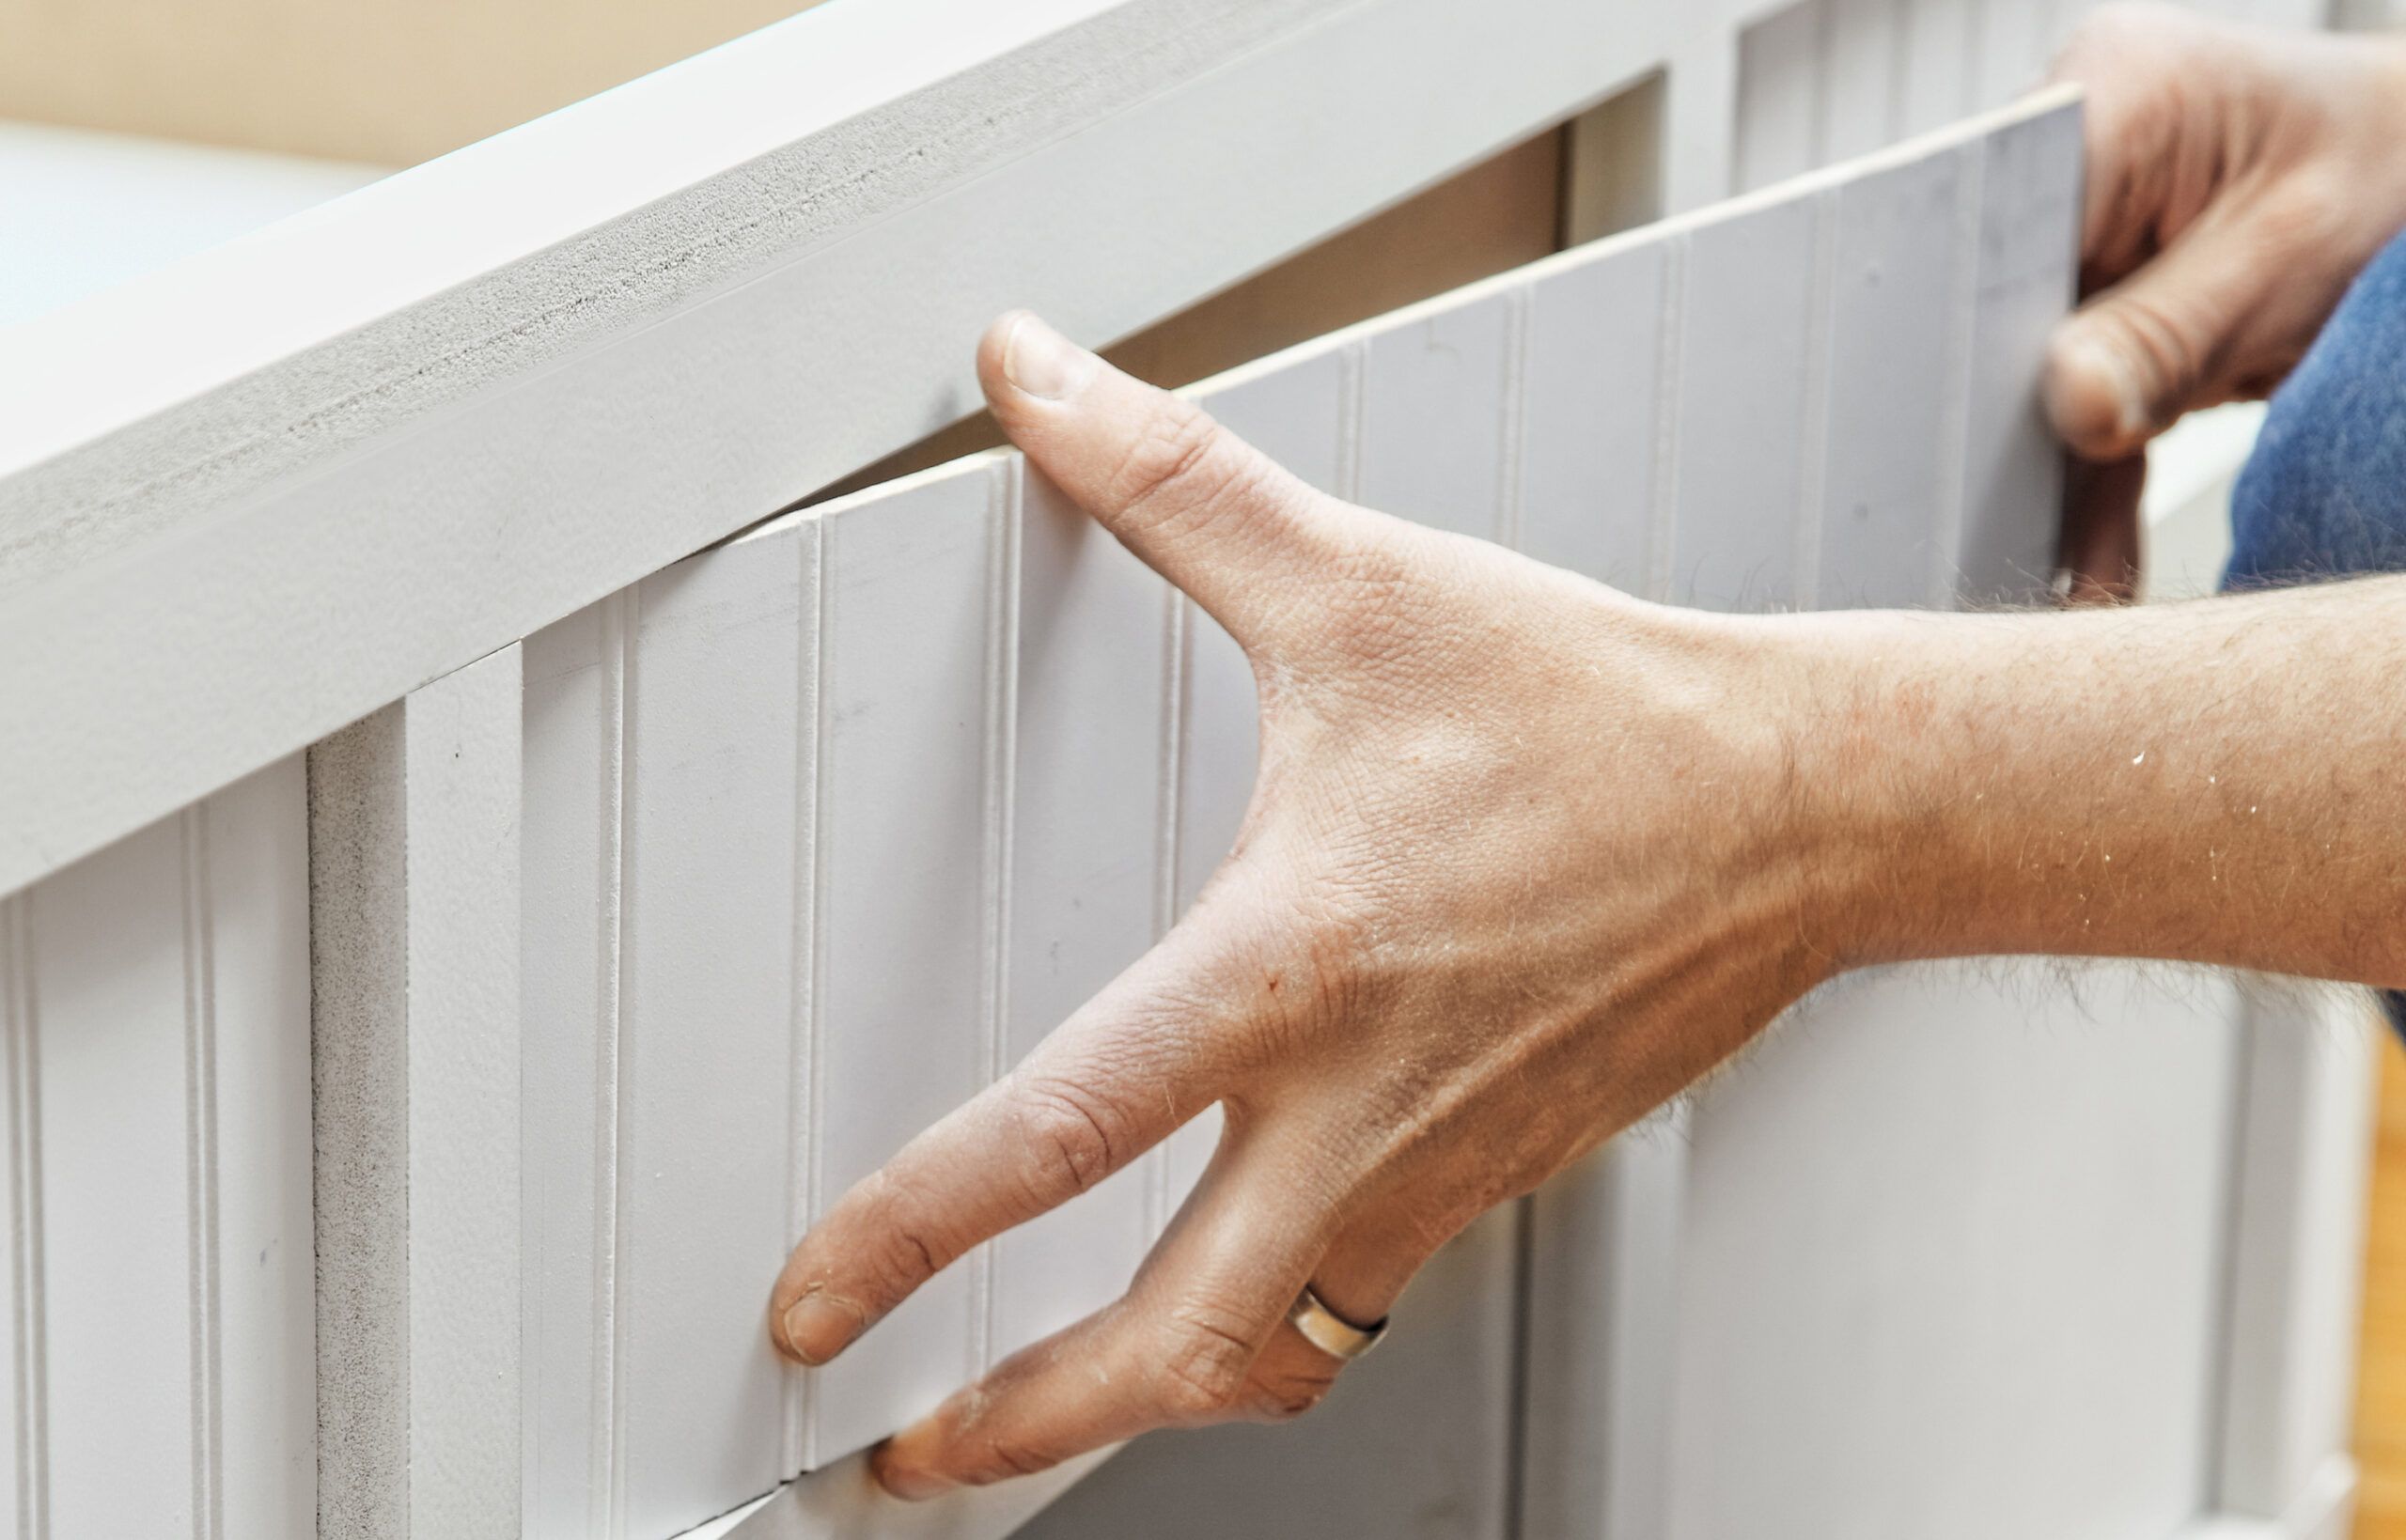
Cut pieces of beadboard panel to fit into the two halves of the headboard. Use construction adhesive to affix them, and tack them down with a brad nailer. Do the same for all the areas of the face frames with exposed MDF.
Step 13: Add the Finishing Touches
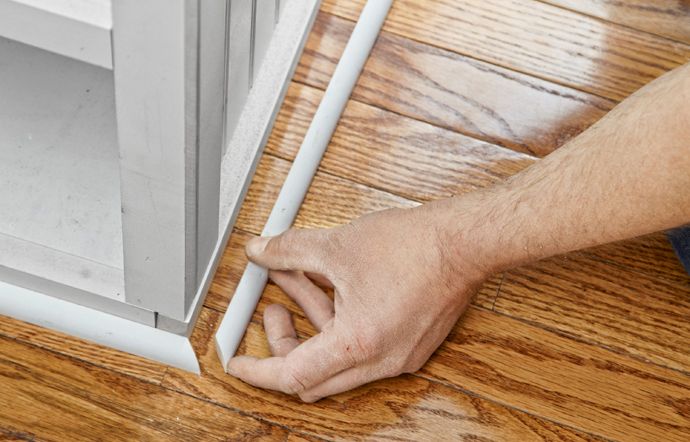
Use a miter saw to cut shoe molding for each side, straight at the headboard end and angled at 45 degrees at the footboard end. Use a brad nailer to fasten the shoe in place. Measure, cut, and install the footboard piece, as shown. Fill any nail holes, then sand and paint the bed. Before you know it, it’ll be time to hit the hay. If you really want to take your new storage bed to the next level, you need a high-quality mattress that compliments your new set up and delivers restful sleep. Check out the best mattresses in a box that are available online, won’t gouge your wallet, and elevate your sleep experience.