Project details
Skill
Cost
Estimated Time
If you’re looking for a stylish and original way to spruce up your home’s landscaping, well, look to the right.
This outdoor lighting project is deceptively simple to build. Made of rot-resistant western red cedar, the fixture consists of a 2×4 center post to anchor it, a horizontal arm to hold the lantern, and 1×6 cladding that yokes the 2x4s together and creates attractive shadow lines. Fitted with a handsome copper-and-glass candle lantern, it exudes Zen-like beauty day and night.
This Old House senior technical editor Mark Powers installed our lamppost along a garden path but says its proportions would complement virtually any outdoor space, from a patio to a water feature. If you’d prefer to wire the lamppost for low-voltage lighting, he shows how to do that, too.
SHOWN: H. Potter Craftsman Lantern, 9¾ by 10½ inches, $80; H.Potter
Watco Teak Oil Finish, $11 per quart; Rust-Oleum
Download and print the lamppost cut list
Step 1: Lamppost Overview

Day-to-day timeline
- Day 1: Cut to size and shape the cedar boards (Steps 2–8).
- Day 2: Assemble the lamppost and install it (Steps 9–18).
Pathway Lamppost Cut List
- 2×4 post: 1 @ 6 feet
- 2×4 crossarm: 1 @ 12½ inches
- 2×4 crossarm: 1 @ 3 inches
- 1×6 post cladding: 2 @ 4¾ inches with a 45-degree beveled top
- 1×6 post cladding: 2 @ 36 inches
- 1×6 crossarm cladding: 2 @ 27 inches with 1-inch noses and 45-degree angled ends
- 2×10 base trim: 2 @ 6 inches
- 2×10 base trim: 2 @ 7½ inches
Both pieces with a 45-degree beveled edge at the top and measured between long points of the mitered ends
Download and print the cut list
Shopping List
- 2×4 common cedar board. Get one 8-footer to make the center post and lantern arm.
- 1×6 clear cedar boards. Get two 8-foot lengths to clad the post.
- 2×10 clear cedar board. Get one 6-footer to wrap the base of the post.
- construction adhesive
- 2- and 2½-inch-long finishing nails for a pneumatic nailer
- ⅜-inch hardwood dowel
- ⅜-inch-diameter spade bit waterproof carpenter’s glue to glue dowel rods in place
- polyurethane glue for mitered joints on the decorative base
- 100-grit disks for the random-orbit sander
- 1-inch screw hook for hanging the lantern or light fixture
- copper candle lantern
- low-voltage land-scape light fixture (optional)
- transformer (optional)
- 12-volt cable (optional)
- cable staples (optional)
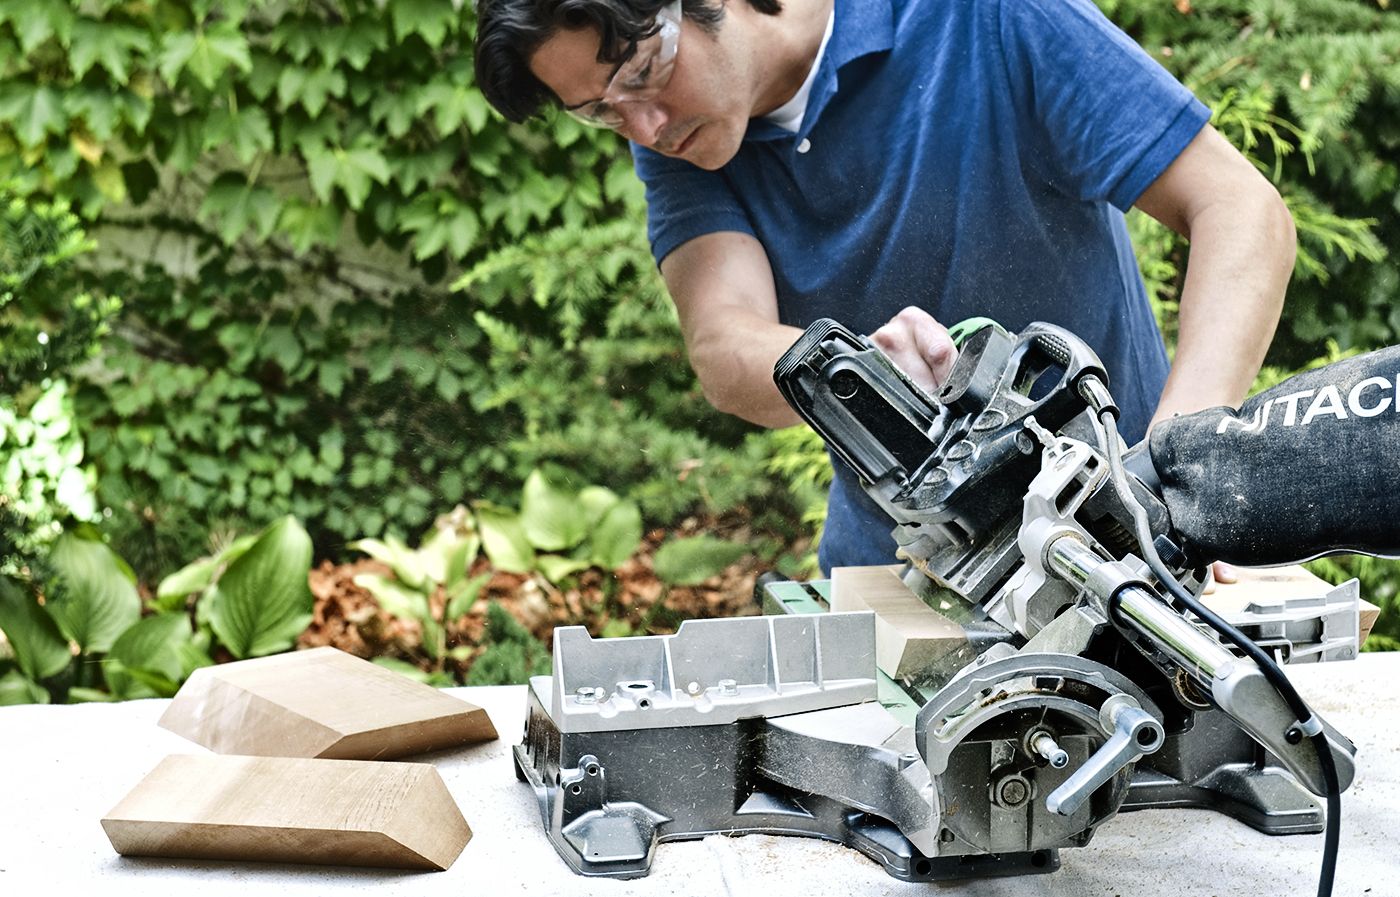
Step 2: Crosscut the 2×4 to Length
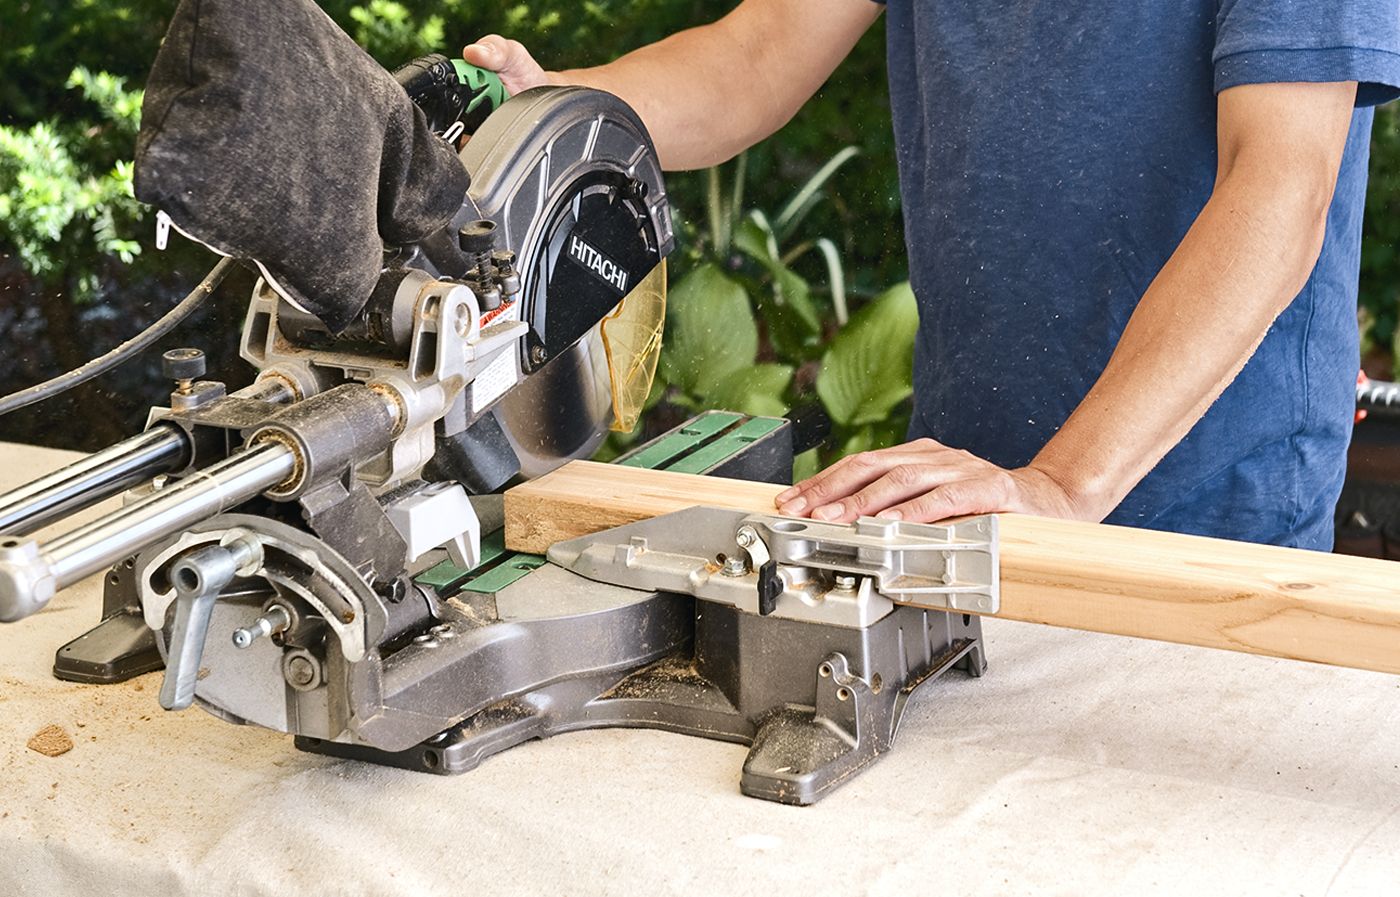
Refer to the cut list. Use a sliding compound miter saw to crosscut the 2×4 into three lengths: the long vertical center post and the two shorter pieces that make up the core of the lantern arm.
Step 3: Miter the Post End
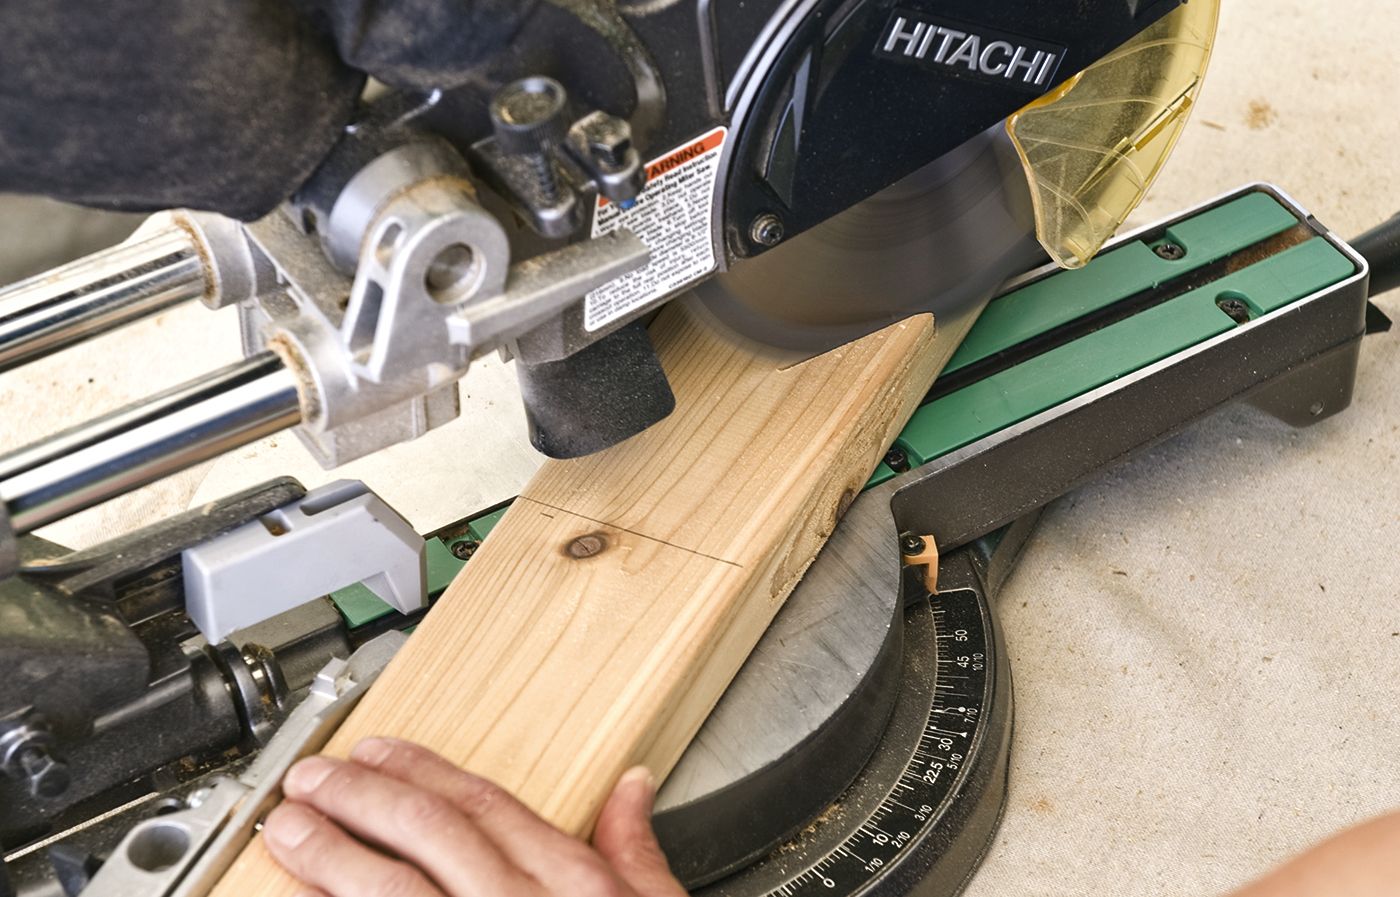
Set the miter-saw blade to its sharpest angle (some go to 55 degrees) and trim the bottom end of the center post. The resulting sharp point will allow you to later pound the post into the ground with a sledgehammer.
Step 4: Cut the Wiring Channel
Follow this three-step sequence if you plan to connect a low-voltage landscape light fixture. If not, skip to Step 7.
Mark the centerline of the post from where it will meet the ground to its intersection with the lantern arm, 6¼ inches from the top of the post.
Use a ½-inch spade bit and a drill/driver to bore a ½-inch-deep hole at that intersection. To make the wiring channel, set the blade of a circular saw to ½ inch deep and make several cuts parallel to the centerline, no more than ¼ inch to either side.
Do the same from the drill hole toward one edge of the board.
On the lantern arm, follow the same process to continue the channel from the post; drill a similar turn hole 2 inches from the end, and cut a channel to the edge to reach the lantern.
Step 5: Remove the Waste Wood
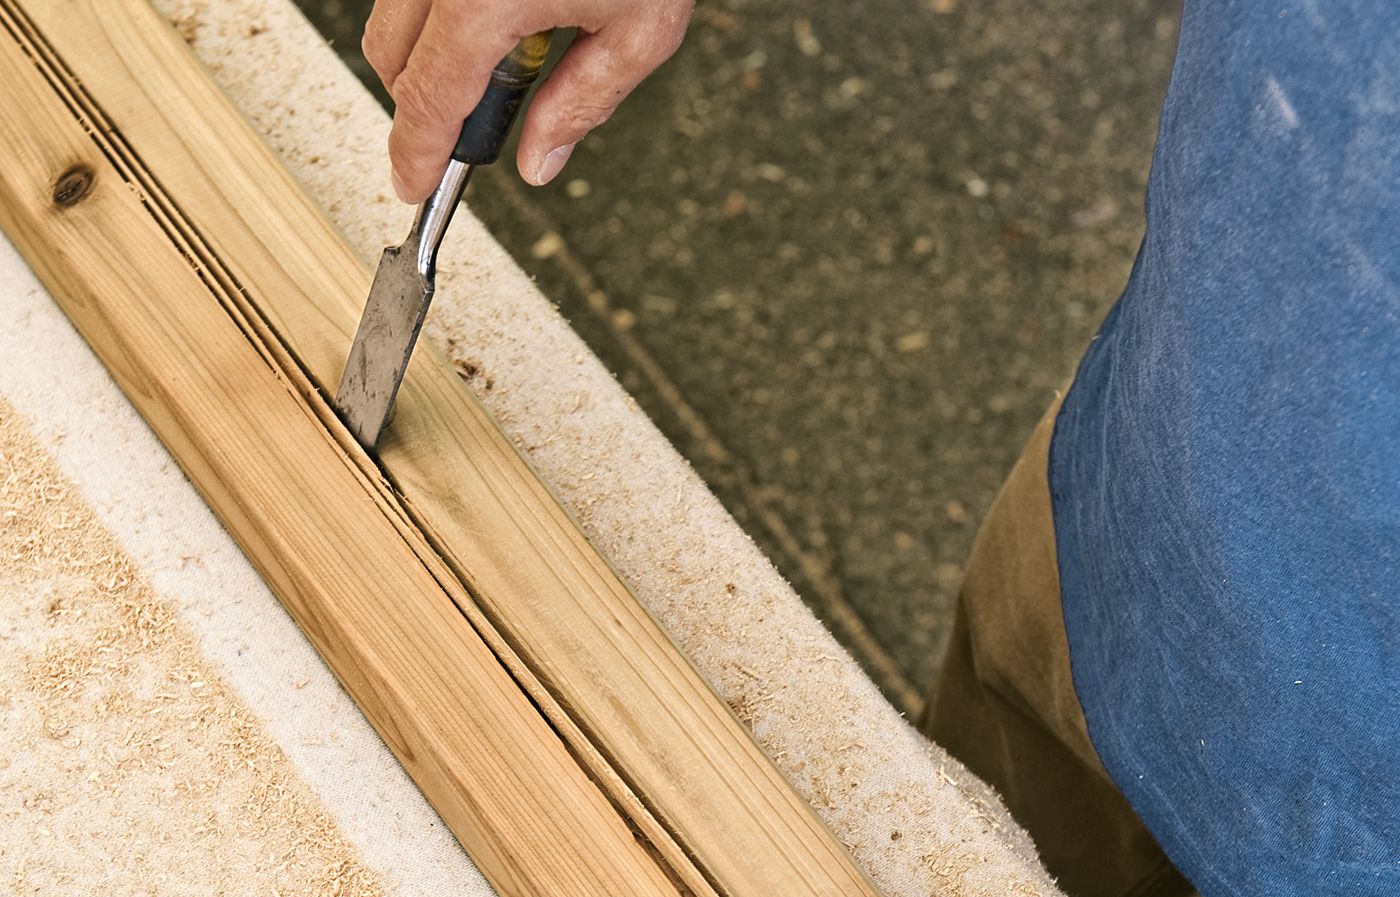
Use a wood chisel to pry out the waste wood from the channel and scrape it clean.
Step 6: Set the Cable in the Groove
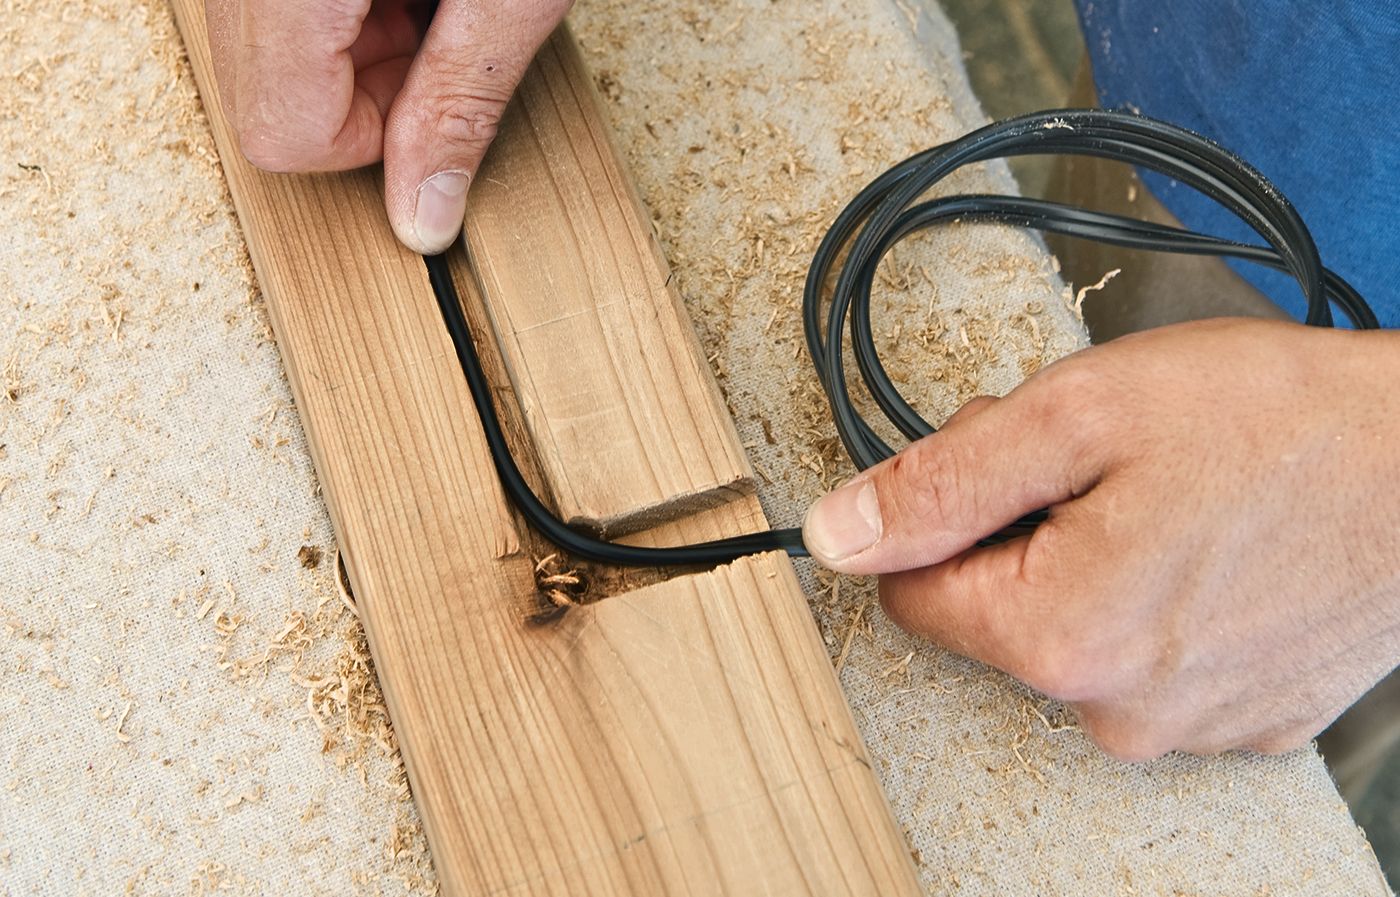
Lay the low-voltage electrical cable in the groove, making sure to leave a few feet extra at the lantern arm.
Fasten the cable in place with cable staples. Note that 12-gauge low-voltage cable is sufficient for most landscape lighting systems that total 200 watts or less.
Tip: Adjust your combination square to the distance between the edge of the post and the edge of the channel, and use that setting to avoid puncturing the cable in Steps 9 and 18.
Step 7: Mark the 1×6 Arms
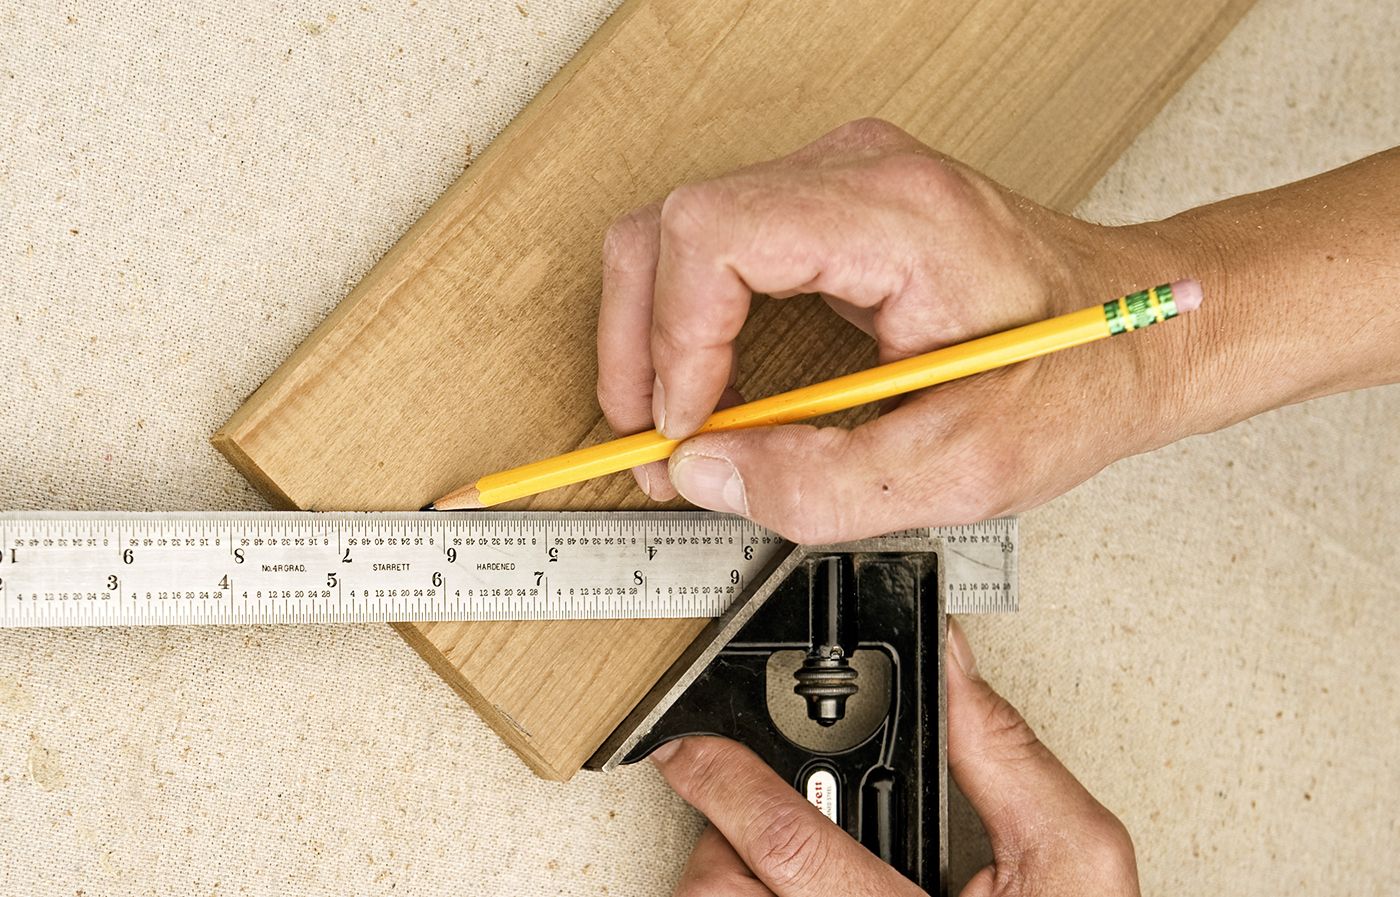
Cut to length the two 1×6 boards to clad the lantern arm. Use a combination square to mark a 45-degree cutline on each end of both crossarms.
Position the lines so that 1 inch of the boards’ ends remains square.
Step 8: Cut the Pieces
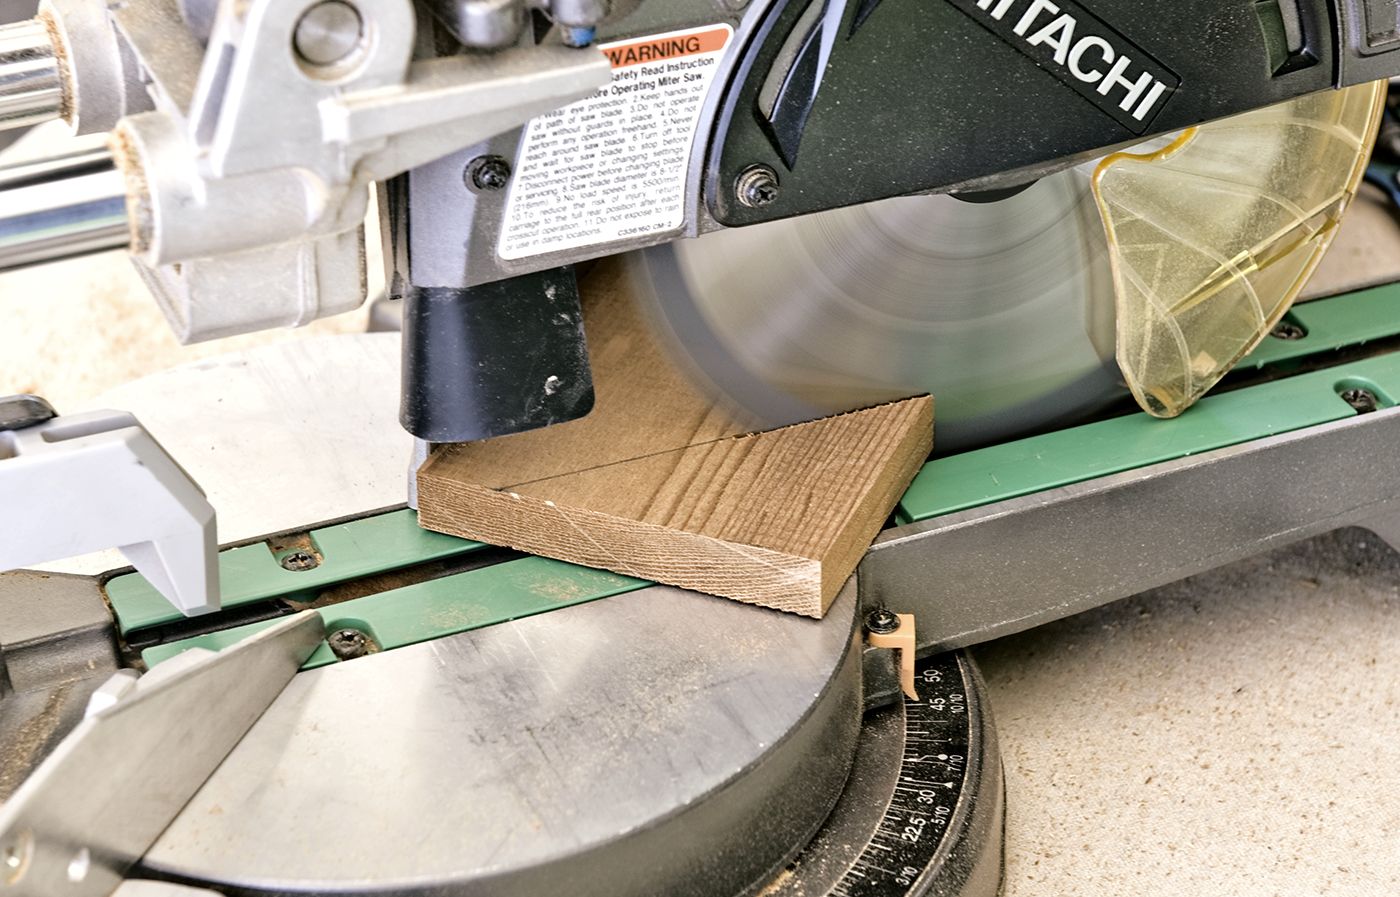
Set the miter saw to 45 degrees and trim the arms at the cutlines you marked.
Next, you’ll cut the four 1×6 boards to clad the center post.
First, though, bevel one end of each board at 45 degrees and use those ends to make the short pieces that fit directly above the lantern arm.
Step 9: Lay out the Cladding
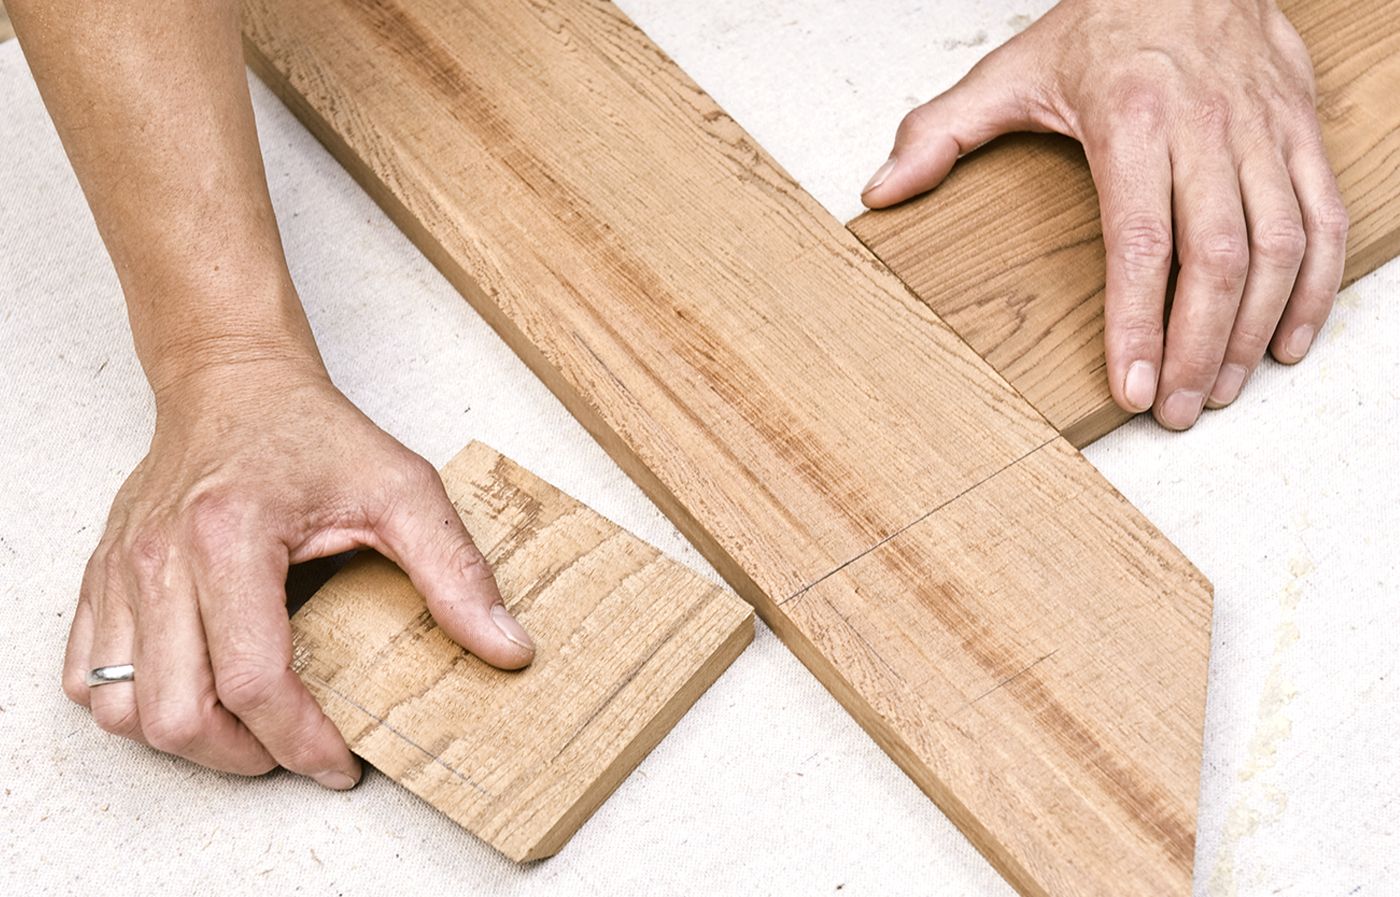
On a flat work surface, arrange the three 1×6 pieces that make up one side of the lamppost, as shown.
Step 10: Position the 2×4 Parts
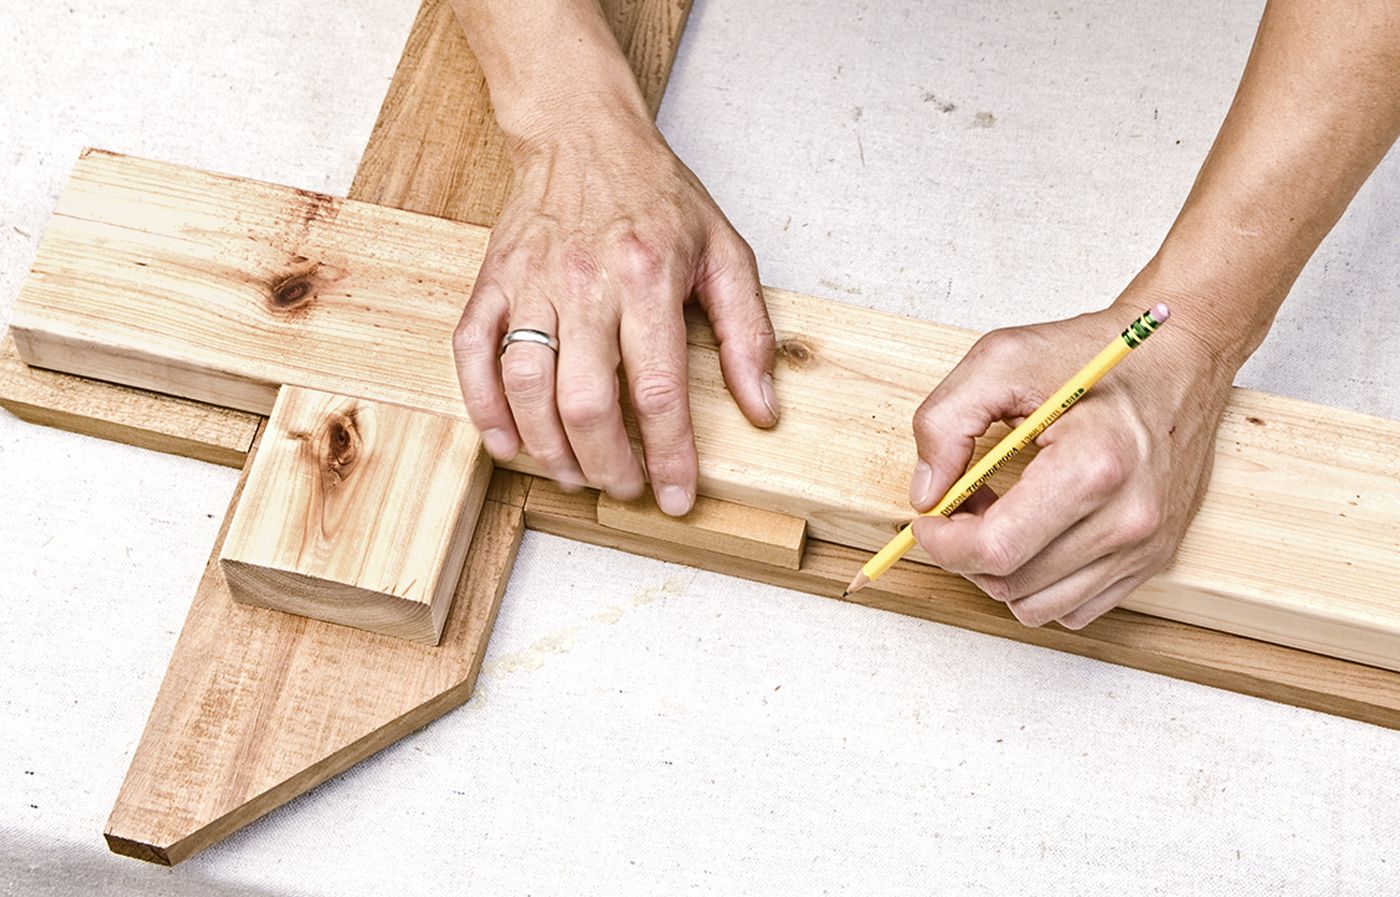
Lay the 2×4 center post on the boards. To center it, use a 1-inch-wide scrap-wood block and shift the 2×4 until the block is flush with one edge of the 1×6.
Mark the 2×4’s final position with a pencil, and repeat the process for the lantern arm.
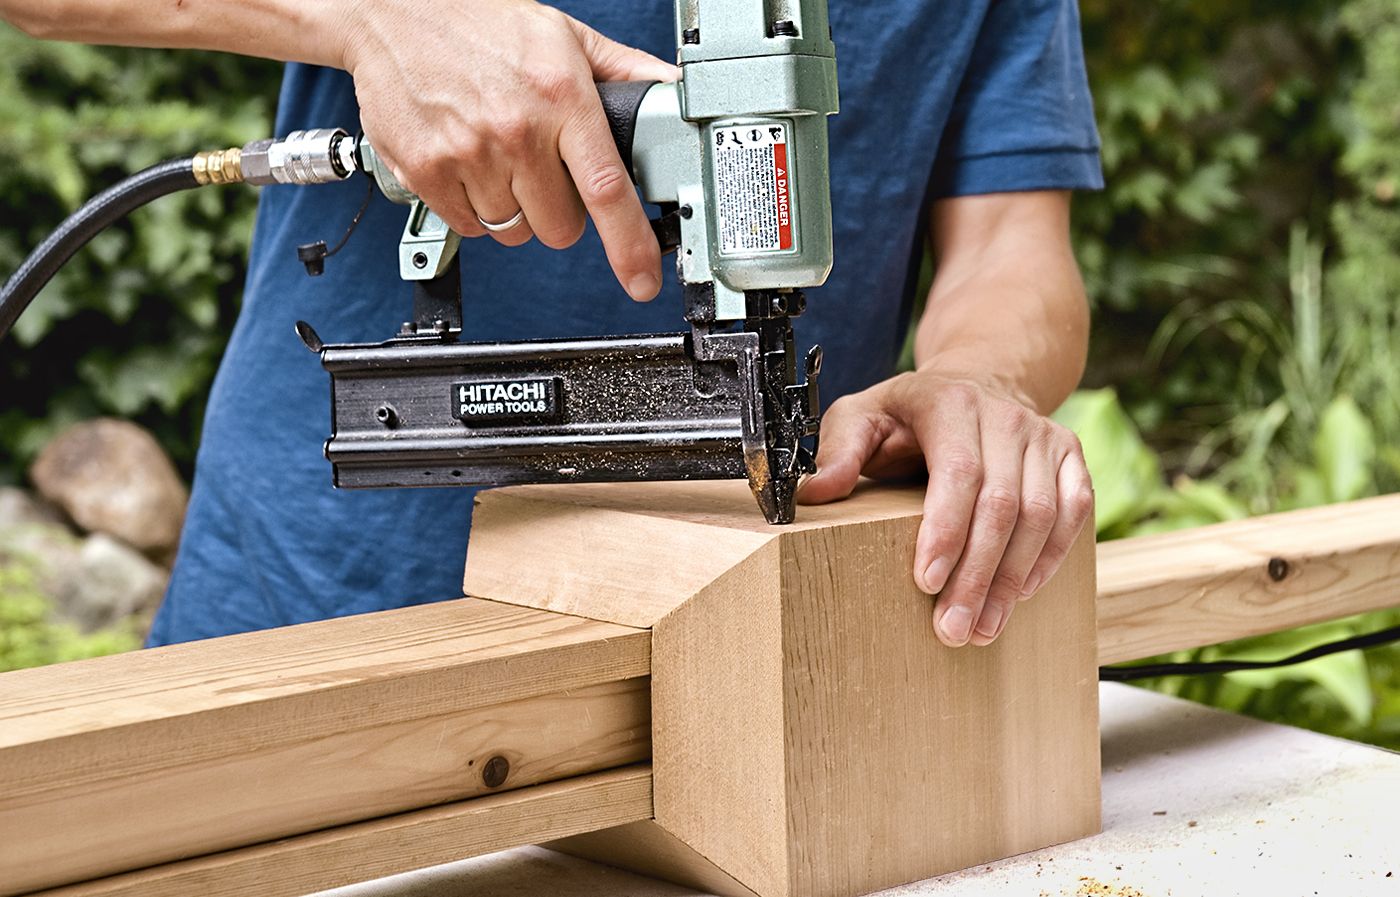
Step 11: Join the Post Parts
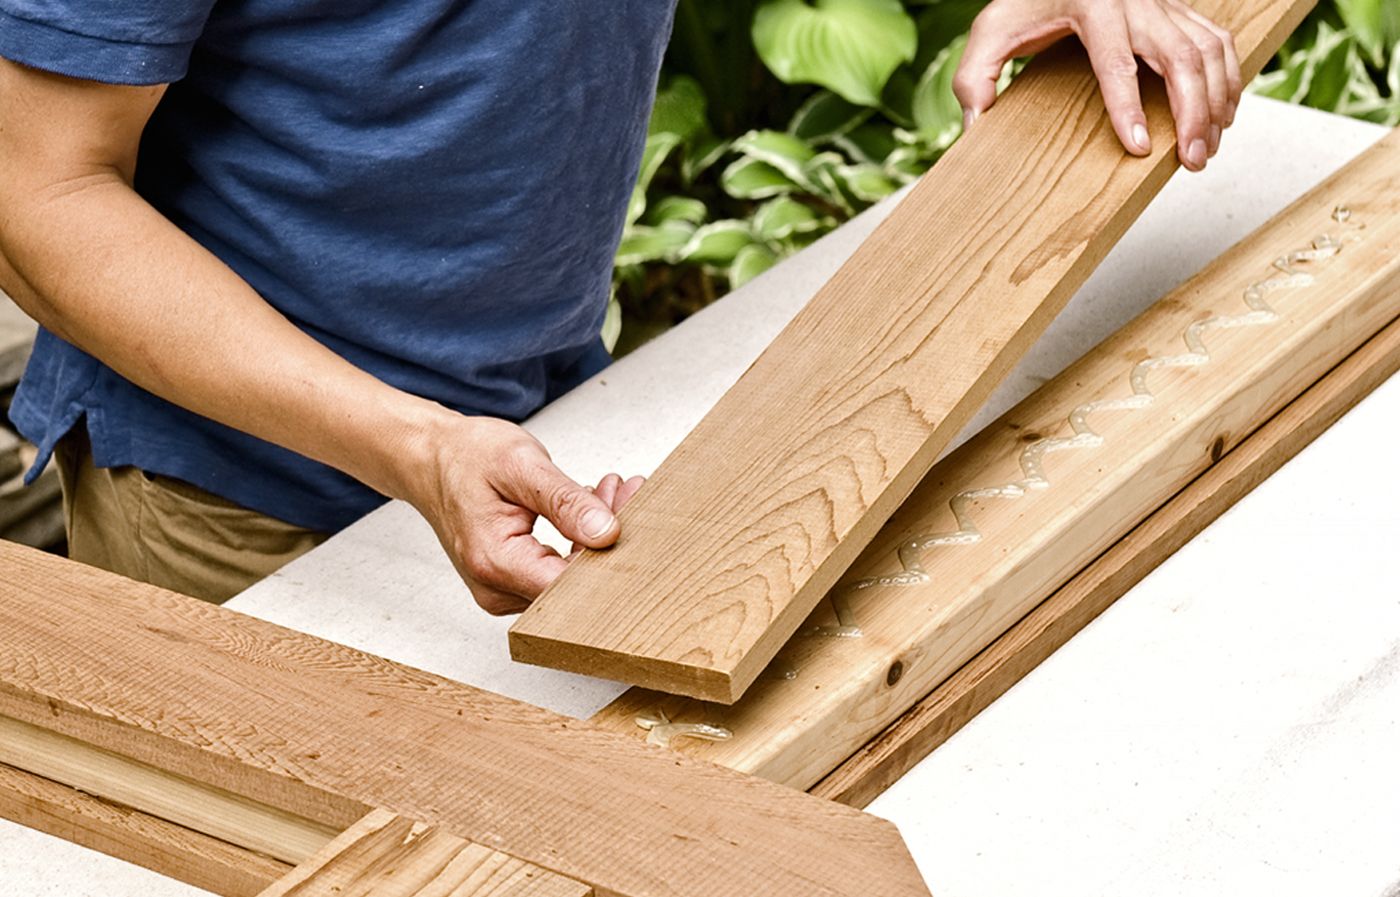
Remove the center post and arms, apply construction adhesive to them, and press them into the outlines on the cladding.
Tack the 2×4 pieces with a pneumatic finishing nailer and 2-inch-long nails. If you installed the electrical cable in Step 4, be sure to keep the fasteners within 1½ inches of either edge of the 2×4. Apply construction adhesive to the exposed faces of the 2x4s and set the remaining cladding in place; use your combination square to align it with the opposite layer of cladding.
Press the boards down. For added strength, you can tack this cladding in place with a pneumatic finishing nailer and 2-inch-long nails. If you do, be sure to fill and sand the nail holes.
Step 12: Bore the Dowel Holes
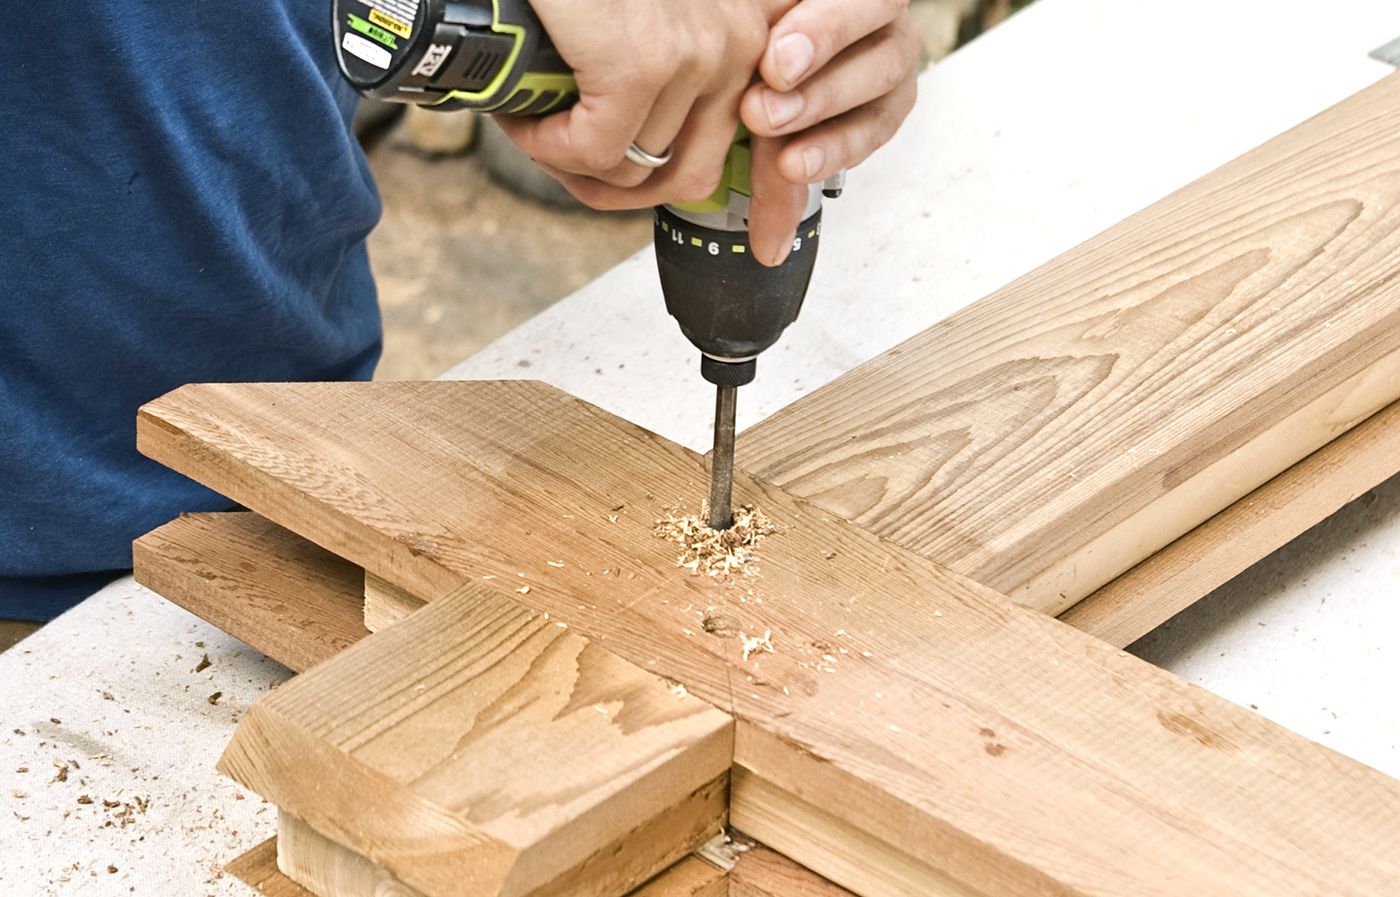
To strengthen the joint between the post and the lantern arm—and to lend the piece a handcrafted look—install two hardwood dowels.
Use a combination square to draw a 45-degree line where the post intersects the arm. Make two marks along the line, 2½ inches in from each corner.
Slip a scrap board underneath the joint, then use a drill and ⅜-inch-diameter spade bit to bore two holes at the marks; go completely through to the other side.
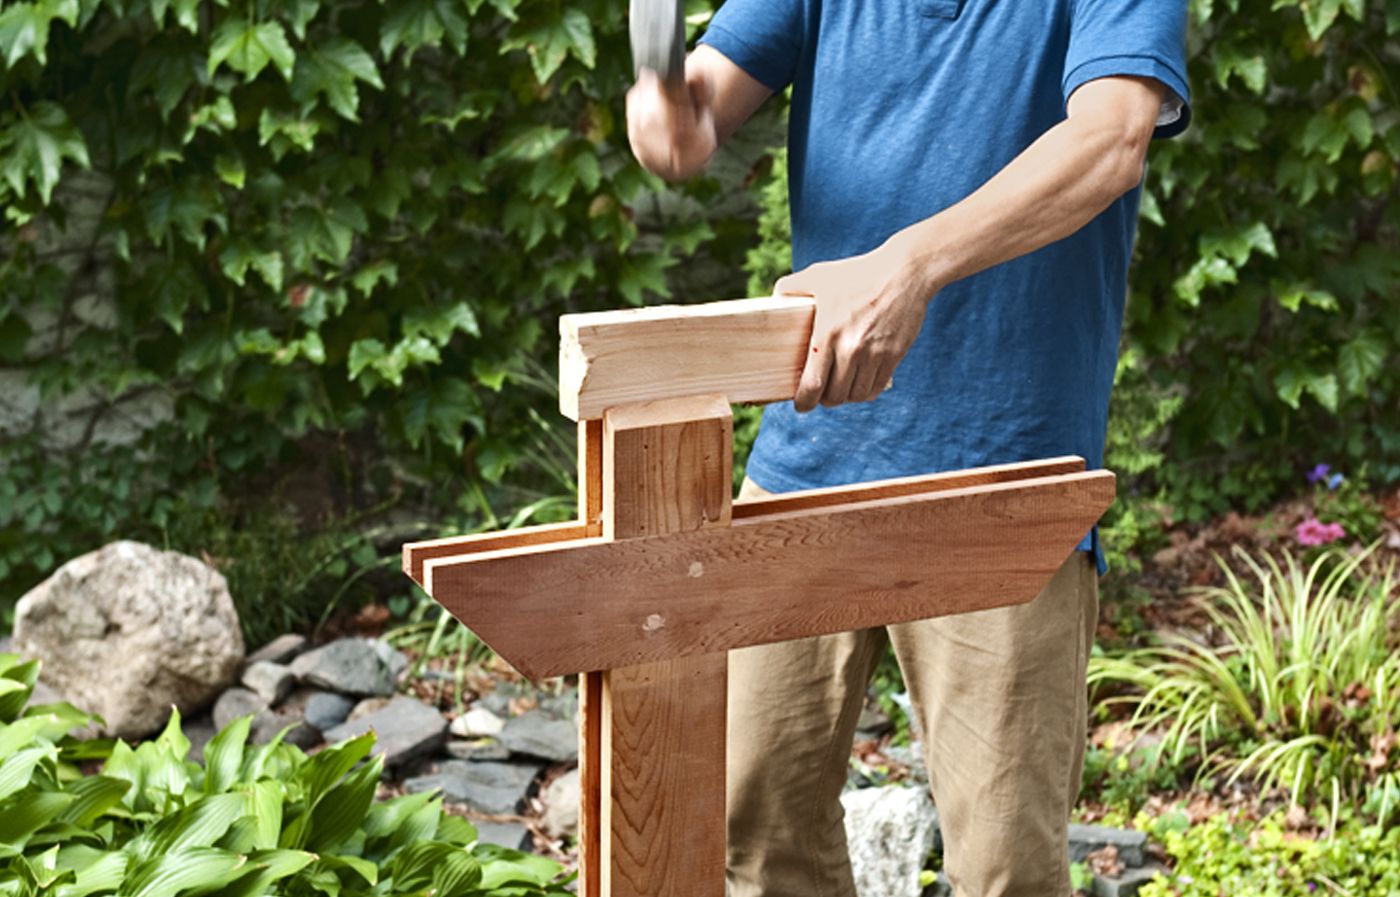
Step 13: Trim the Dowels

Smear waterproof carpenter’s glue or polyurethane glue onto a ⅜-inch hardwood dowel.
Tap the dowel into one of the holes until it protrudes at least ⅜ inch from the opposite side. Trim off the excess dowel with a Japanese-style flush-cutting handsaw, as shown.
Peg the remaining hole, and trim the excess.
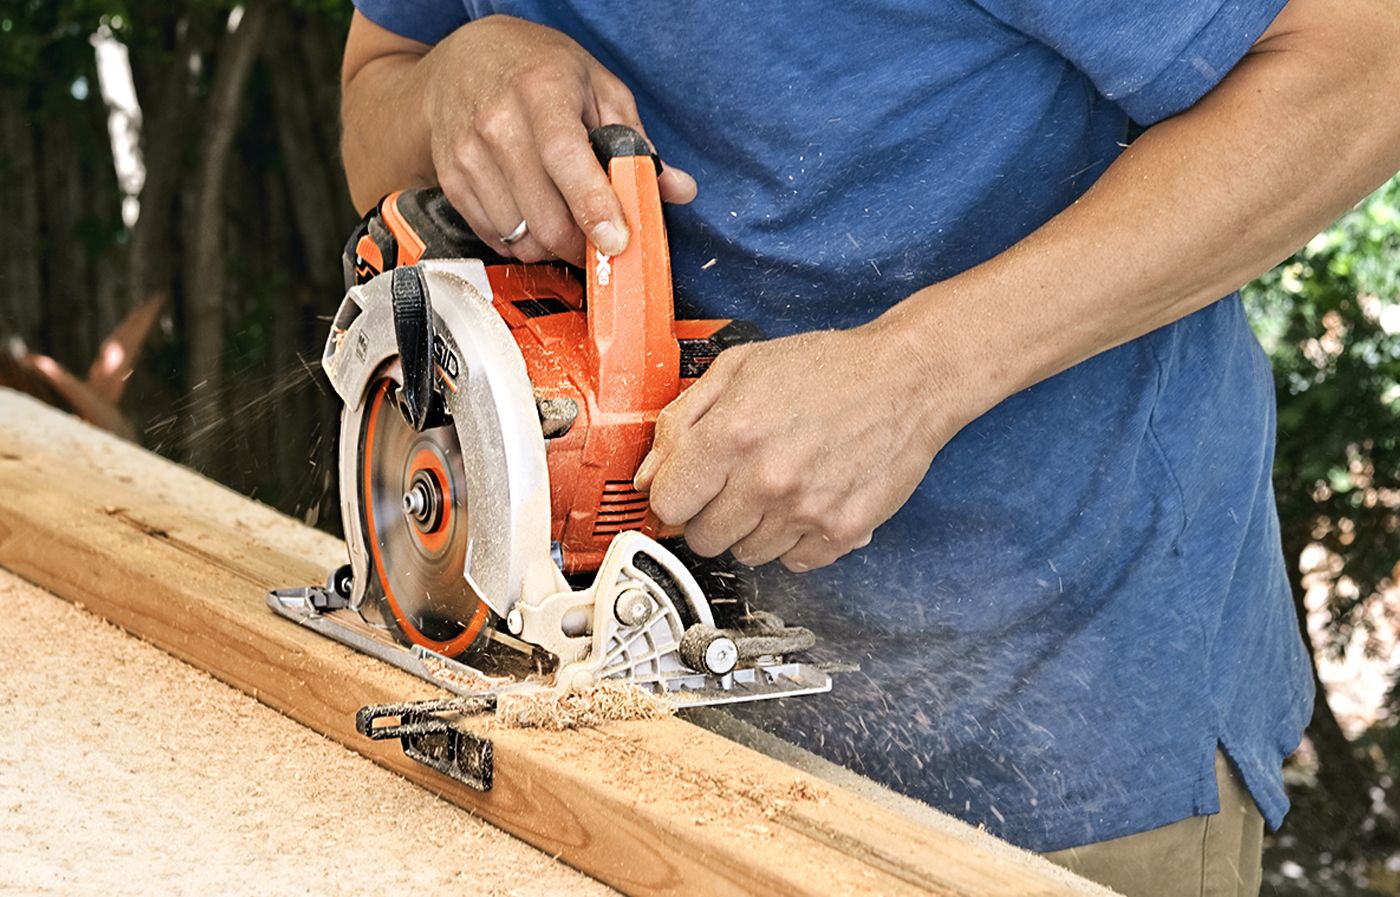
Step 14: Bevel-Rip the Base
Clamp a 2×10 cedar board to a sturdy surface with its long edge overhanging. Use a circular saw to rip a 45-degree bevel along that overhanging edge.
If necessary, clamp a long straightedge to the board to guide you to a perfectly straight cut.
Step 15: Miter-Cut the Base
Tilt the miter-saw blade to a 45-degee bevel and adjust the miter angle to zero. Bevel-cut the 2×10 into four lengths to wrap around the base of the lamppost.
Step 16: Attach the Base to the Post
Apply construction adhesive to the back of the first piece of base trim and press it to the lamppost, square end flush with the end of the cladding.
Use a pneumatic finishing nailer and 2½-inch-long nails to attach it, then attach the remaining three base pieces in a similar fashion.
Use construction adhesive against the post, but apply waterproof carpenter’s glue or polyurethane glue to each of the four mitered corner joints. And be sure to nail through the corners, as shown.
Sand all surfaces smooth with a random-orbit sander fitted with a 100-grit disk.
Step 17: Sink the Post
Hold a 2×4 block on top of the center post and tap it with a 3-pound sledgehammer to drive the pointed end into the ground.
If necessary, loosen the soil first with a shovel. At least one-third of the post should extend belowground.
Use a 2-foot level to plumb the post. Treat it with teak oil if you want to preserve the color.
Step 18: Hang the Lantern
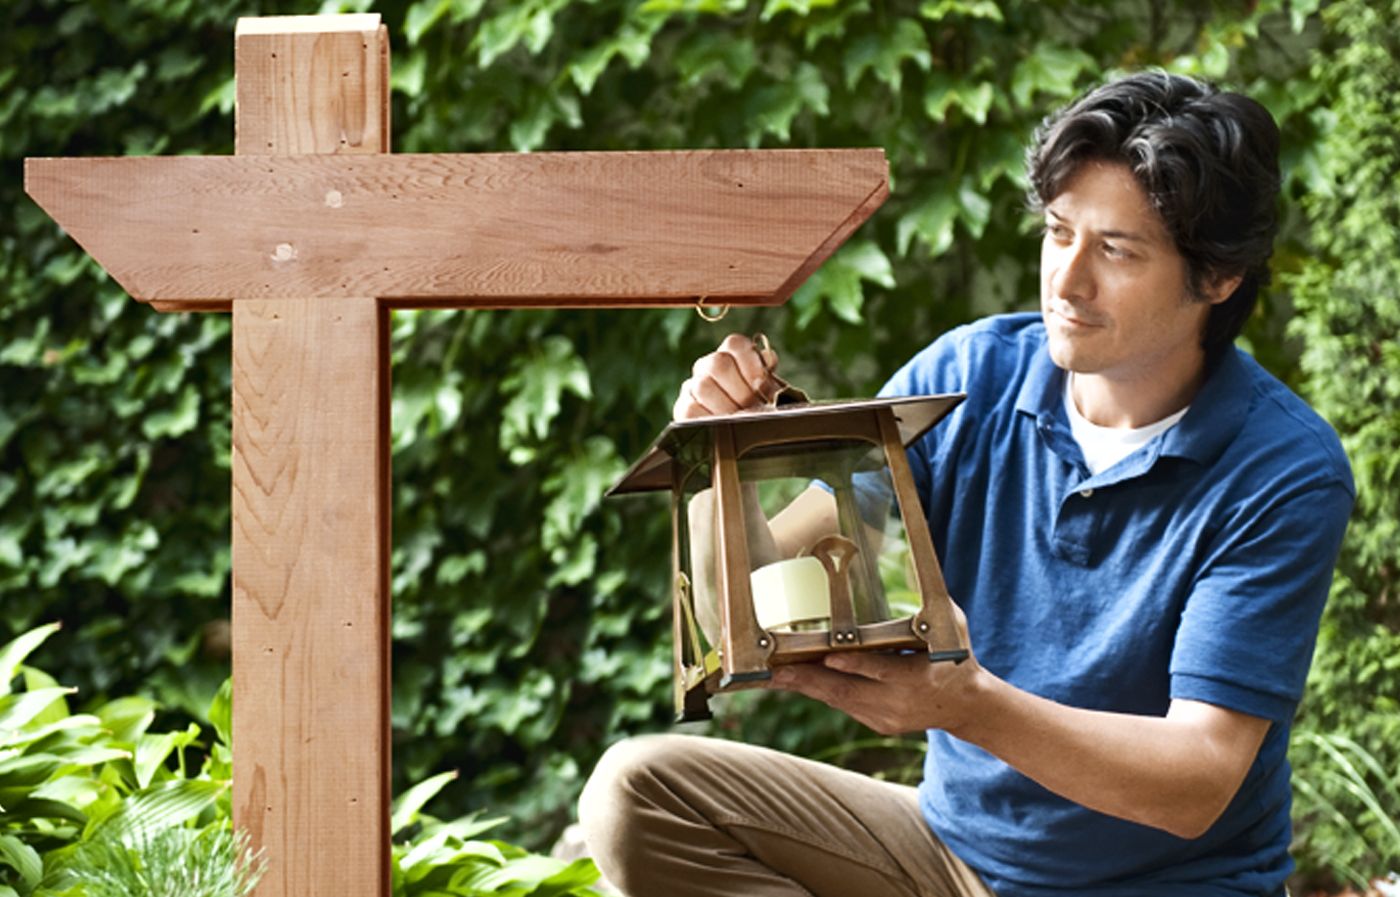
Twist a 1-inch screw hook into the underside of the 2×4 arm, and hang the candle lantern from it.
If you wired the lamppost for low-voltage lighting, hang the fixture from the hook, then complete the electrical connection.