Project details
Skill
Cost
Estimated Time
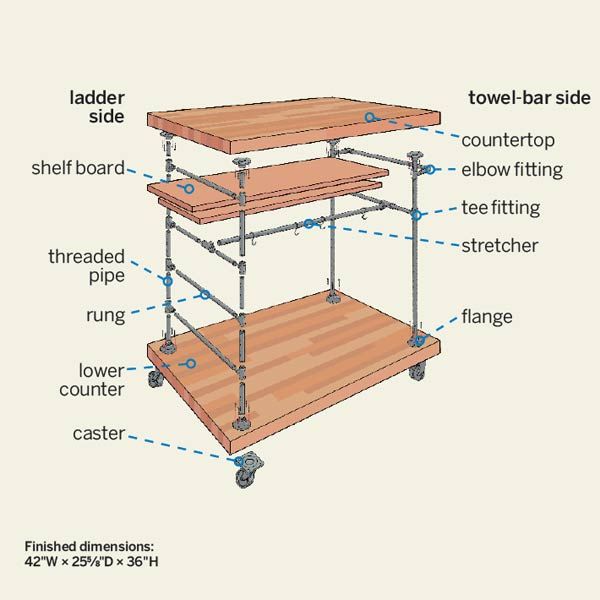
Call it a Kitchen addition on Wheels. If you’re hankering for a bit more elbow room to prepare meals, this rolling island lets you make the most of the floor plan you already have. Generous sections of butcher-block countertop give you plenty of easy-to-clean culinary workspace up top and lots of storage space—including room for hanging pots—down below. The sturdy frame, made of sections of gas pipe, gives it an industrial flair, and the casters make it easy to move. Follow along as This Old House contributor Christopher Beidel, owner of Pernt, a handmade-furniture company in Brooklyn, New York, shows you how to assemble this modern take on the classic kitchen island.
- Butcher block: IKEA Numerar, $169.
- Gas pipe and fittings: The Home Depot
Overview
Day-to-day timeline
- SATURDAY Cut the countertop and make the frame (Steps 2-11).
- SUNDAY Assemble the pieces (Steps 12-18).
(Note: The size of the gas pipe has been corrected from the print edition.)
Cut List
- IKEA Numerar butcher-block countertop: two @ 42 inches
- ½-inch iron threaded pipe for stretcher: one @ 36 inches
- ½-inch iron threaded pipe for rungs and towel bar: six @ 18 inches
- ½-inch iron threaded pipe for shelf rungs: two @ 12 inches
- ½-inch iron threaded pipe for legs: four @ six inches
- ½-inch iron threaded pipe for legs and shelf rungs: six @ 5 inches
- ½-inch iron threaded pipe for legs: two @ 4½ inches
- ½-inch iron threaded pipe for legs and towel bar: six @ 2 inches
- ½-inch iron threaded pipe elbows for towel bar: two
- ½-inch iron threaded pipe flanges for legs: eight
- ½-inch iron threaded pipe tees for legs: 14
- 1 x 10 oak board: one @ 38 inches
- 1 x 10 oak board: one @ 35½ inches
Step 1: Cut the Butcher Block
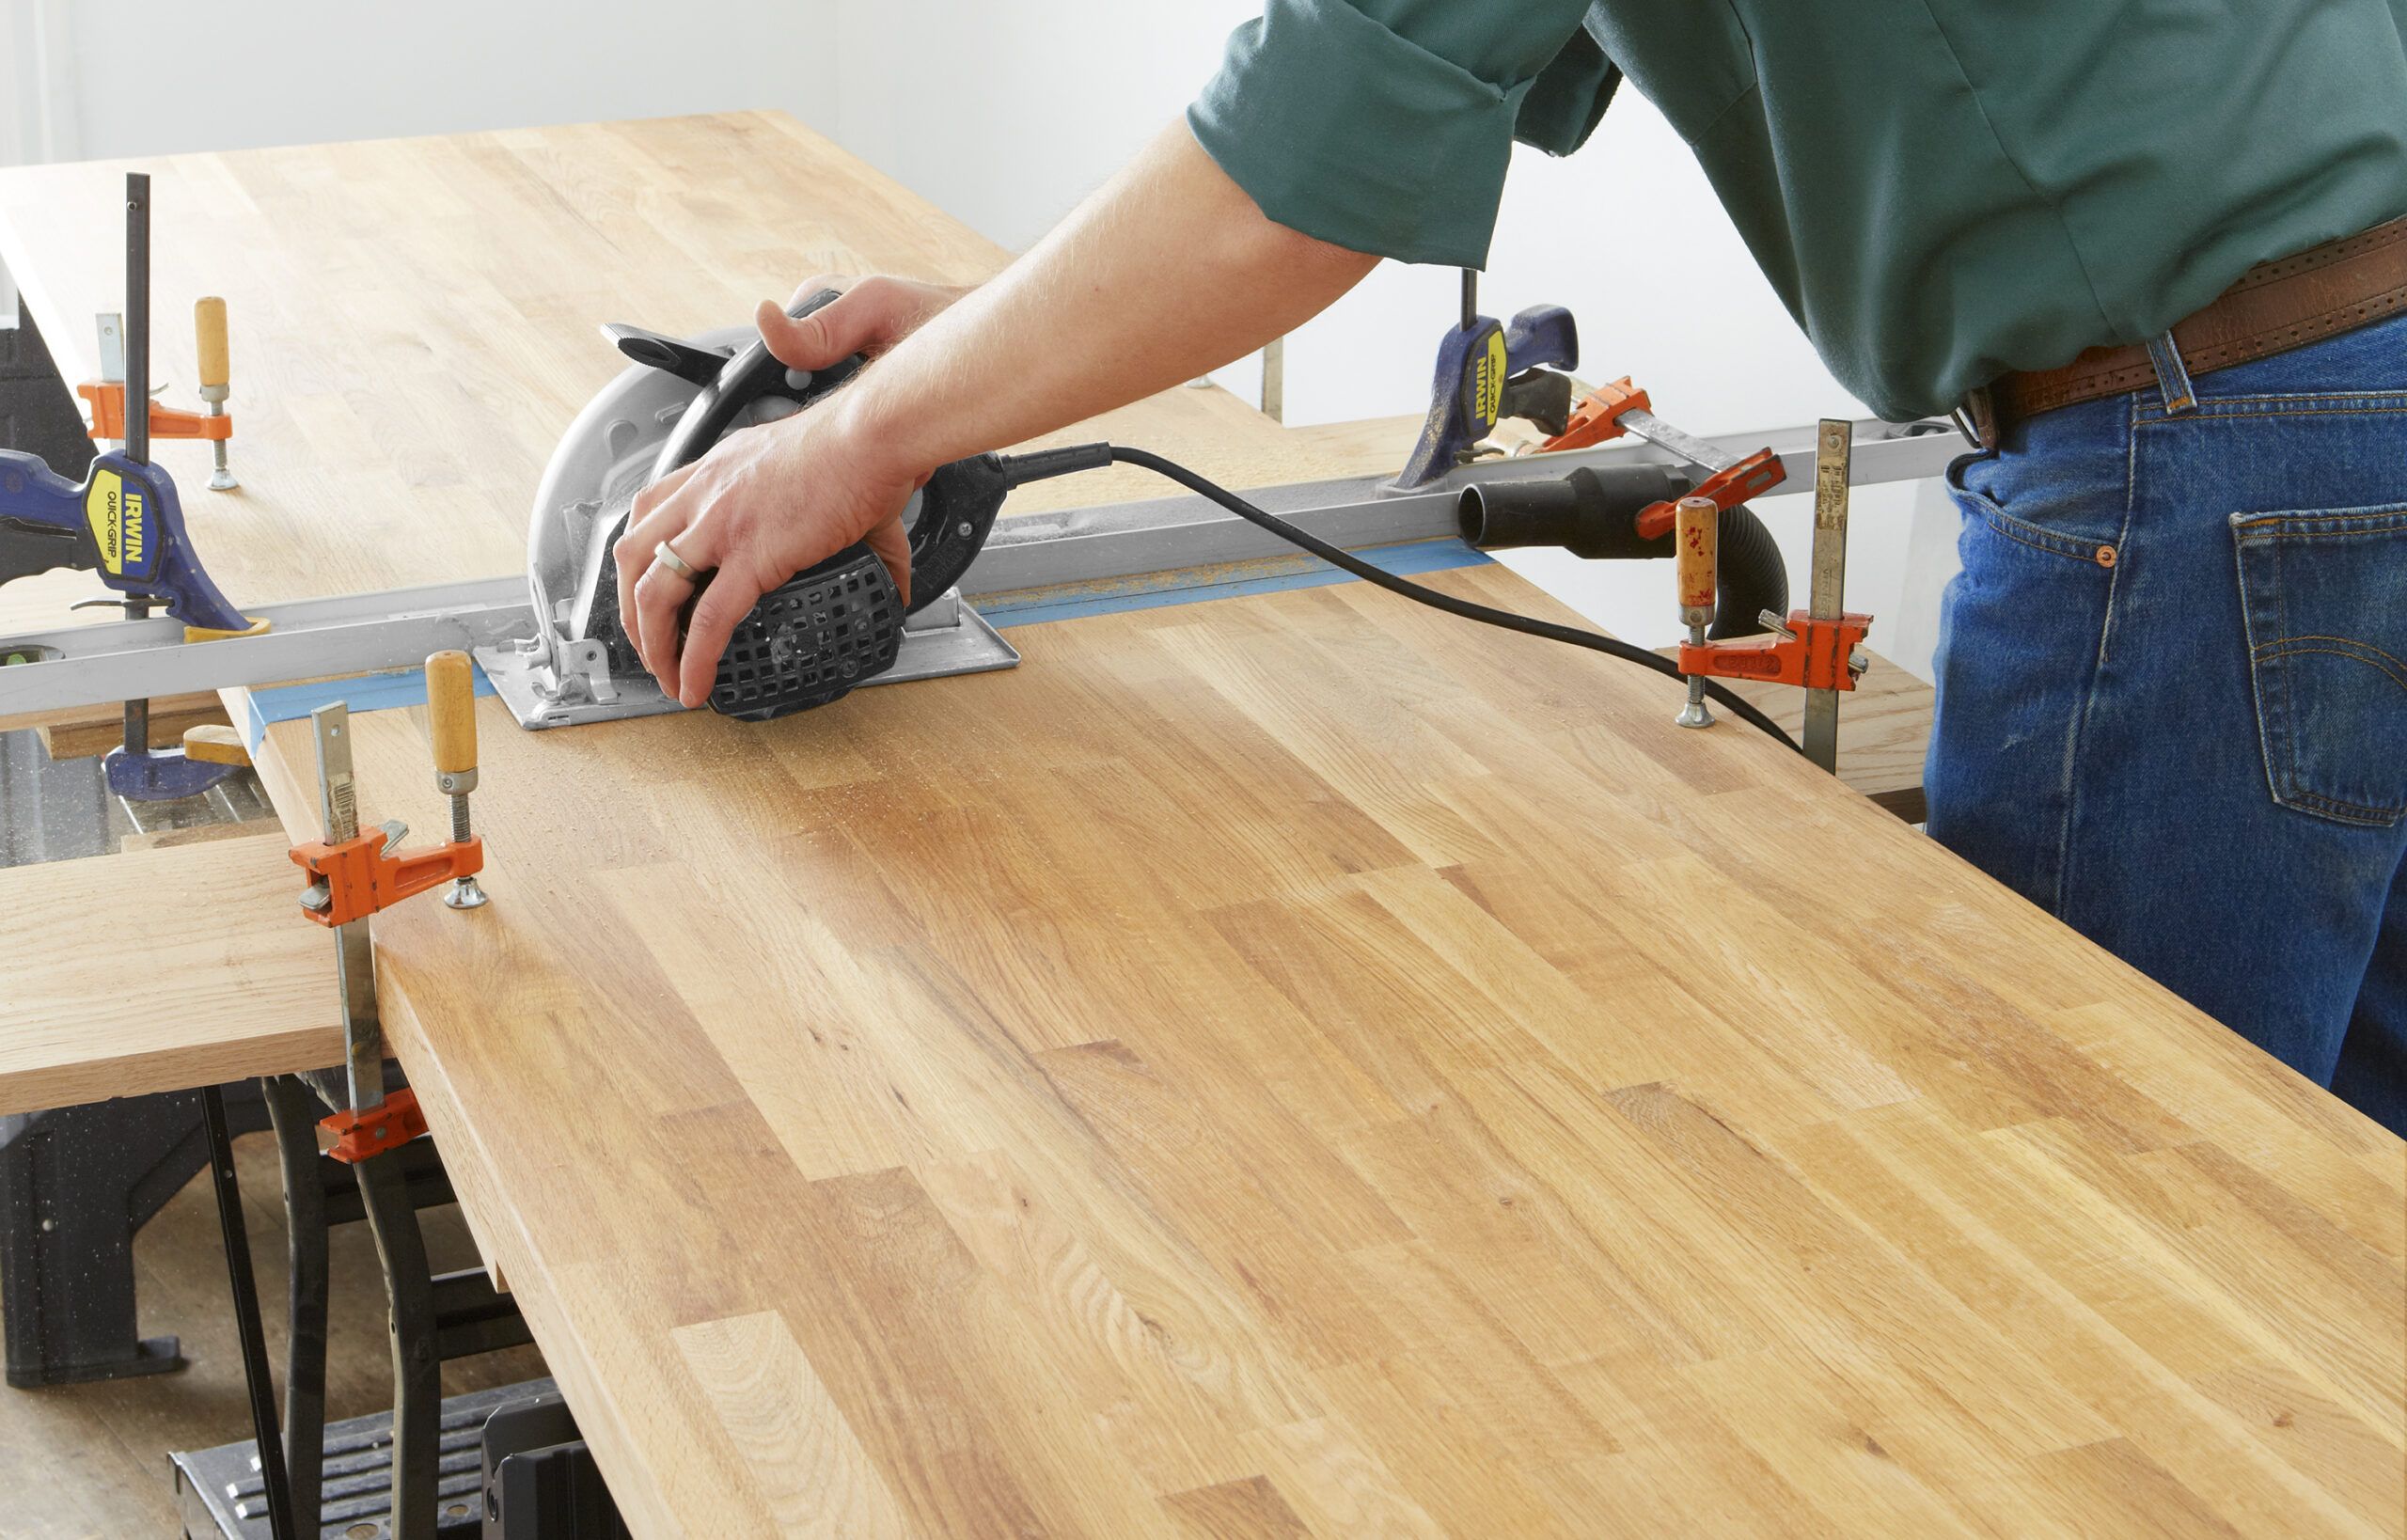
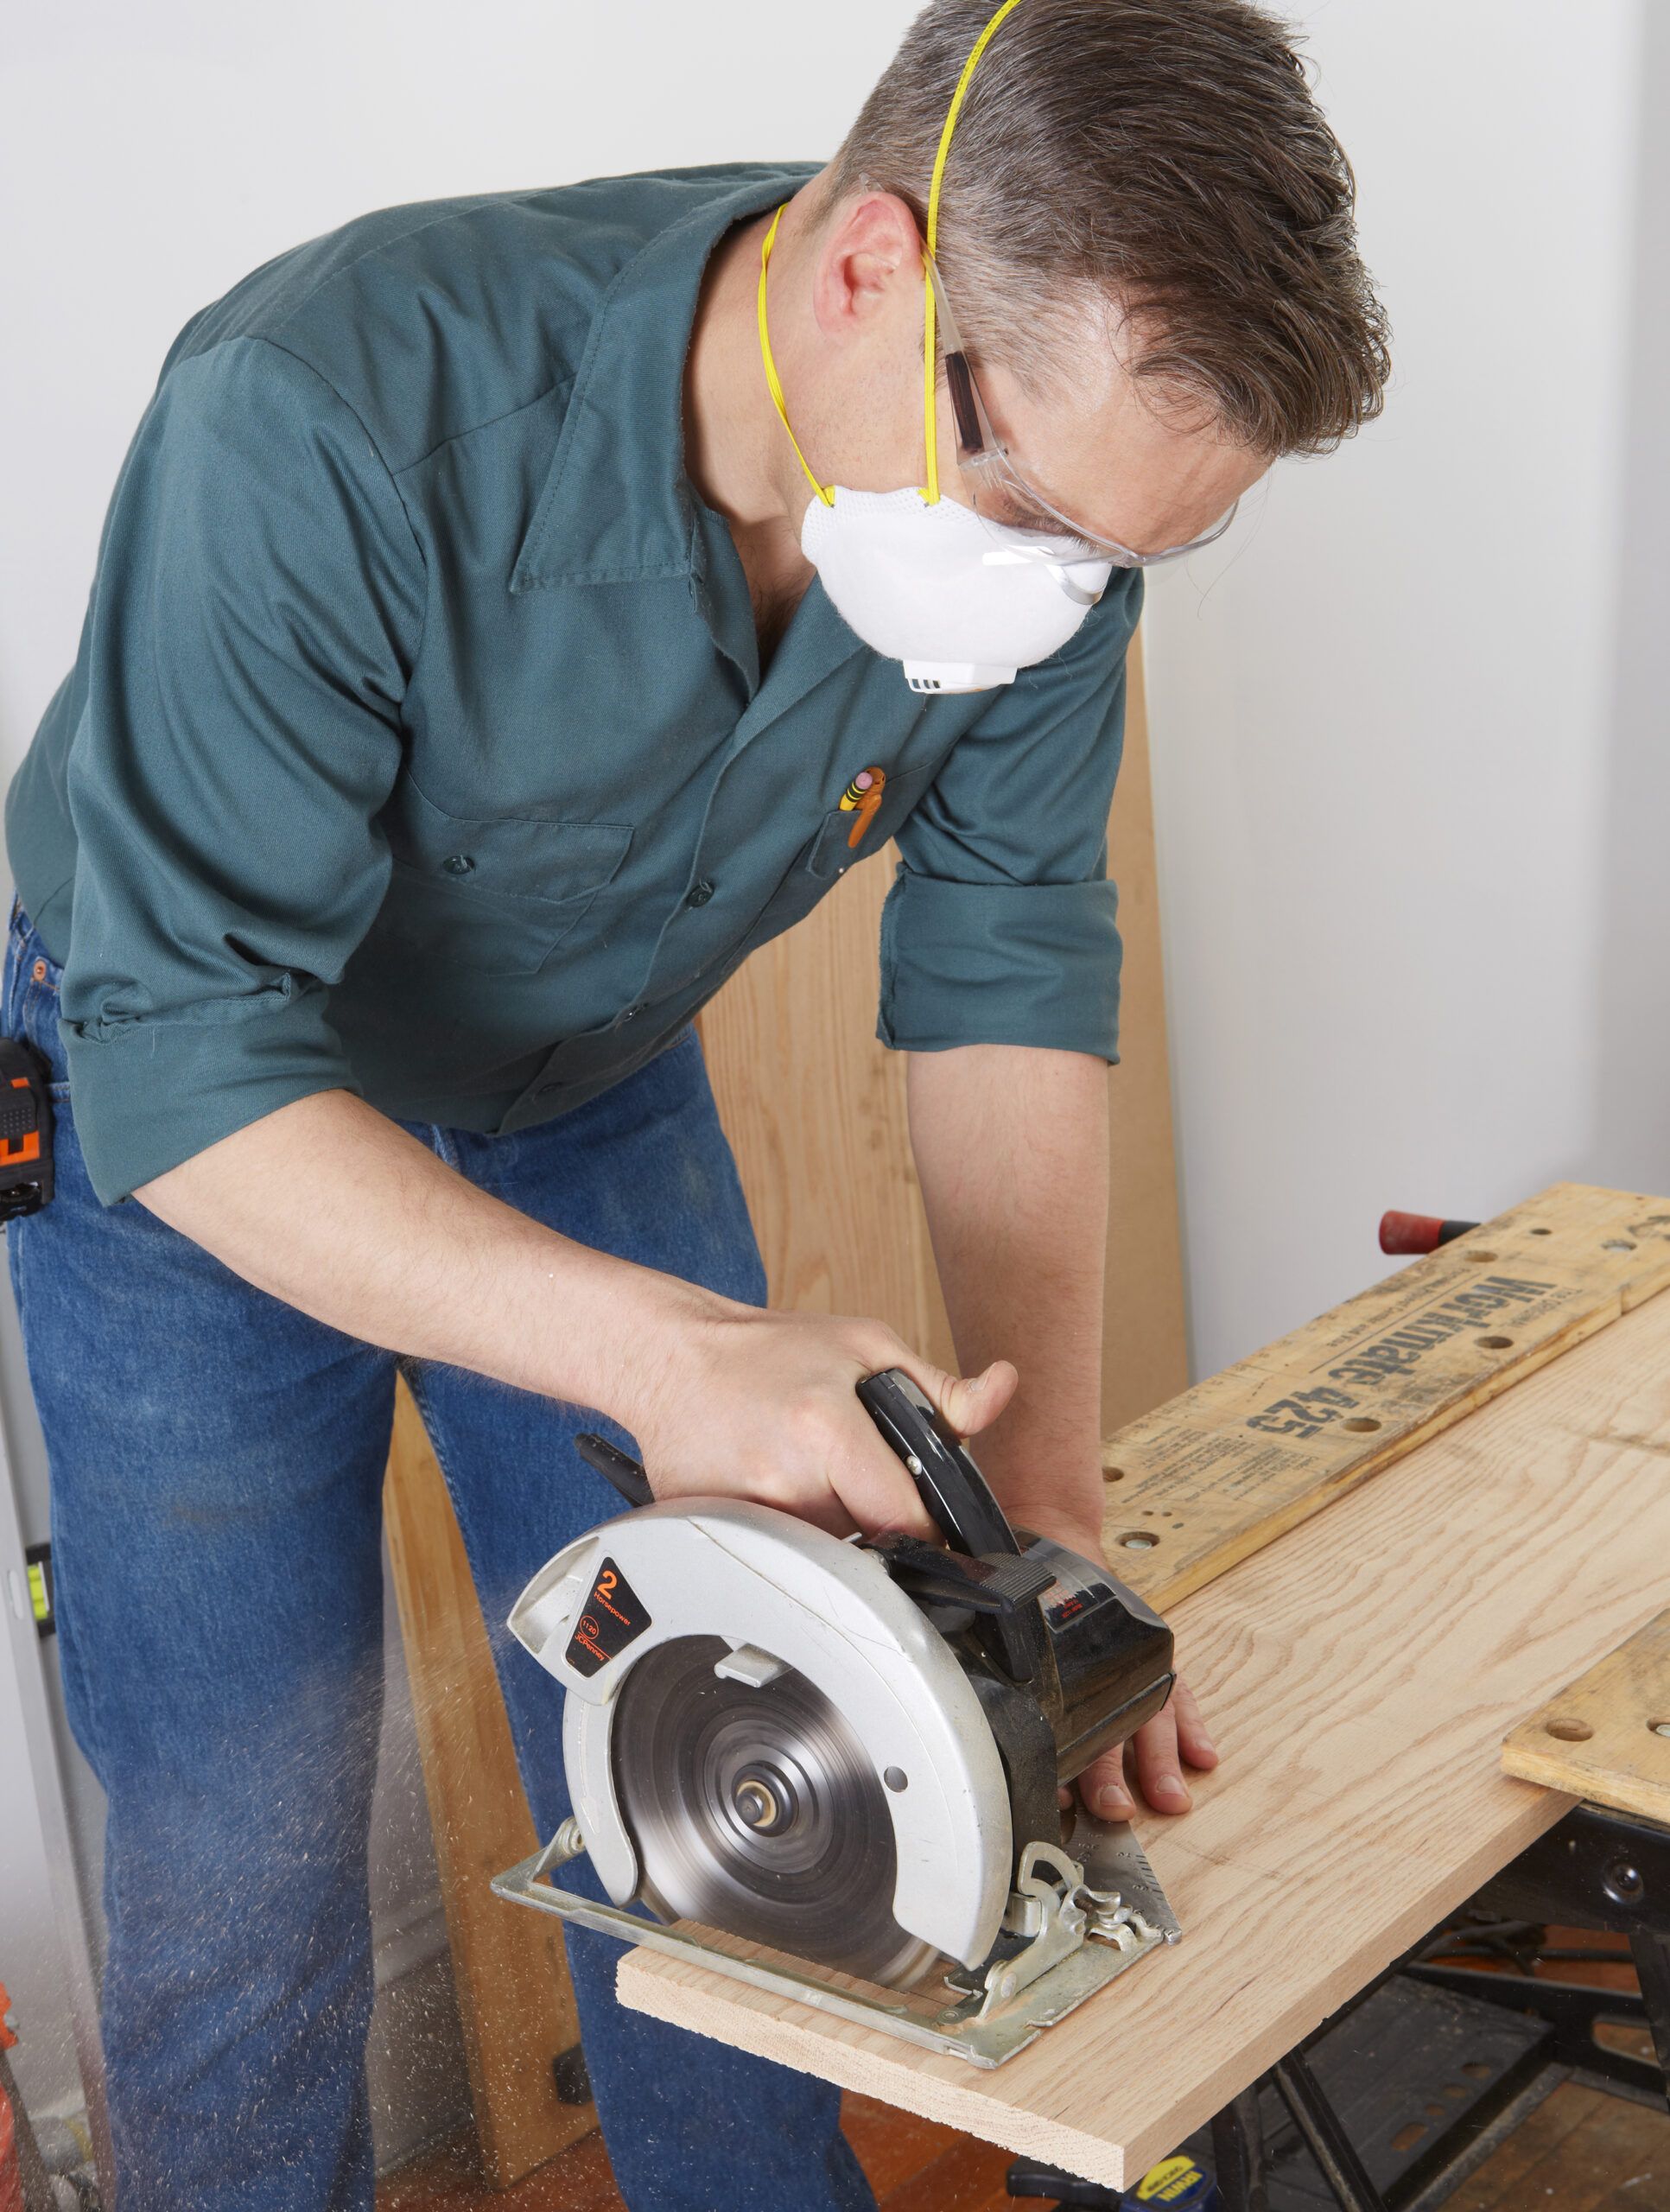
Start with the countertop facedown. Measure and mark the piece with cutlines for the countertop and lower counter. Clamp a straightedge adjacent to the first line as a saw guide. Keep the clamps out of the saw’s path. Apply tape over the line to minimize tear-out. Use a new 40-tooth carbide-tipped blade, and adjust its depth to ¼ inch more than the thickness of the wood. Make your first cut. Reclamp the straightedge, tape the second line, and make the cut.
Step 2: Smooth the Cut Edges
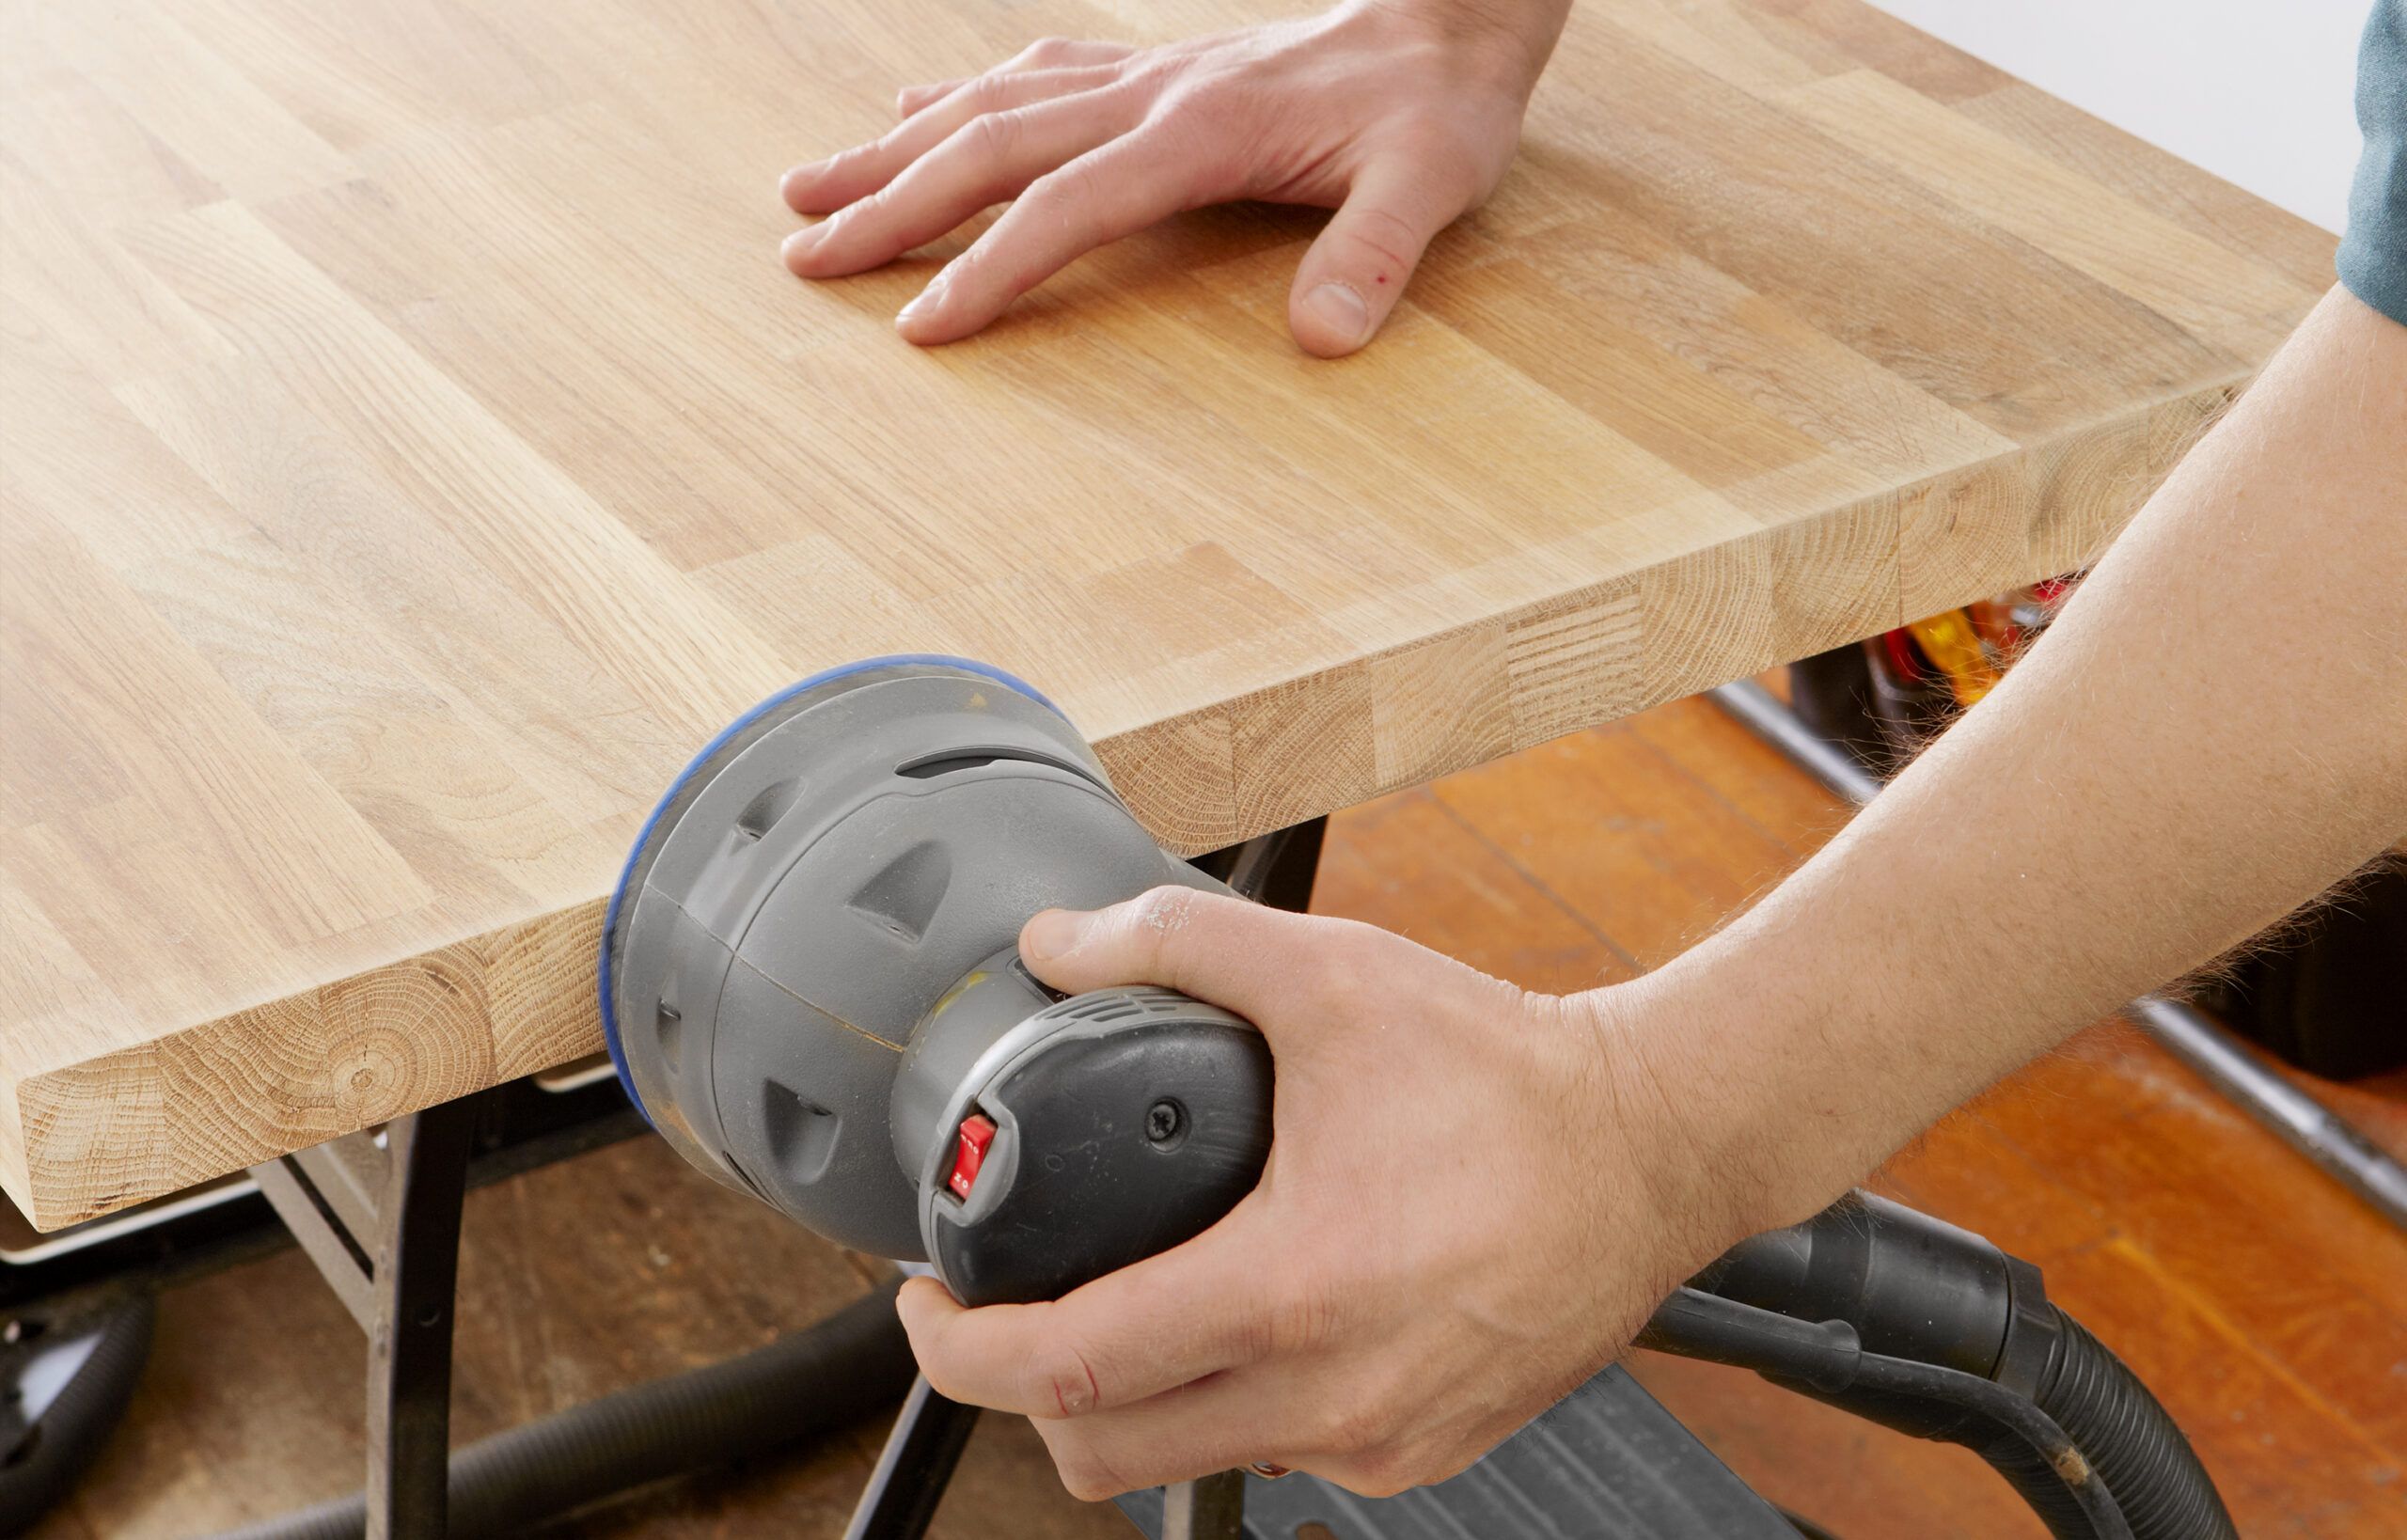
Using a 100-grit disc on a random-orbit sander, sand the cut edges to remove blade marks. Change to successively higher-grit discs, and sand until the cut is as smooth as the uncut surface.
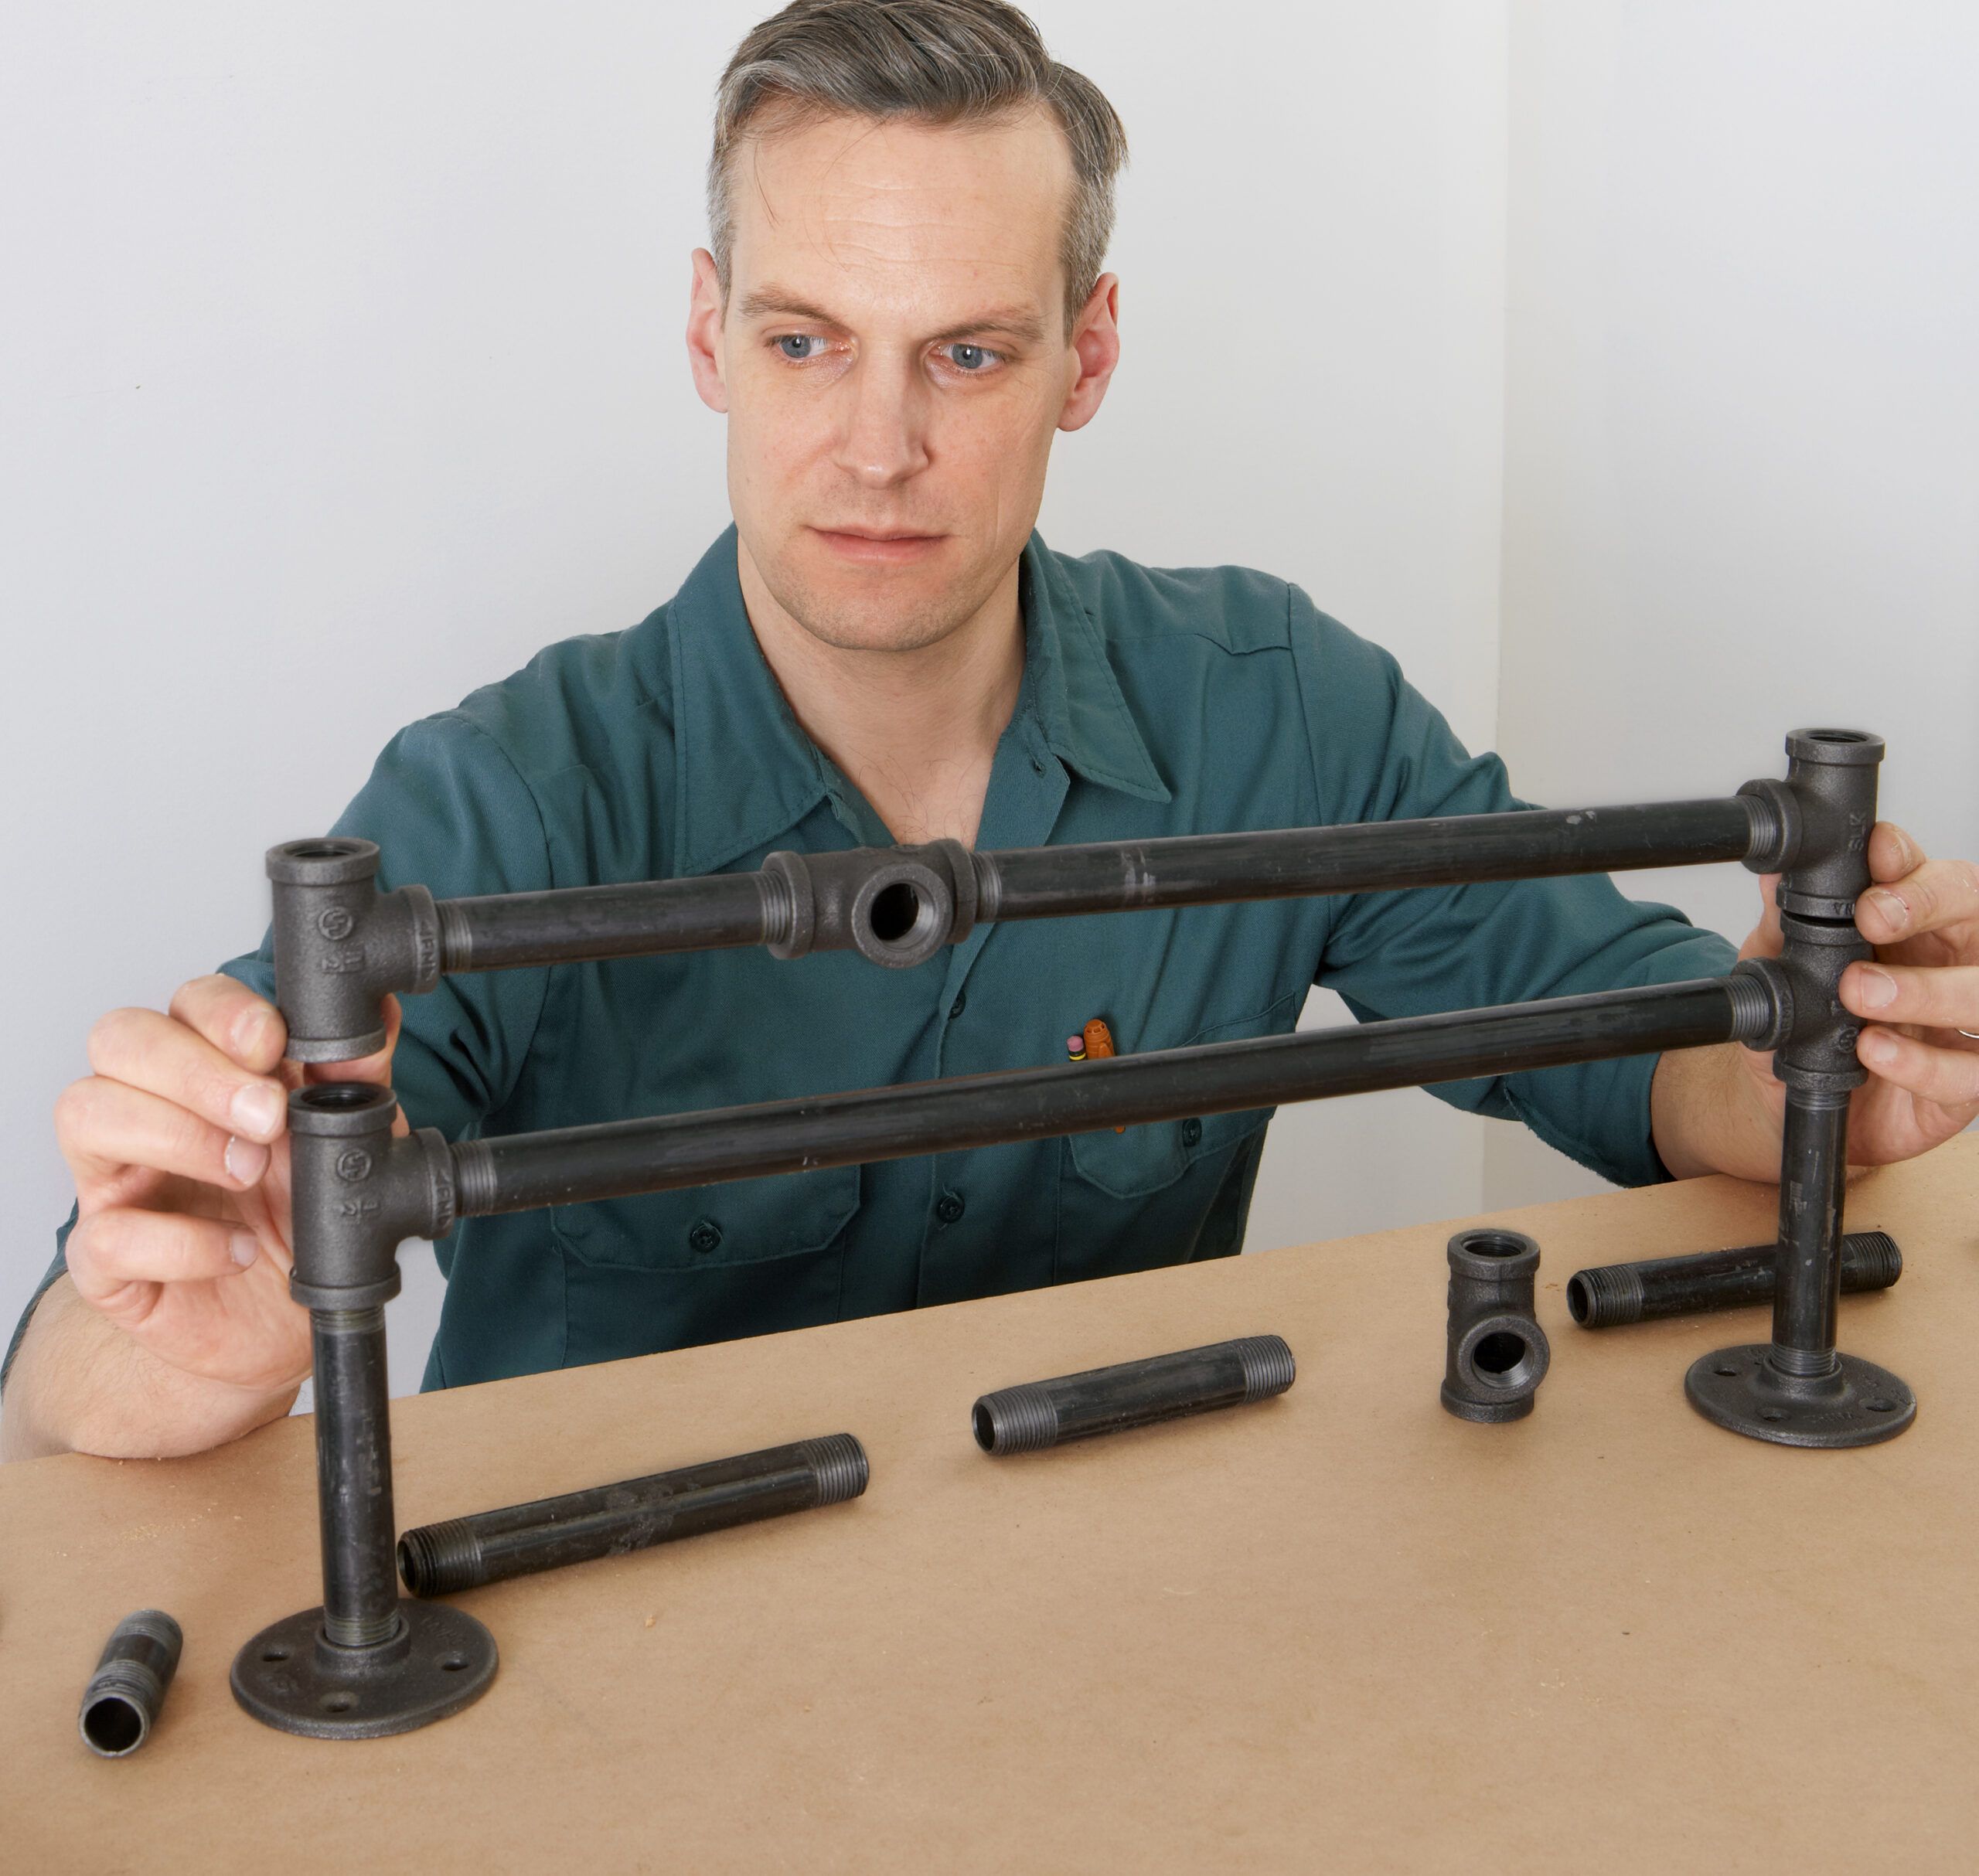
Step 3: Put the Pieces in Order
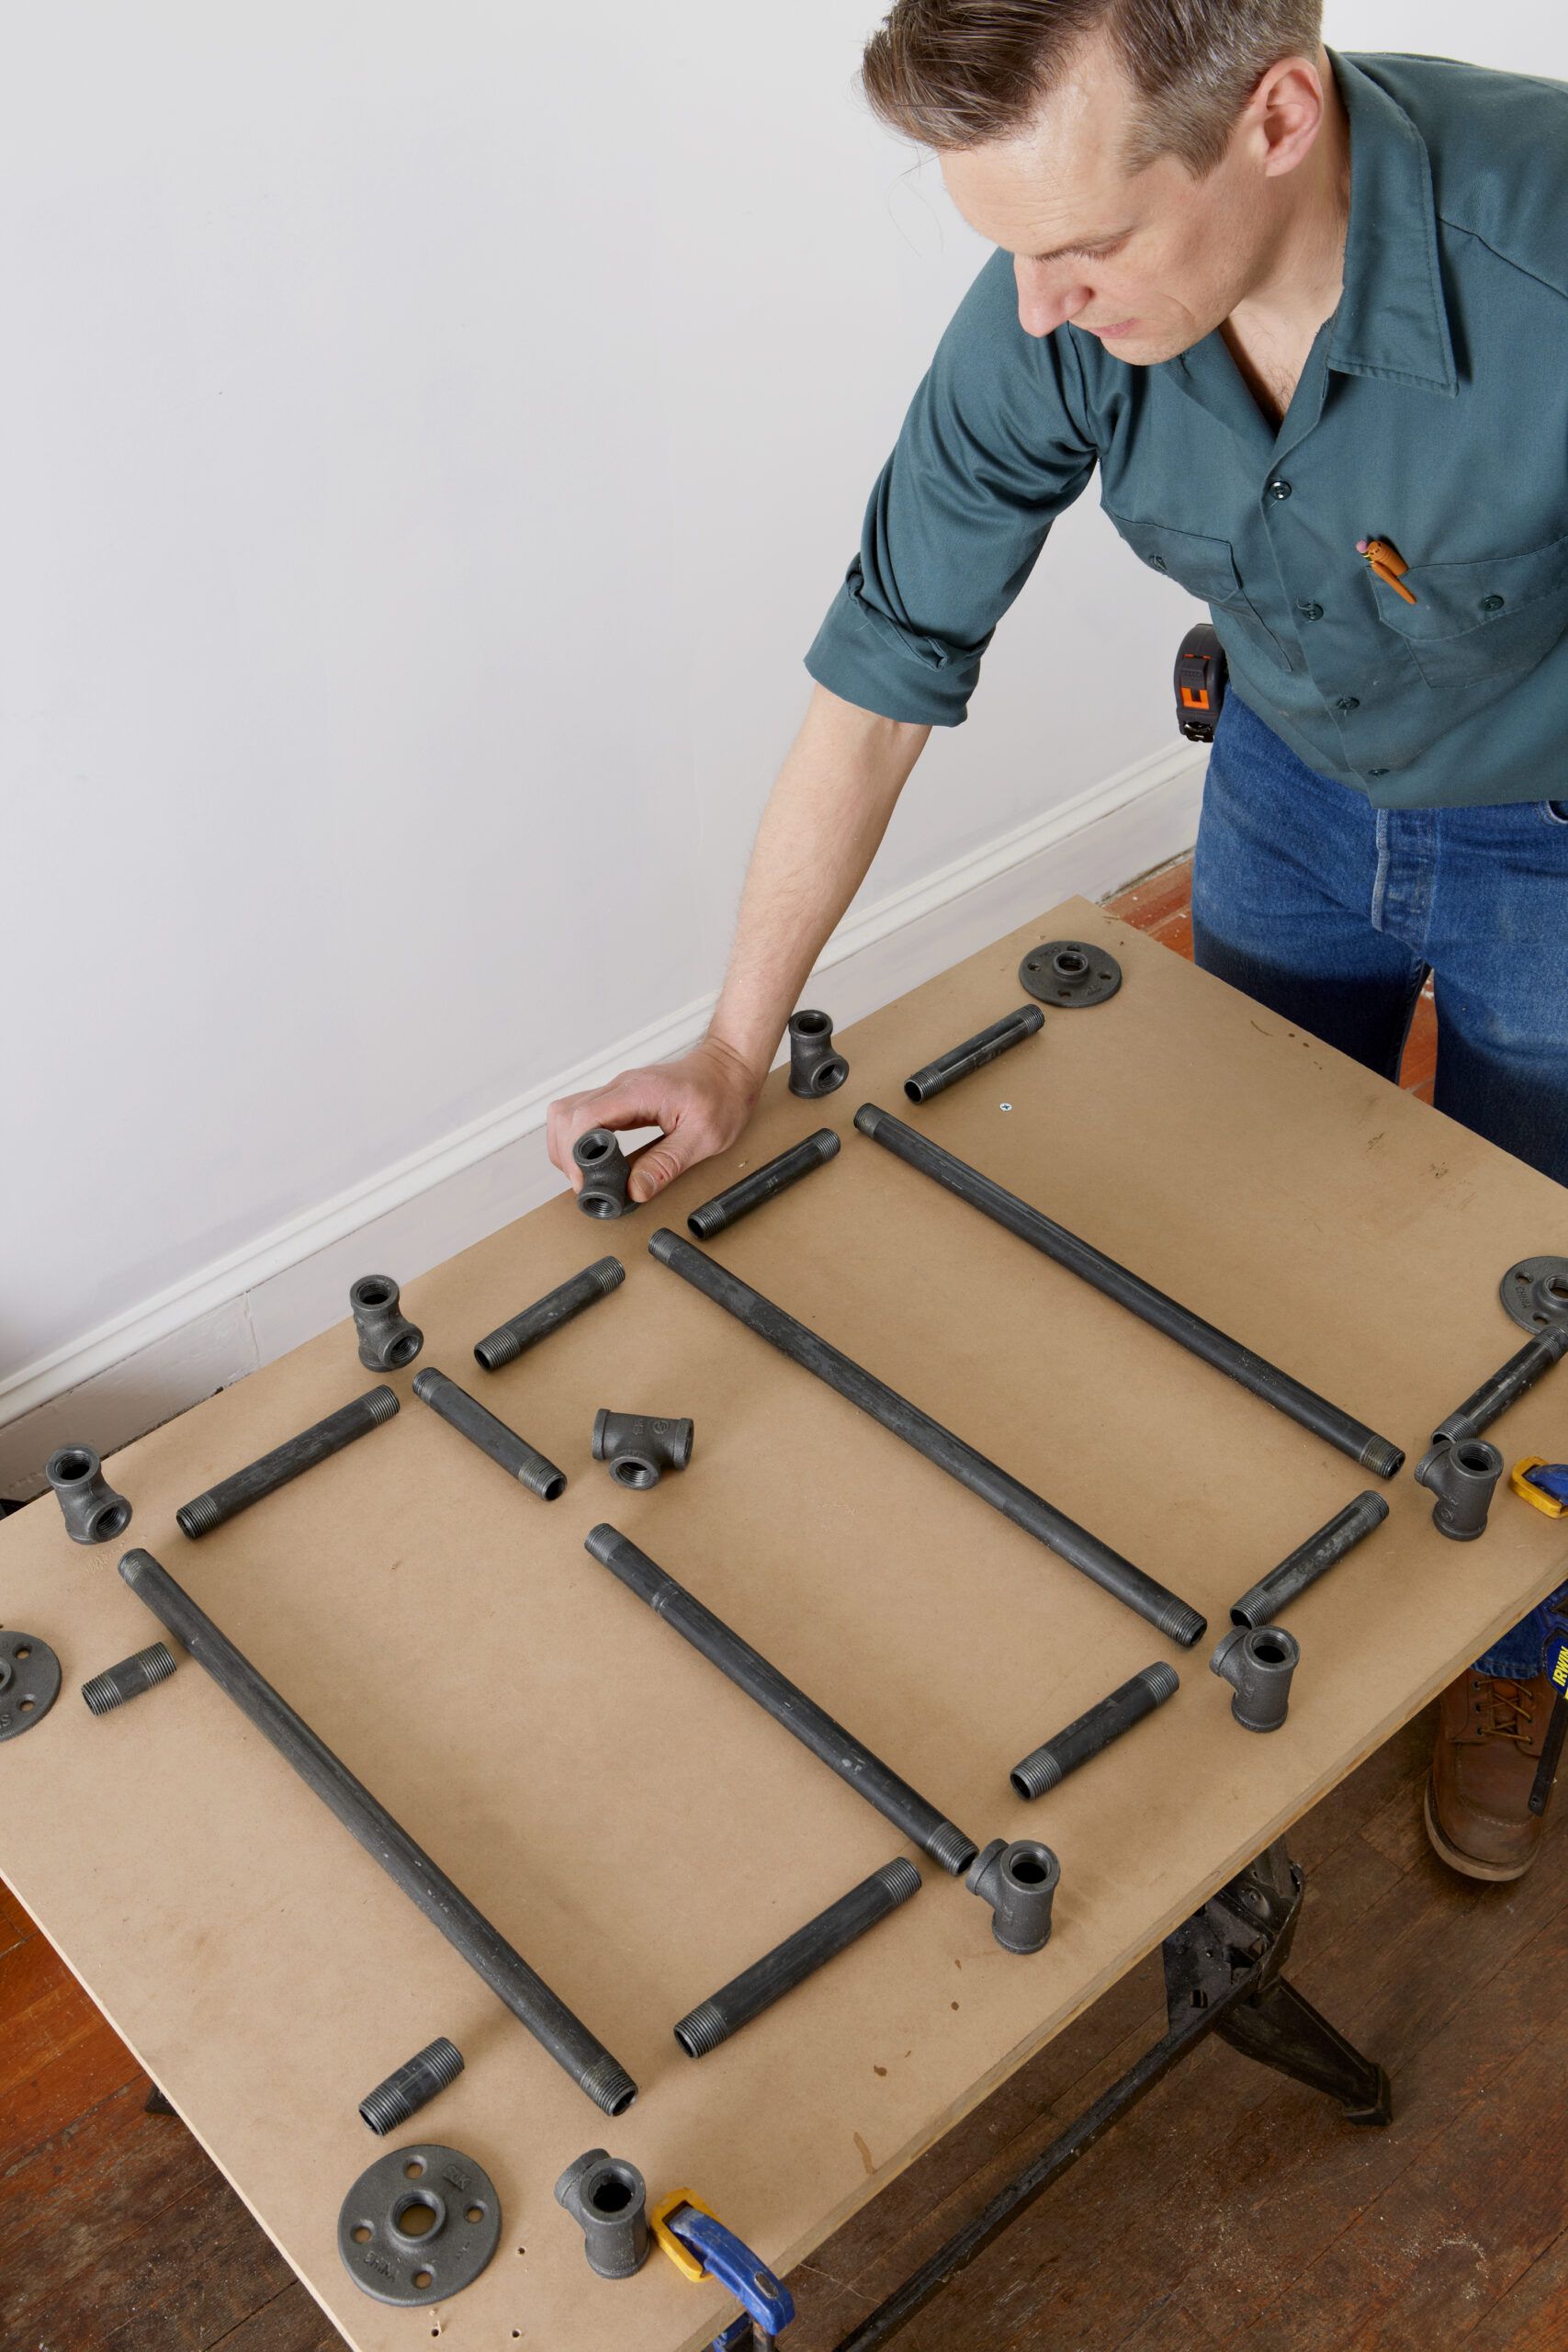
On your work surface, lay out all the pieces, including the flanges and fittings, from top to bottom according to the dimensional drawings. There should be 15 threaded pipe pieces of different lengths, nine tee fittings, and four flanges
Step 4: Build the Stretcher Rung

To establish the width, start by assembling the five pieces of the ladder rung that connects to the stretcher. The center tee is horizontal and the side tees are vertical. Although we’re using standardized, precut pipe, expect some variation in threading among pieces. It’s a good idea to gently tighten pieces by hand as you work, keeping in mind that you’ll need to loosen some connections and tighten others to get matching lengths.
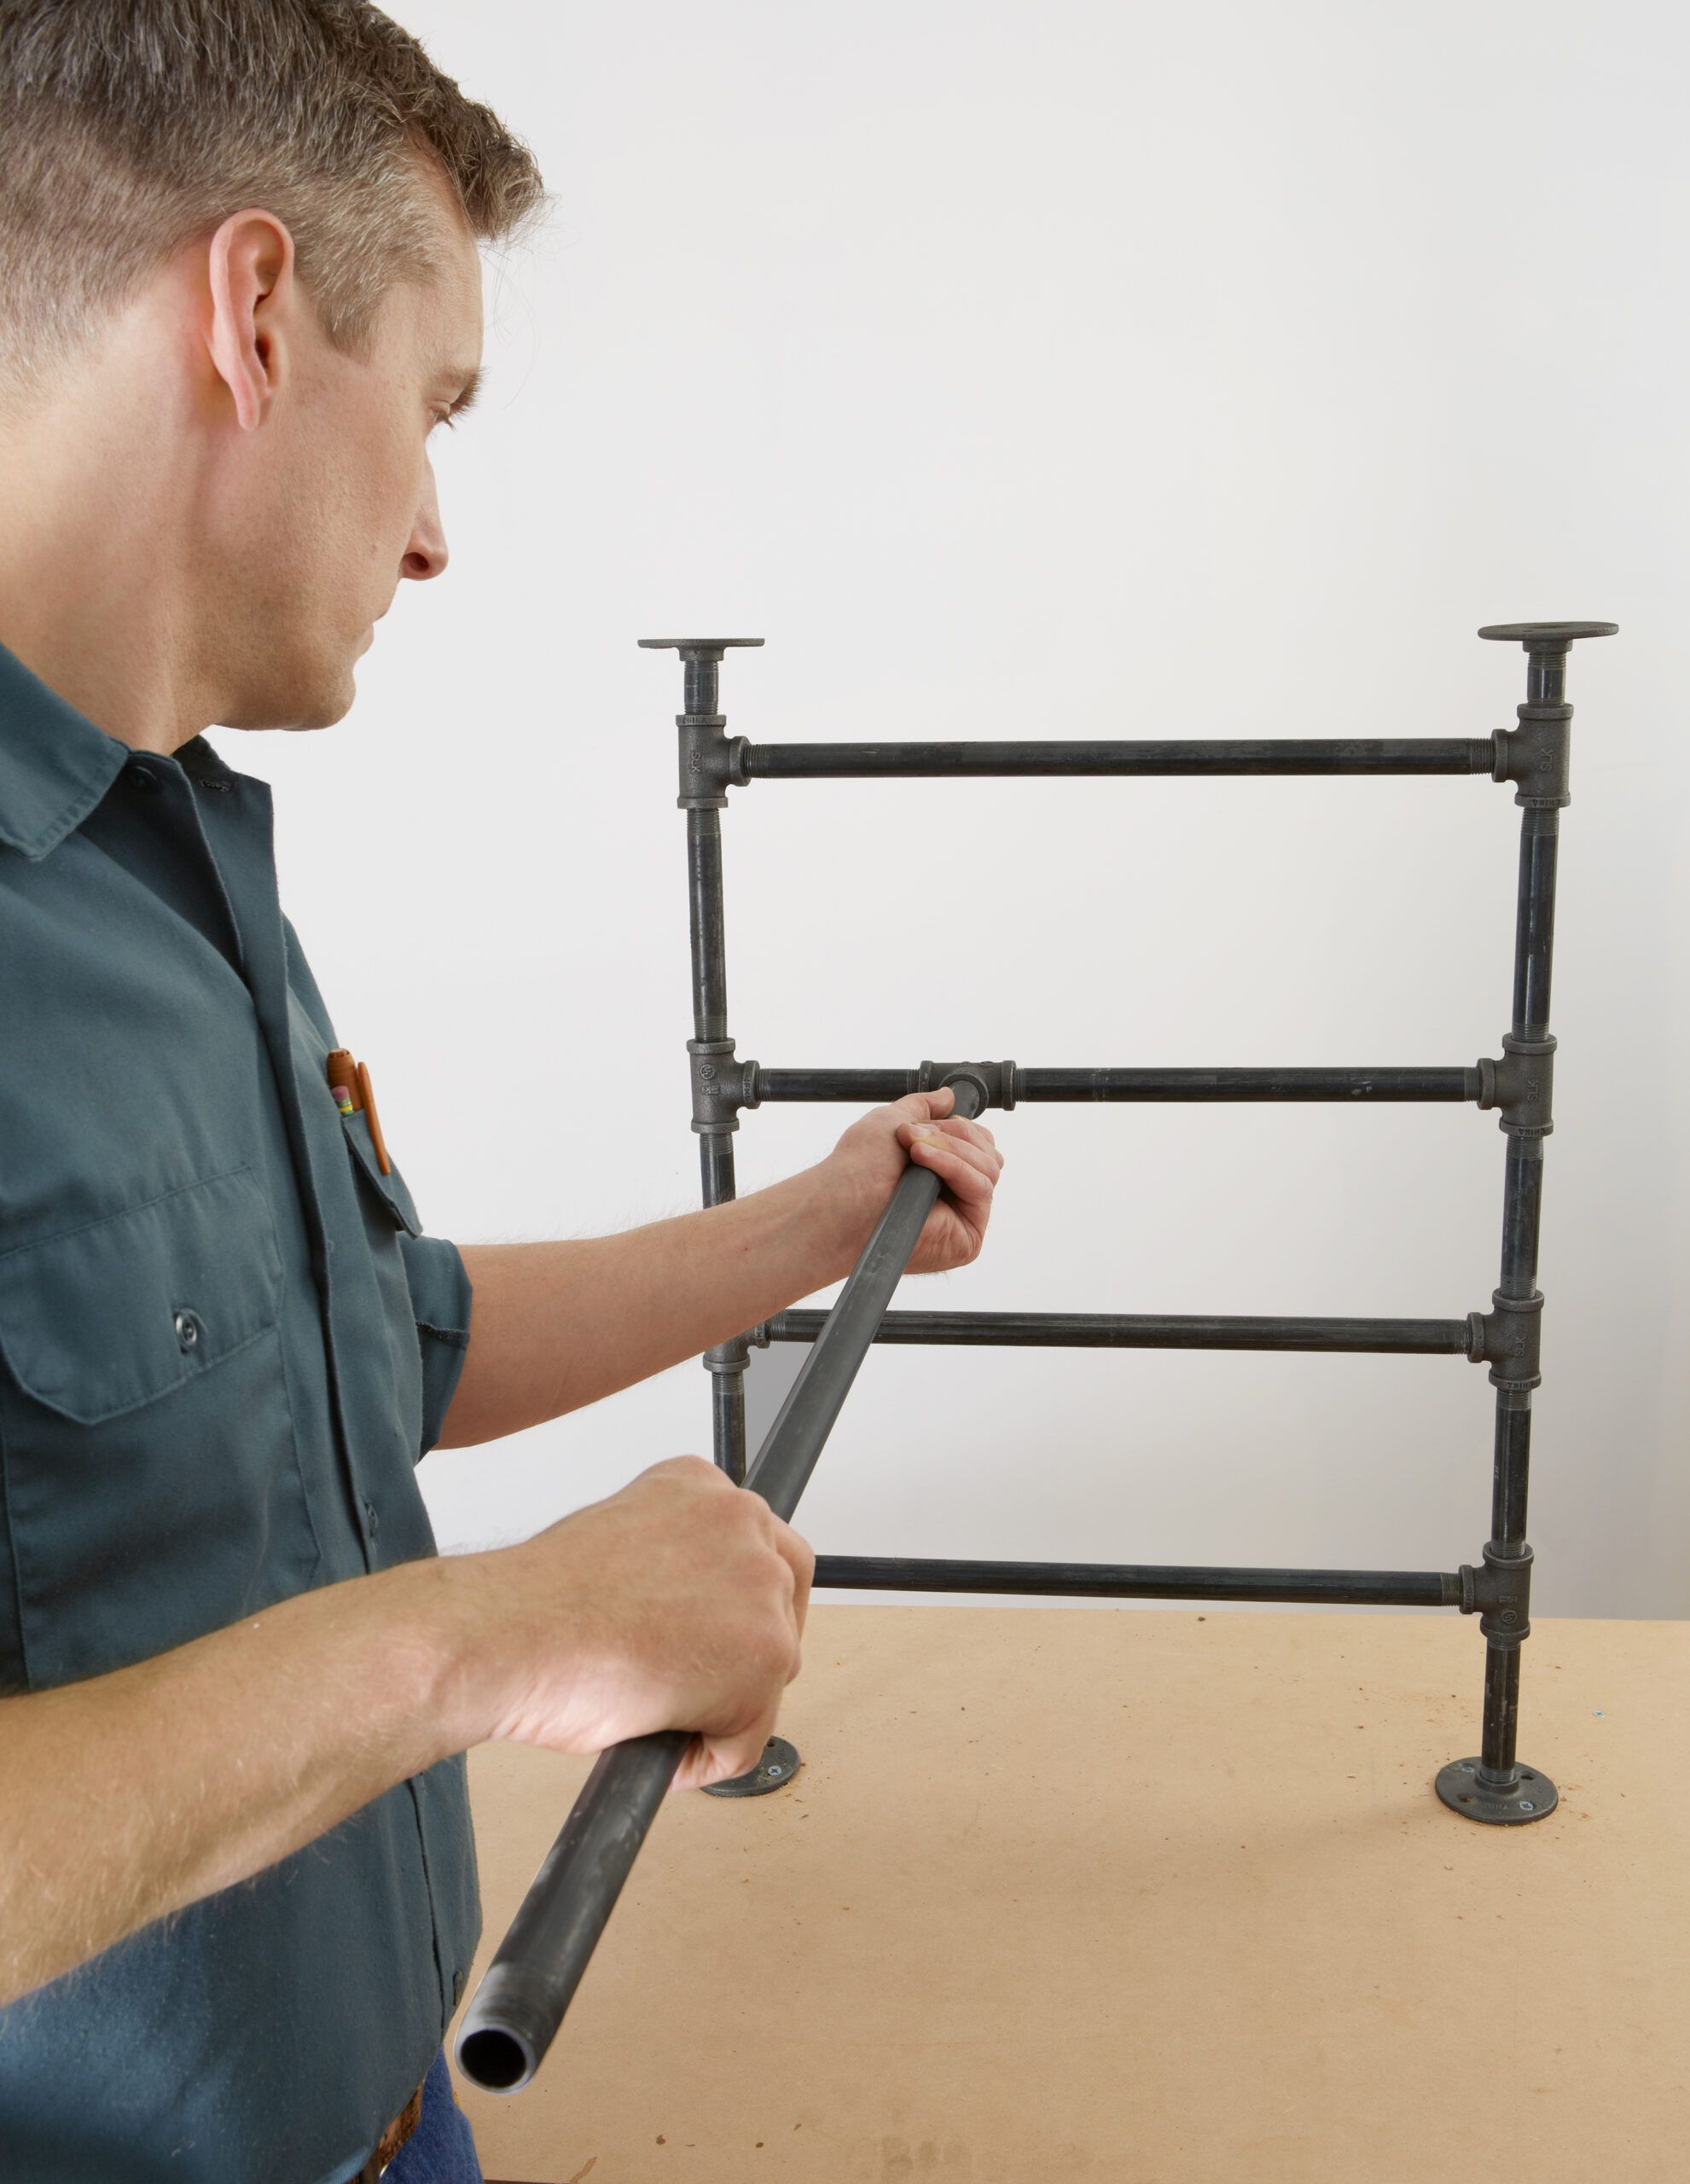
Step 5: Make the Base Rung
Thread together the seven pieces of the base rung. Stand it on your work surface and compare its width to that of the stretcher rung—they should be the same. Spin the T fitting on one end and then the other, a full rotation at a time, until both fittings line up with those of the stretcher rung, as shown. Repeating this for each stage will give you a straight ladder.
Step 6: Compare Rungs for Length
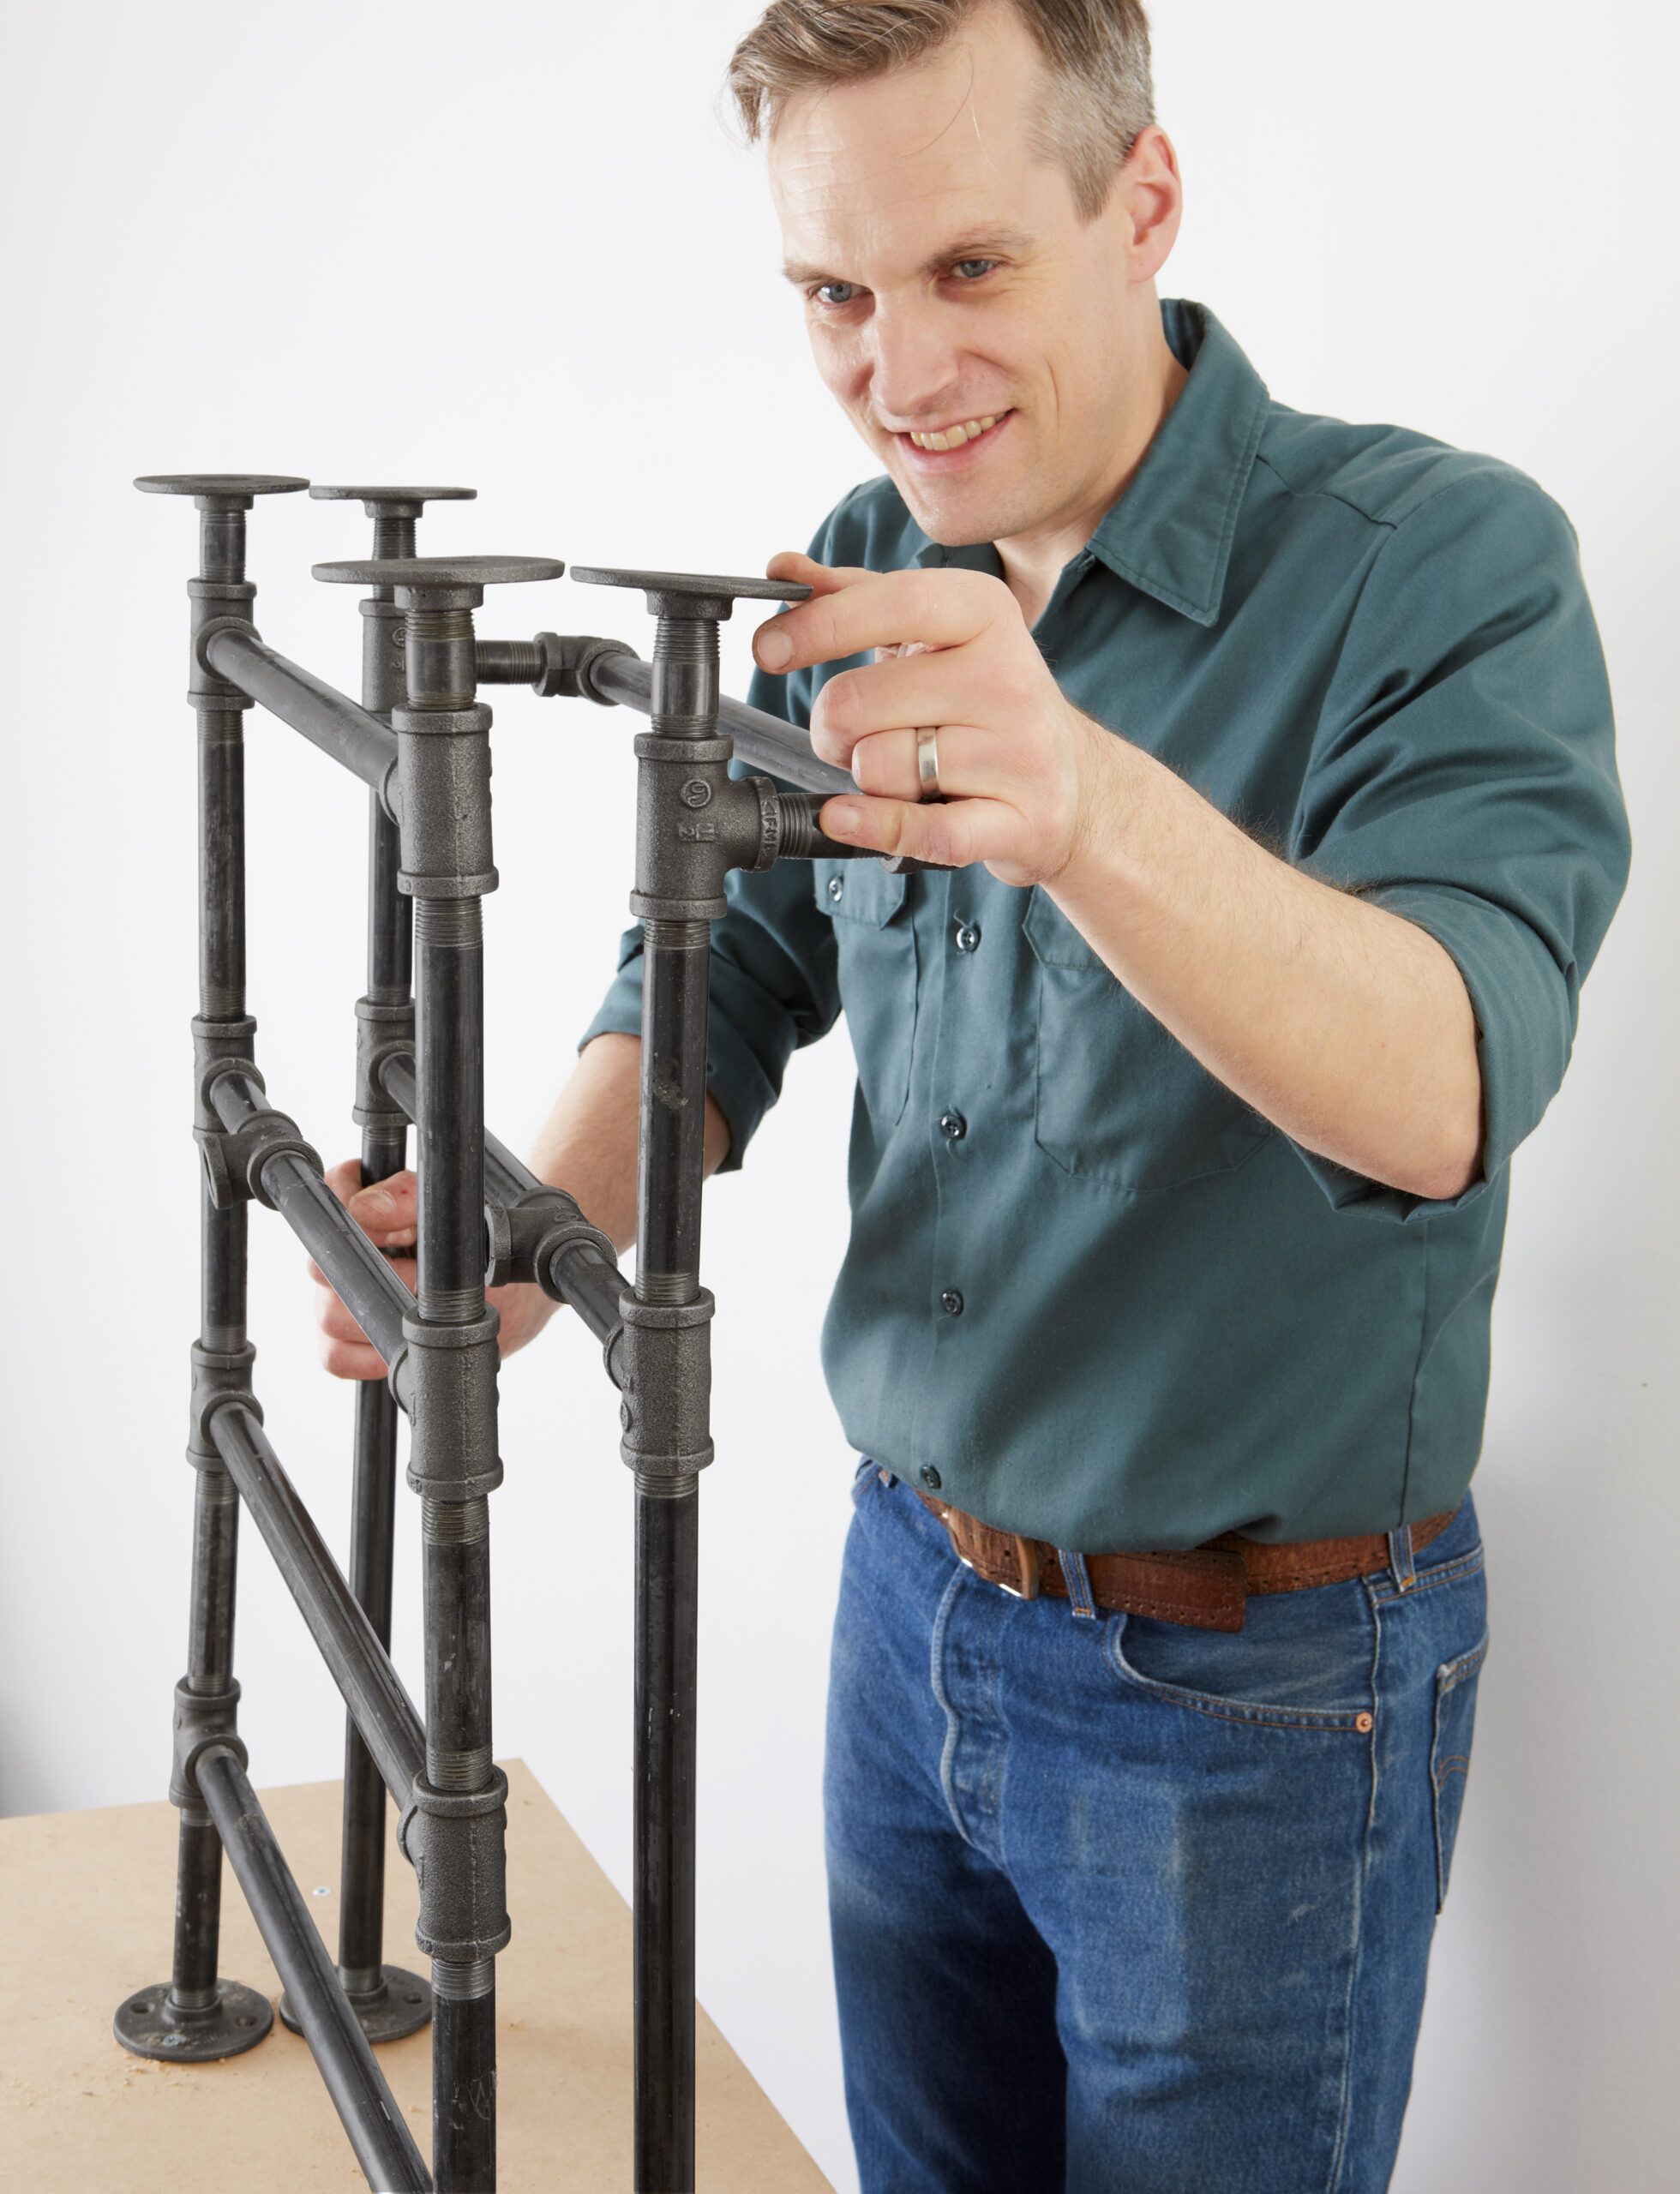
To hold the base rung steady while you work, you can temporarily screw the flanges to your work surface, as shown. Now use the base as your reference for each new rung. You will need to tighten and loosen pieces throughout the assembly process to adjust for length. Don’t worry if some pieces seem slightly loose in their fittings—they won’t once the entire island comes together.
Step 7: Build the Ladder
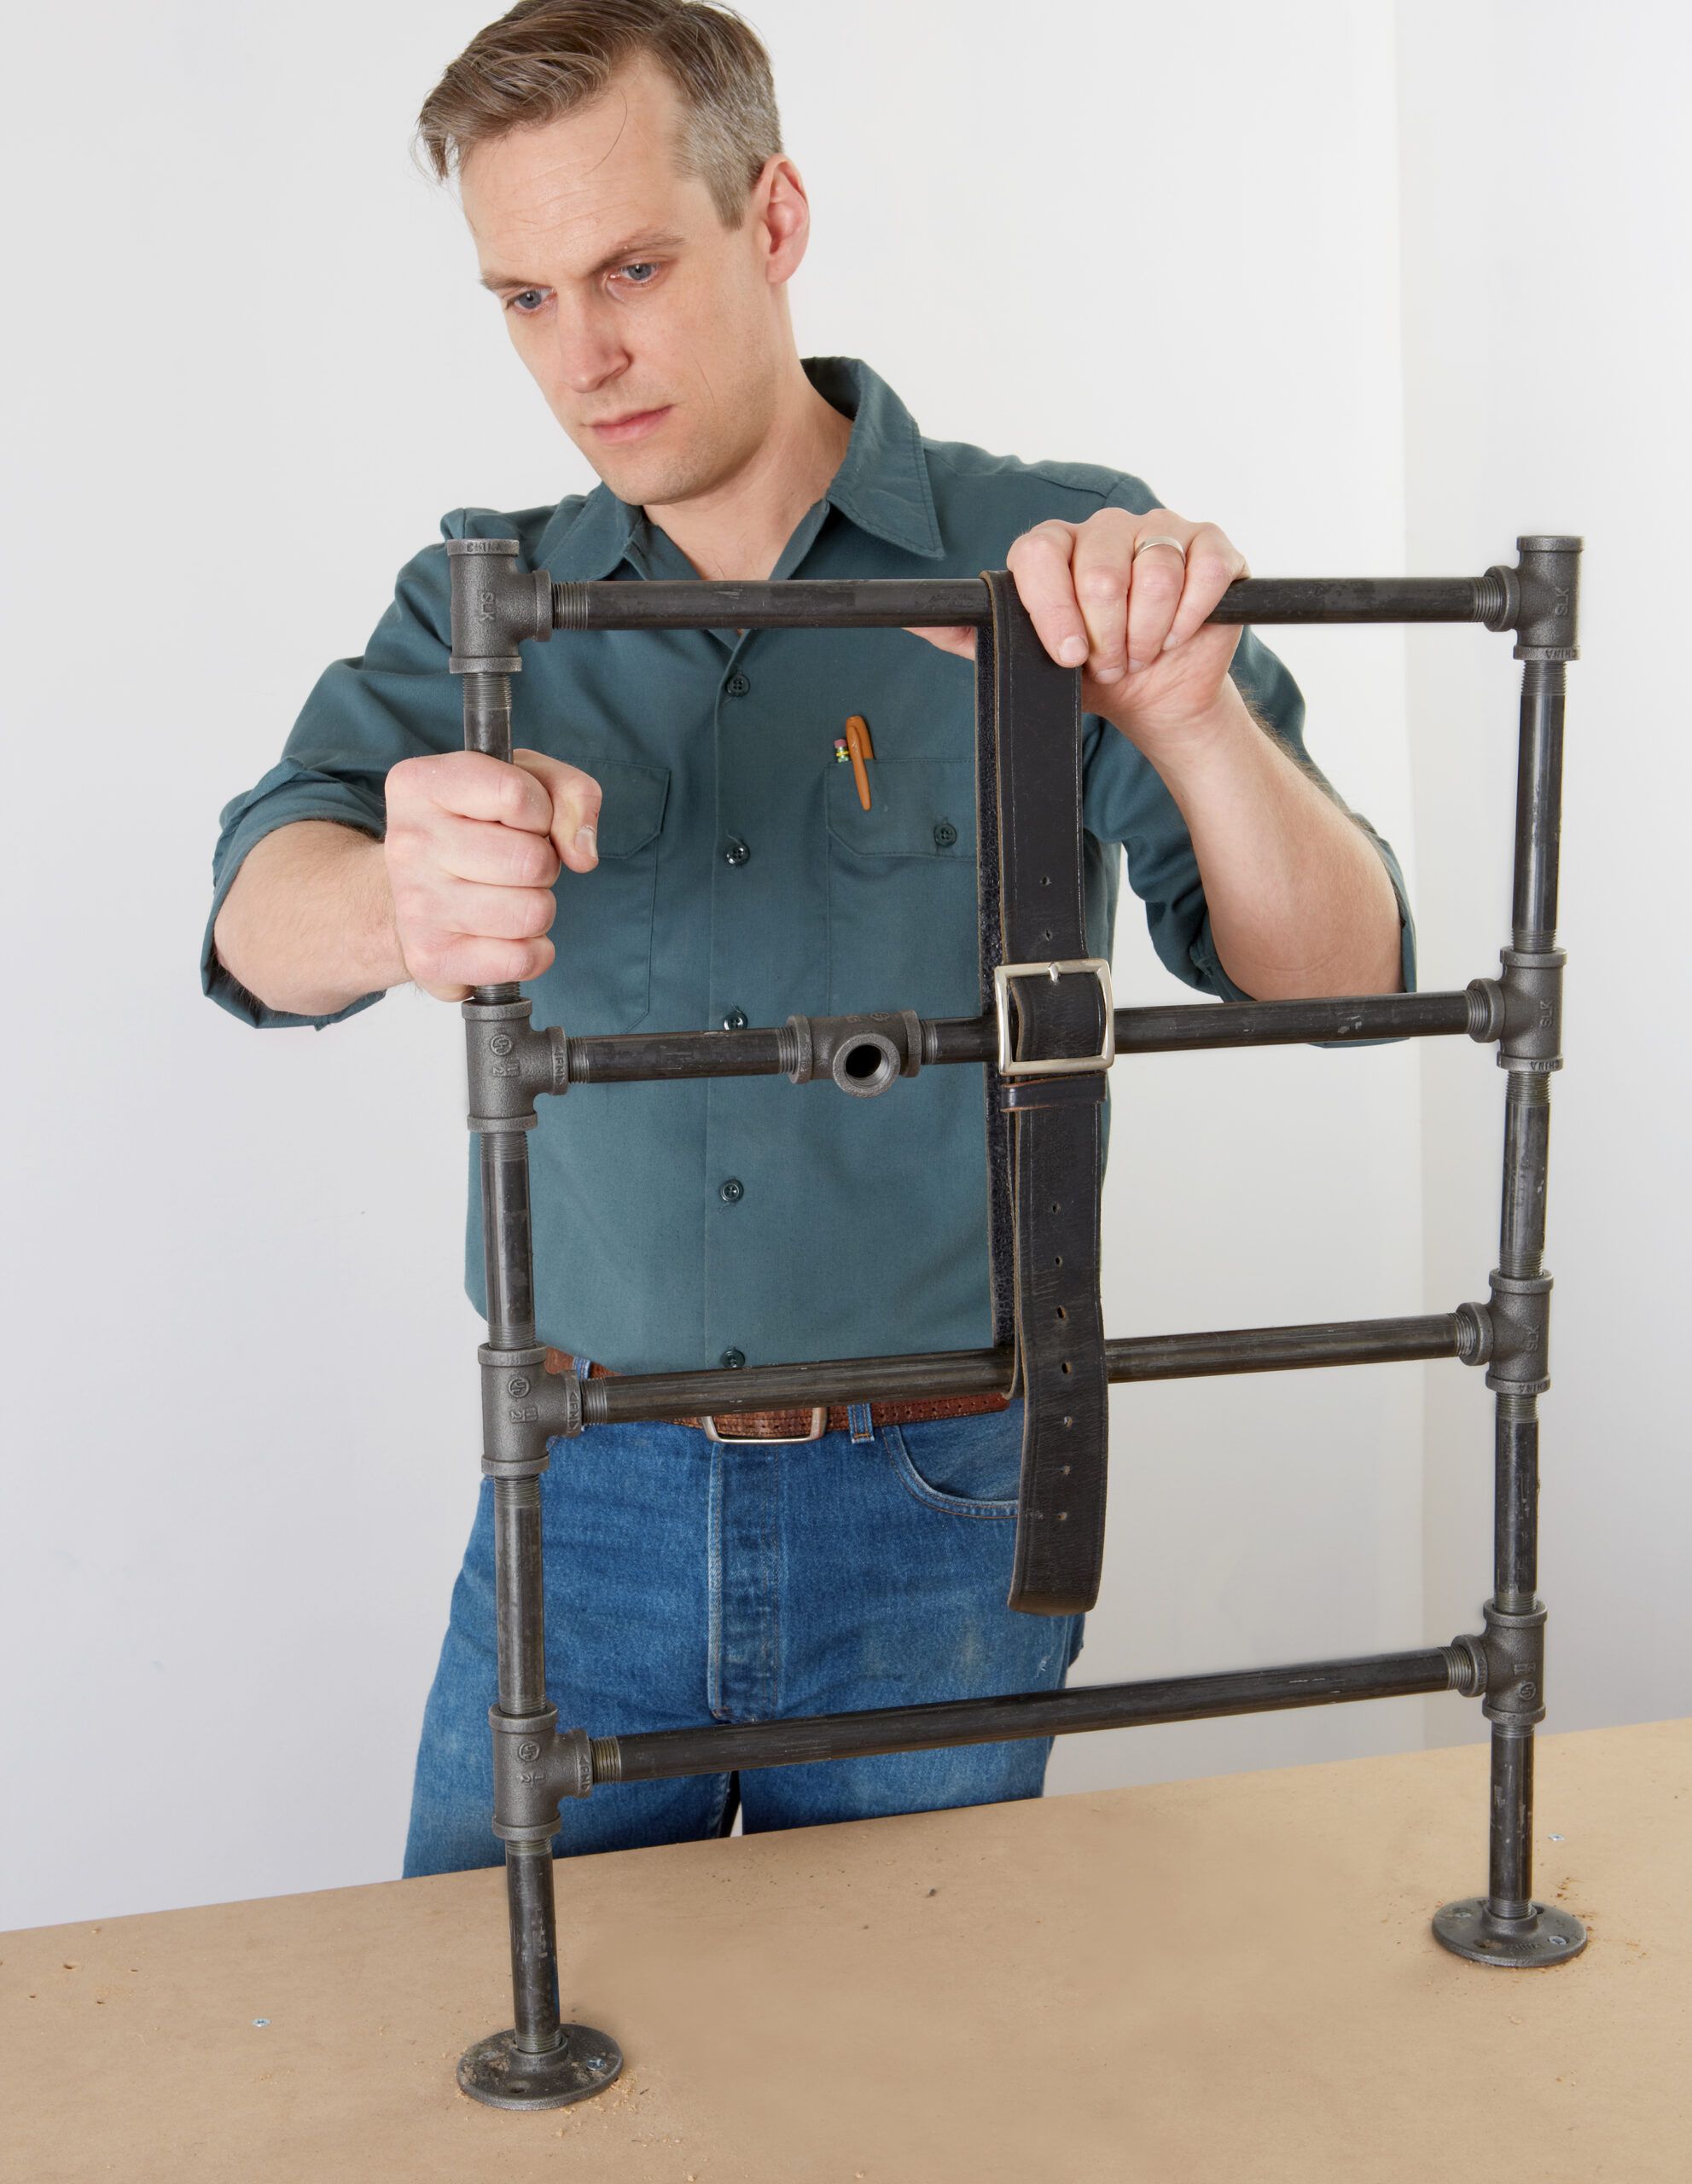
Thread the second stage of vertical pieces into place. Thread the fittings onto the second rung, then seat them onto the threads of the vertical pipes. Now back the vertical pipes out of their lower fittings, about halfway, until the top threads engage with the fittings above. As you work, keep both sides of the ladder the same height, and loop a belt around the rungs to hold them in place. Once the top rung is in place, thread in the short vertical pipes and flanges.
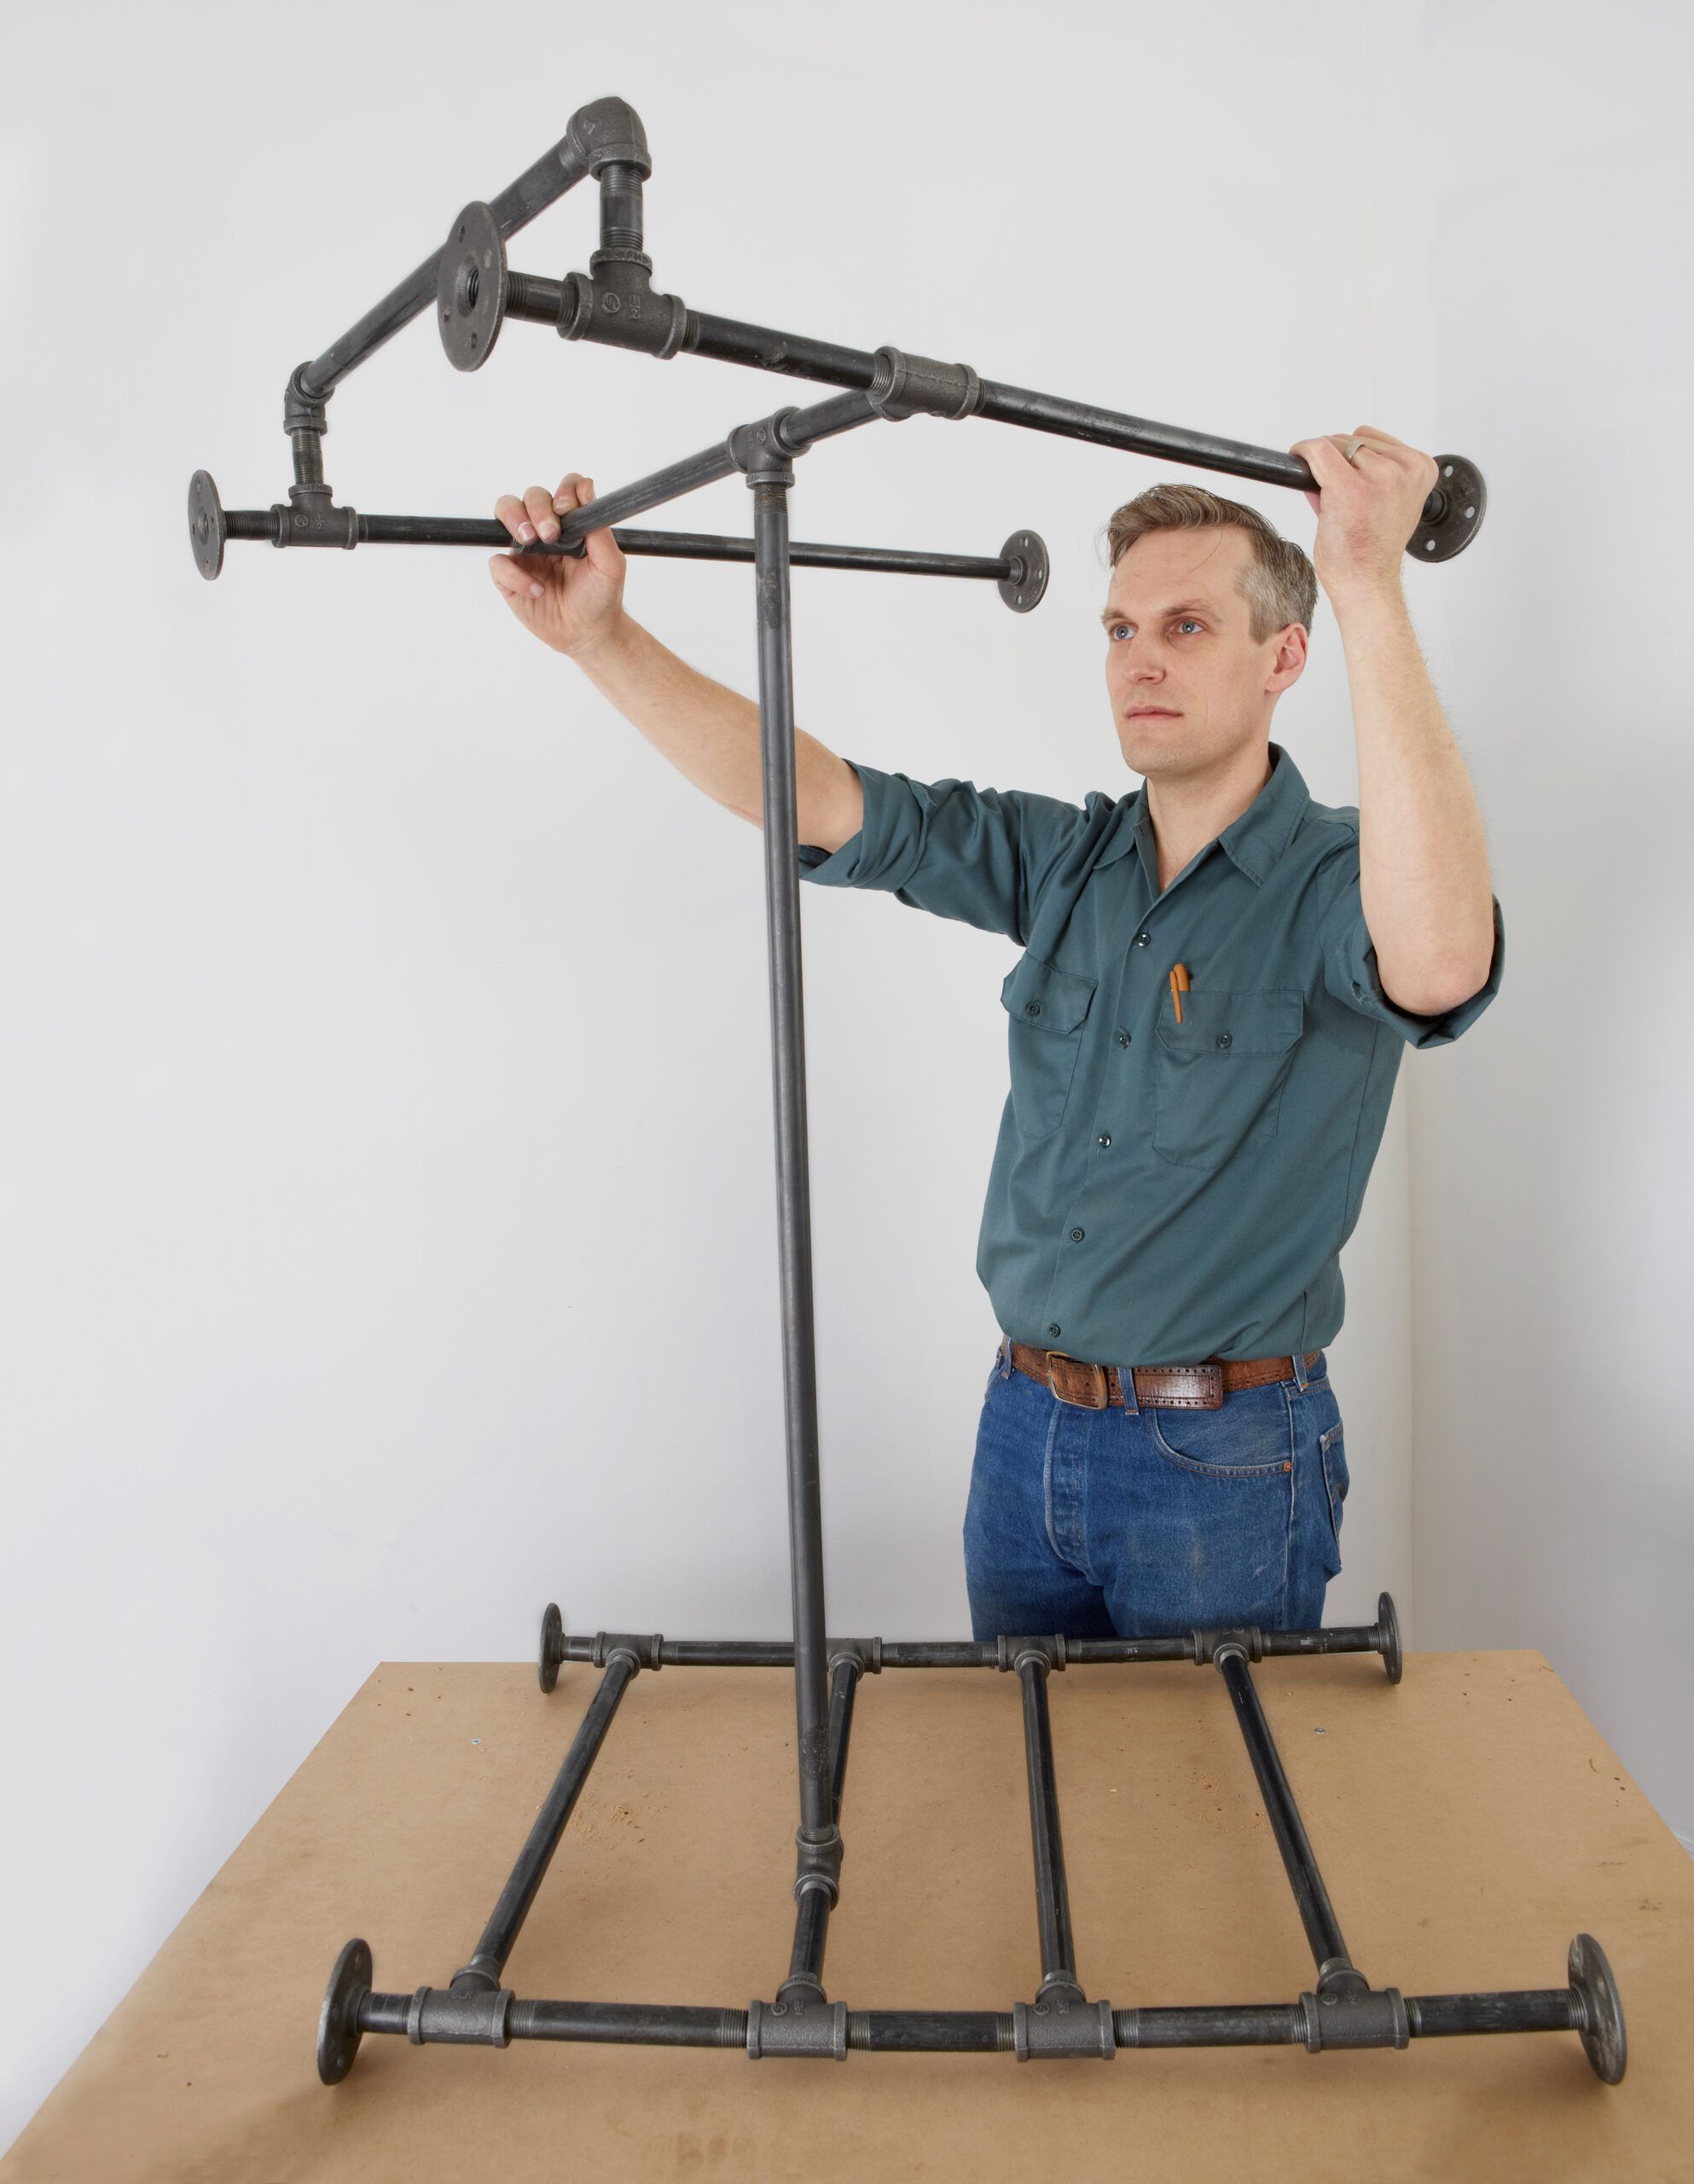
Step 8: Build the Towel-Bar Side
Lay out the pieces for the opposite, towel-bar side. You’ll need four flanges, eleven pieces of threaded pipe, four tee fittings, and two elbows. Repeat all of Step 3 to build the towel-bar side. It’s critical that the horizontal tee fittings on both sides line up so that the stretcher and the shelf will be level. Stand the towel-bar side next to the ladder side to compare it, and adjust the flanges, as shown, to make the heights match.
Step 9: Install the Stretcher
With the ladder side still secured upright to your work surface, thread the stretcher pipe into the tee fitting.
Step 10: Attach the Towel-Bar Side
Remove the screws from the ladder-side flanges, and lay the side flat with the stretcher pointing up. Set the tee fitting of the towel-bar side onto the threads of the stretcher. Rotate the entire towel-bar side, as shown, to thread the fitting with the stretcher until the pieces are well seated and the sides are in proper alignment.
Step 11: Size the Shelf Boards
The shelf is made up of two boards, one shorter than the other to create notches that fit against the rungs. Rest the top board in place on the stretcher rungs, one end aligned with the outside of the frame. At the other end, mark the board where it extends past the rung. Use a rafter square to guide your circular saw, as shown, to make the crosscut. Mark the bottom shelf board to fit between the rungs, and crosscut it to length.
Step 12: Join the Shelf Boards
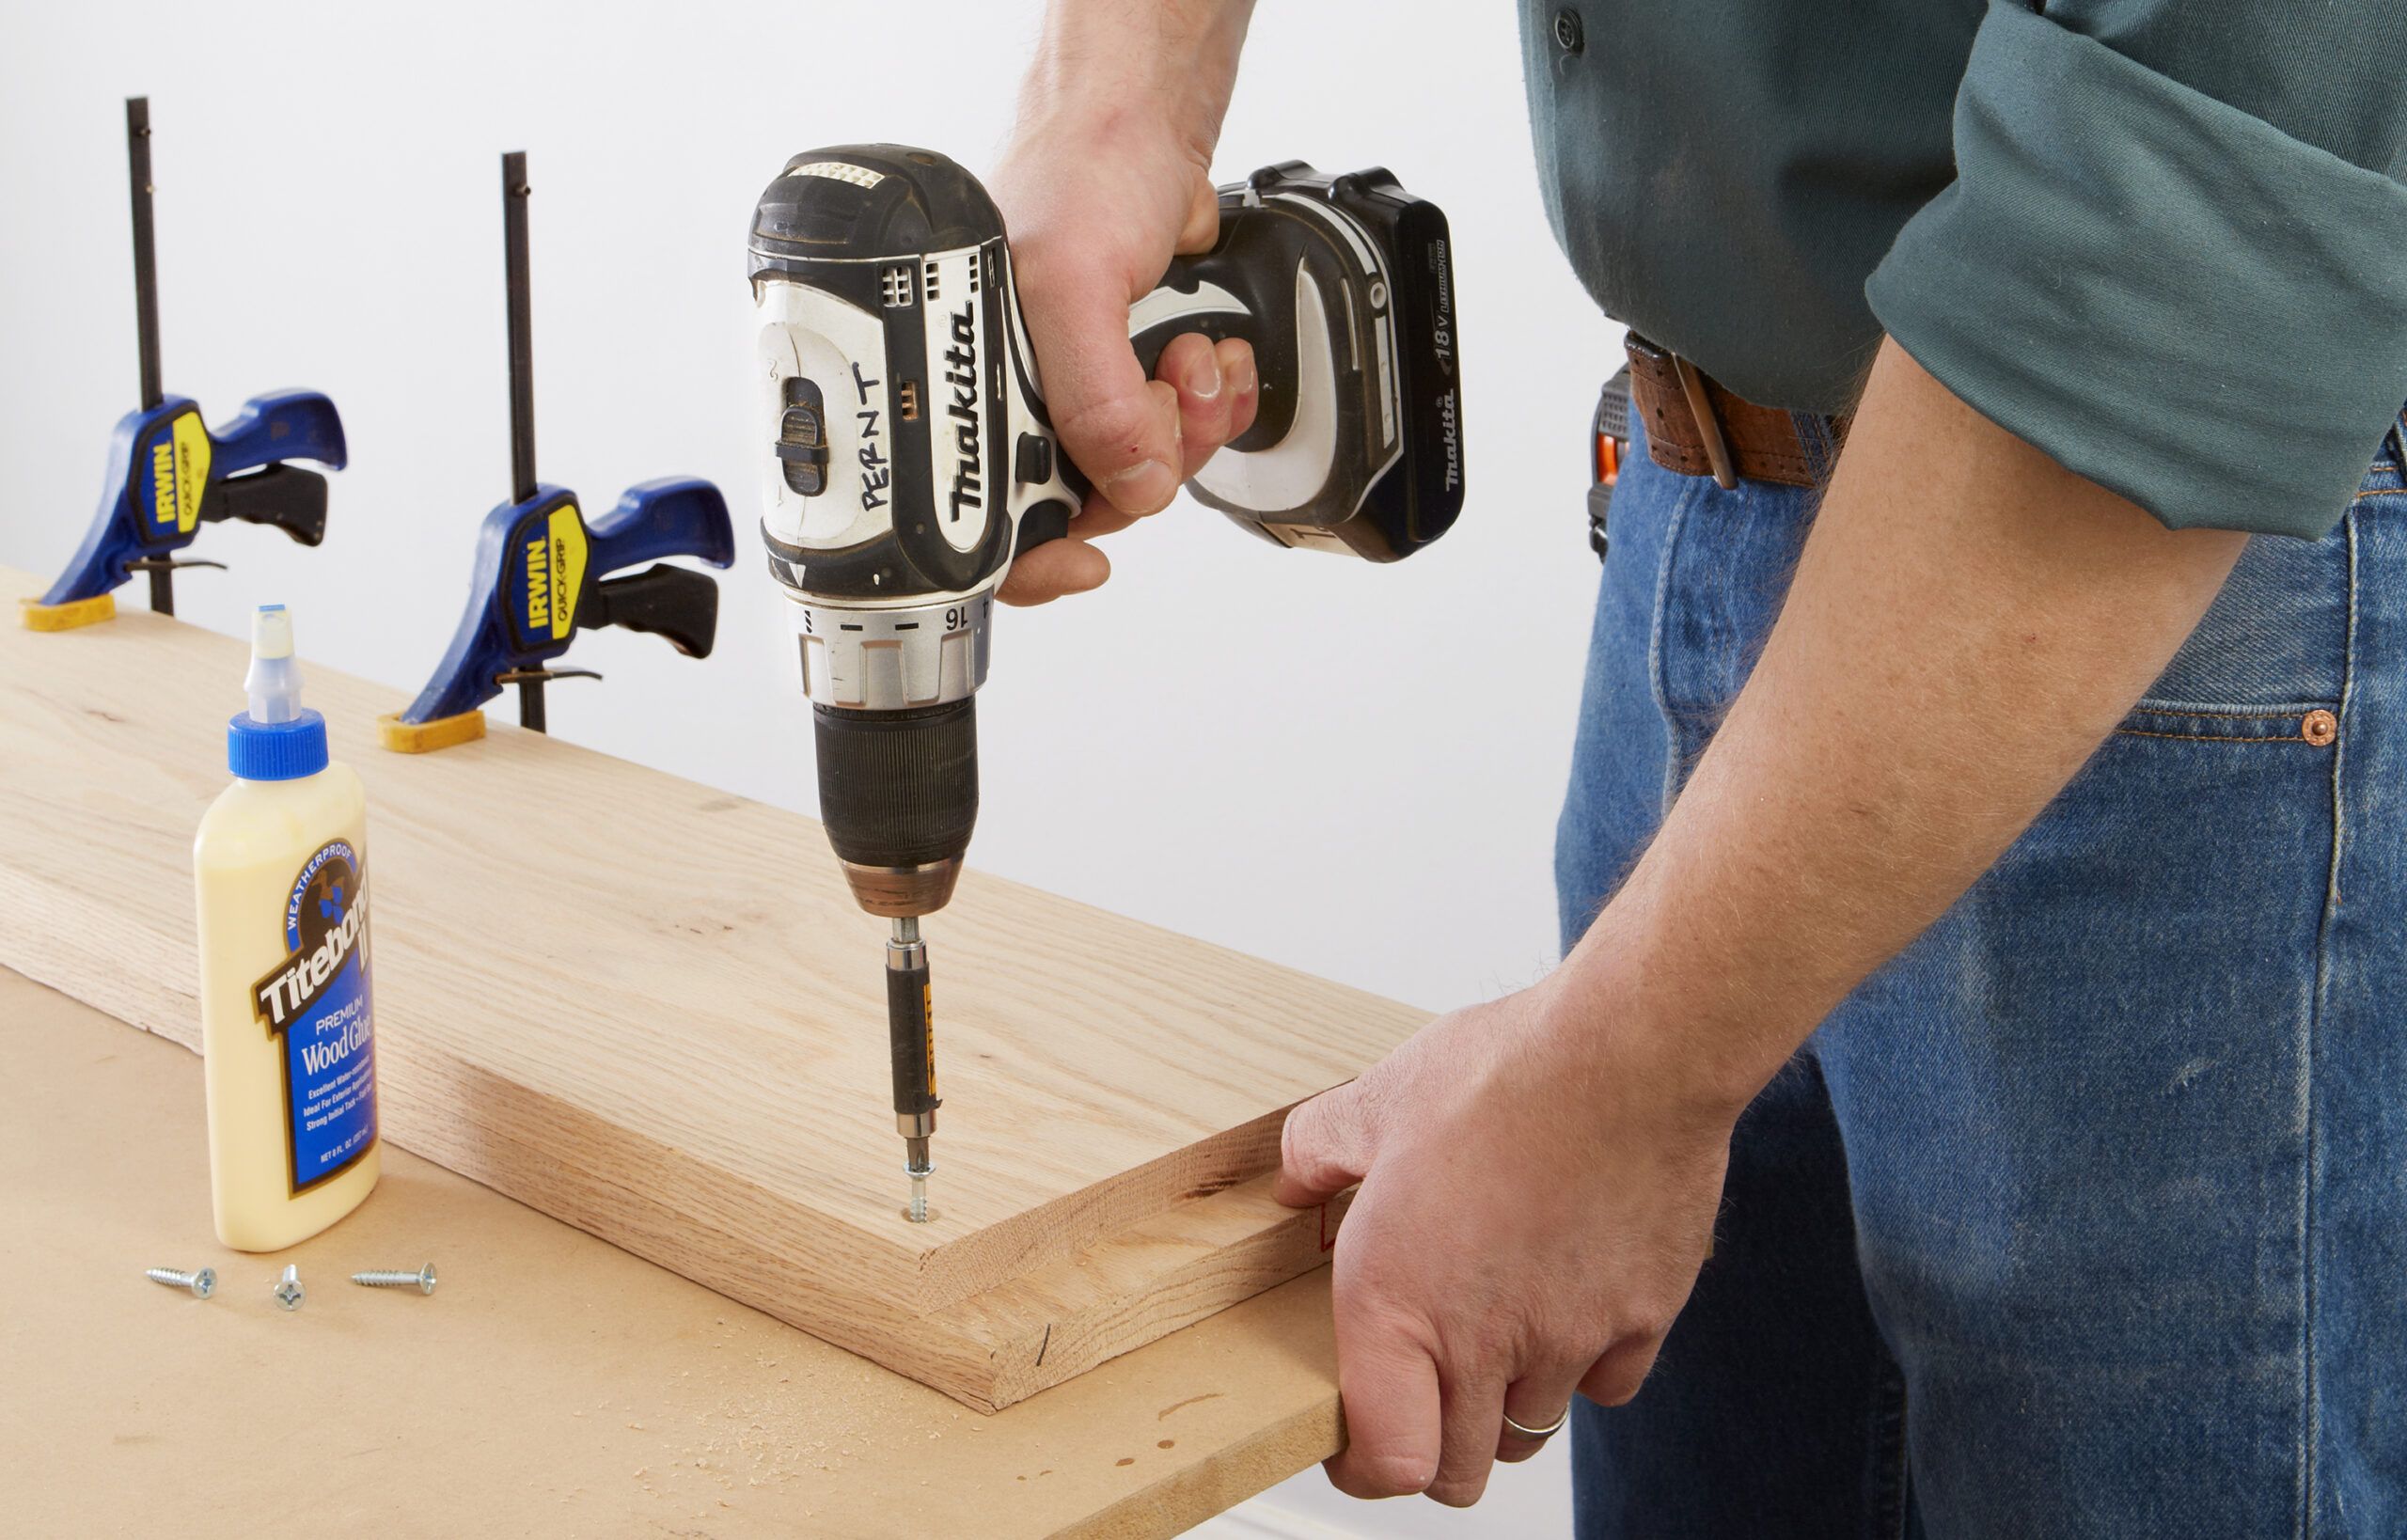
Lay the long shelf board facedown on your work surface. Use a section of pipe to get the right spacing for the shorter board. Apply glue to the joint between the boards, and clamp the short board in place at your marks. Using your drill/driver, countersink pilot holes, and screw the boards together from the underside of the shelf, as shown, to conceal the fasteners. Use 1-inch No. 10 flat-head screws every 10 inches around the perimeter.
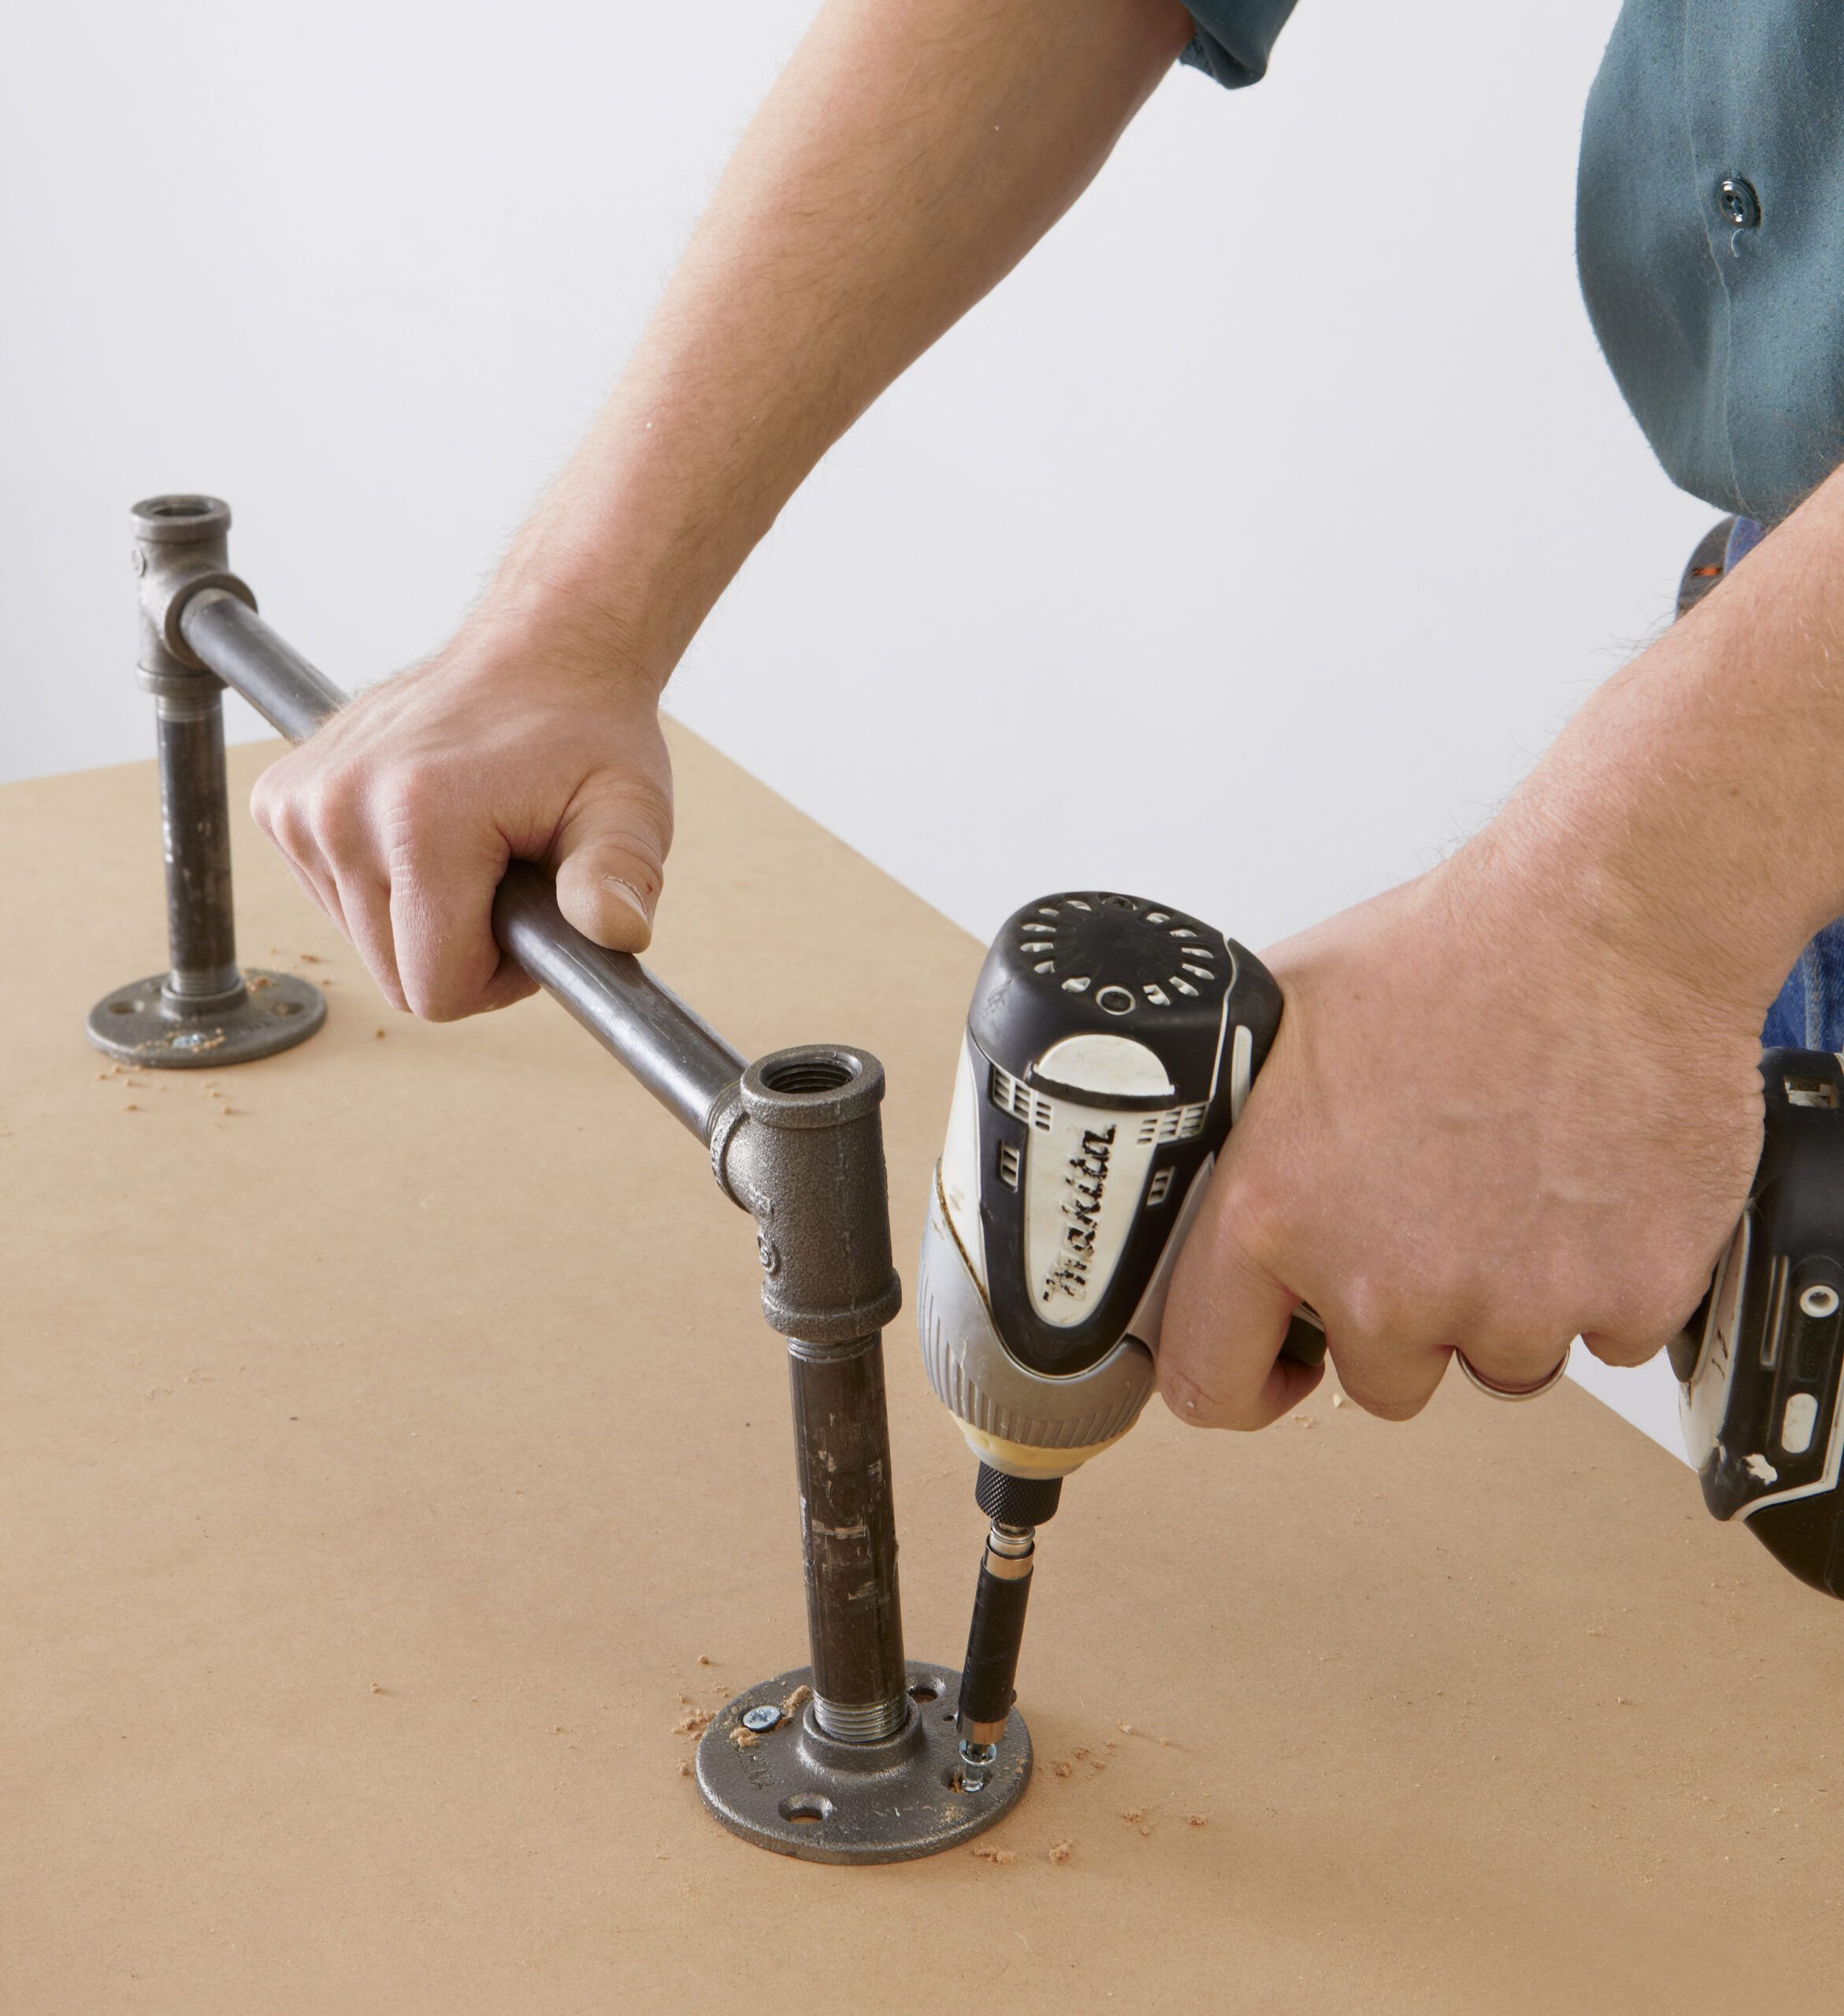
Step 13: Align the Flanges
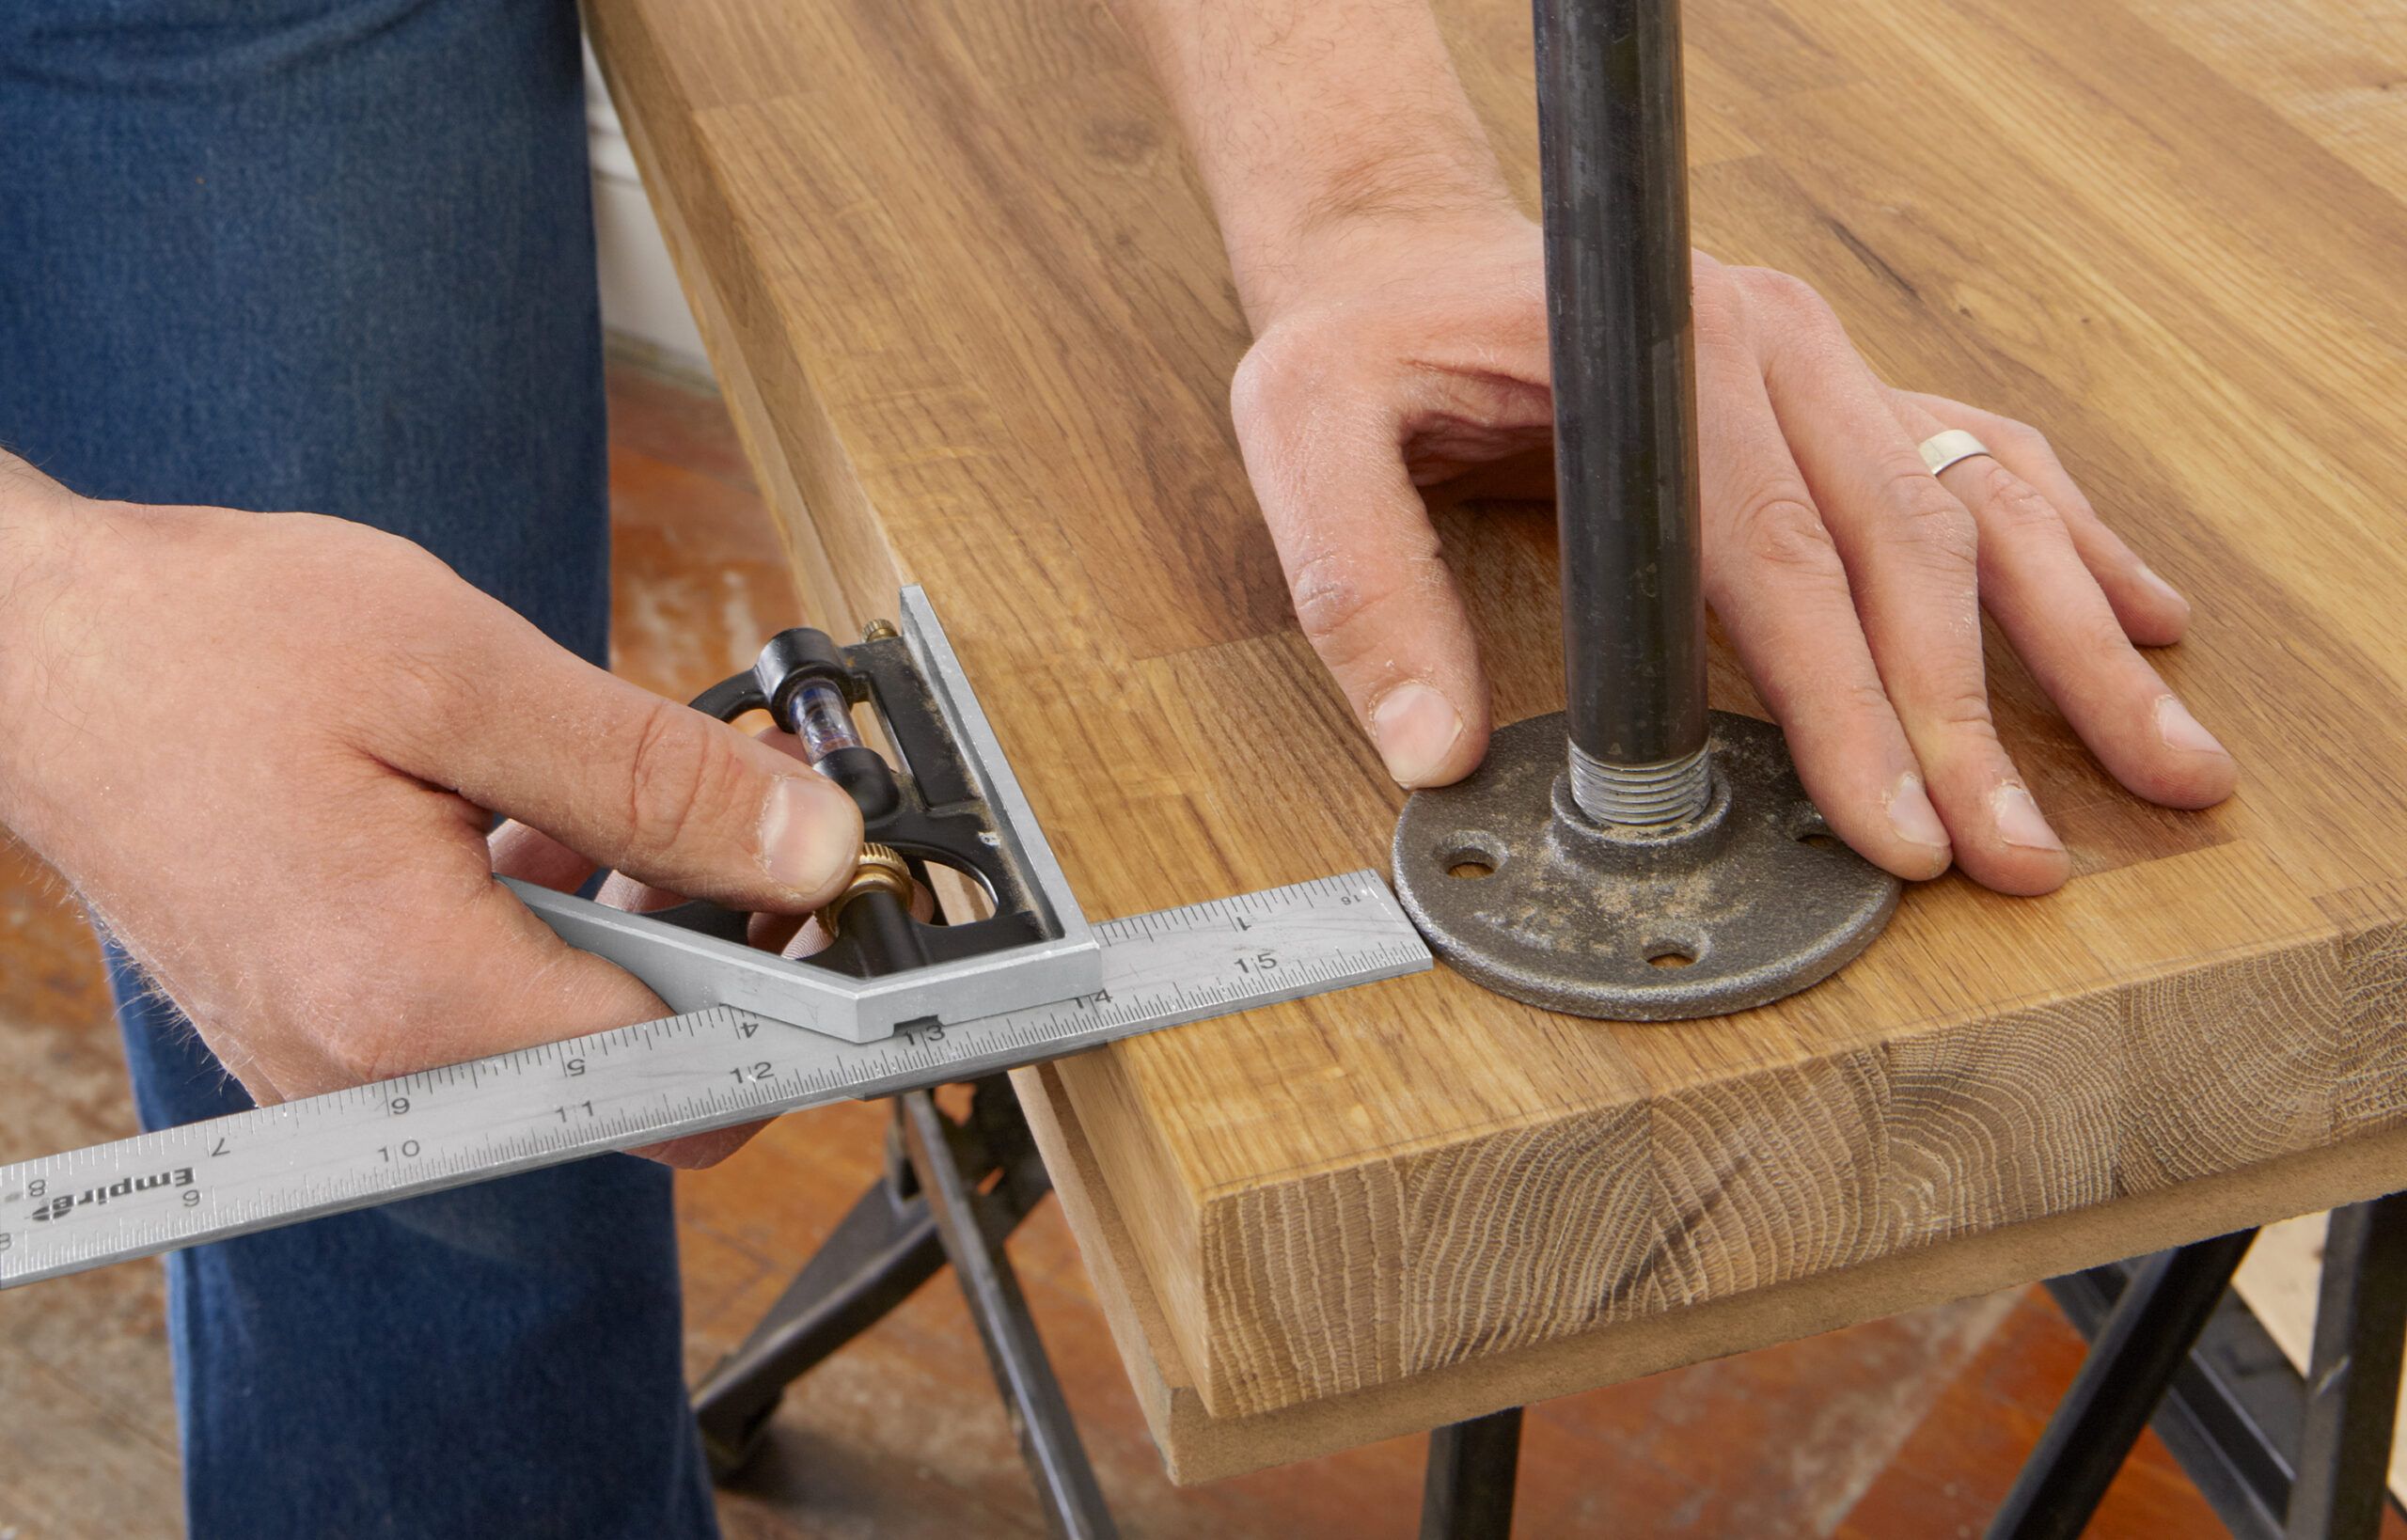
It’s easiest to assemble the island right in the kitchen. Lay the lower butcher-block counter on a temporary work surface. Set the pipe frame on top of it, and use your combination square to center and align the flanges at the corners.
Step 14: Secure the Lower Counter
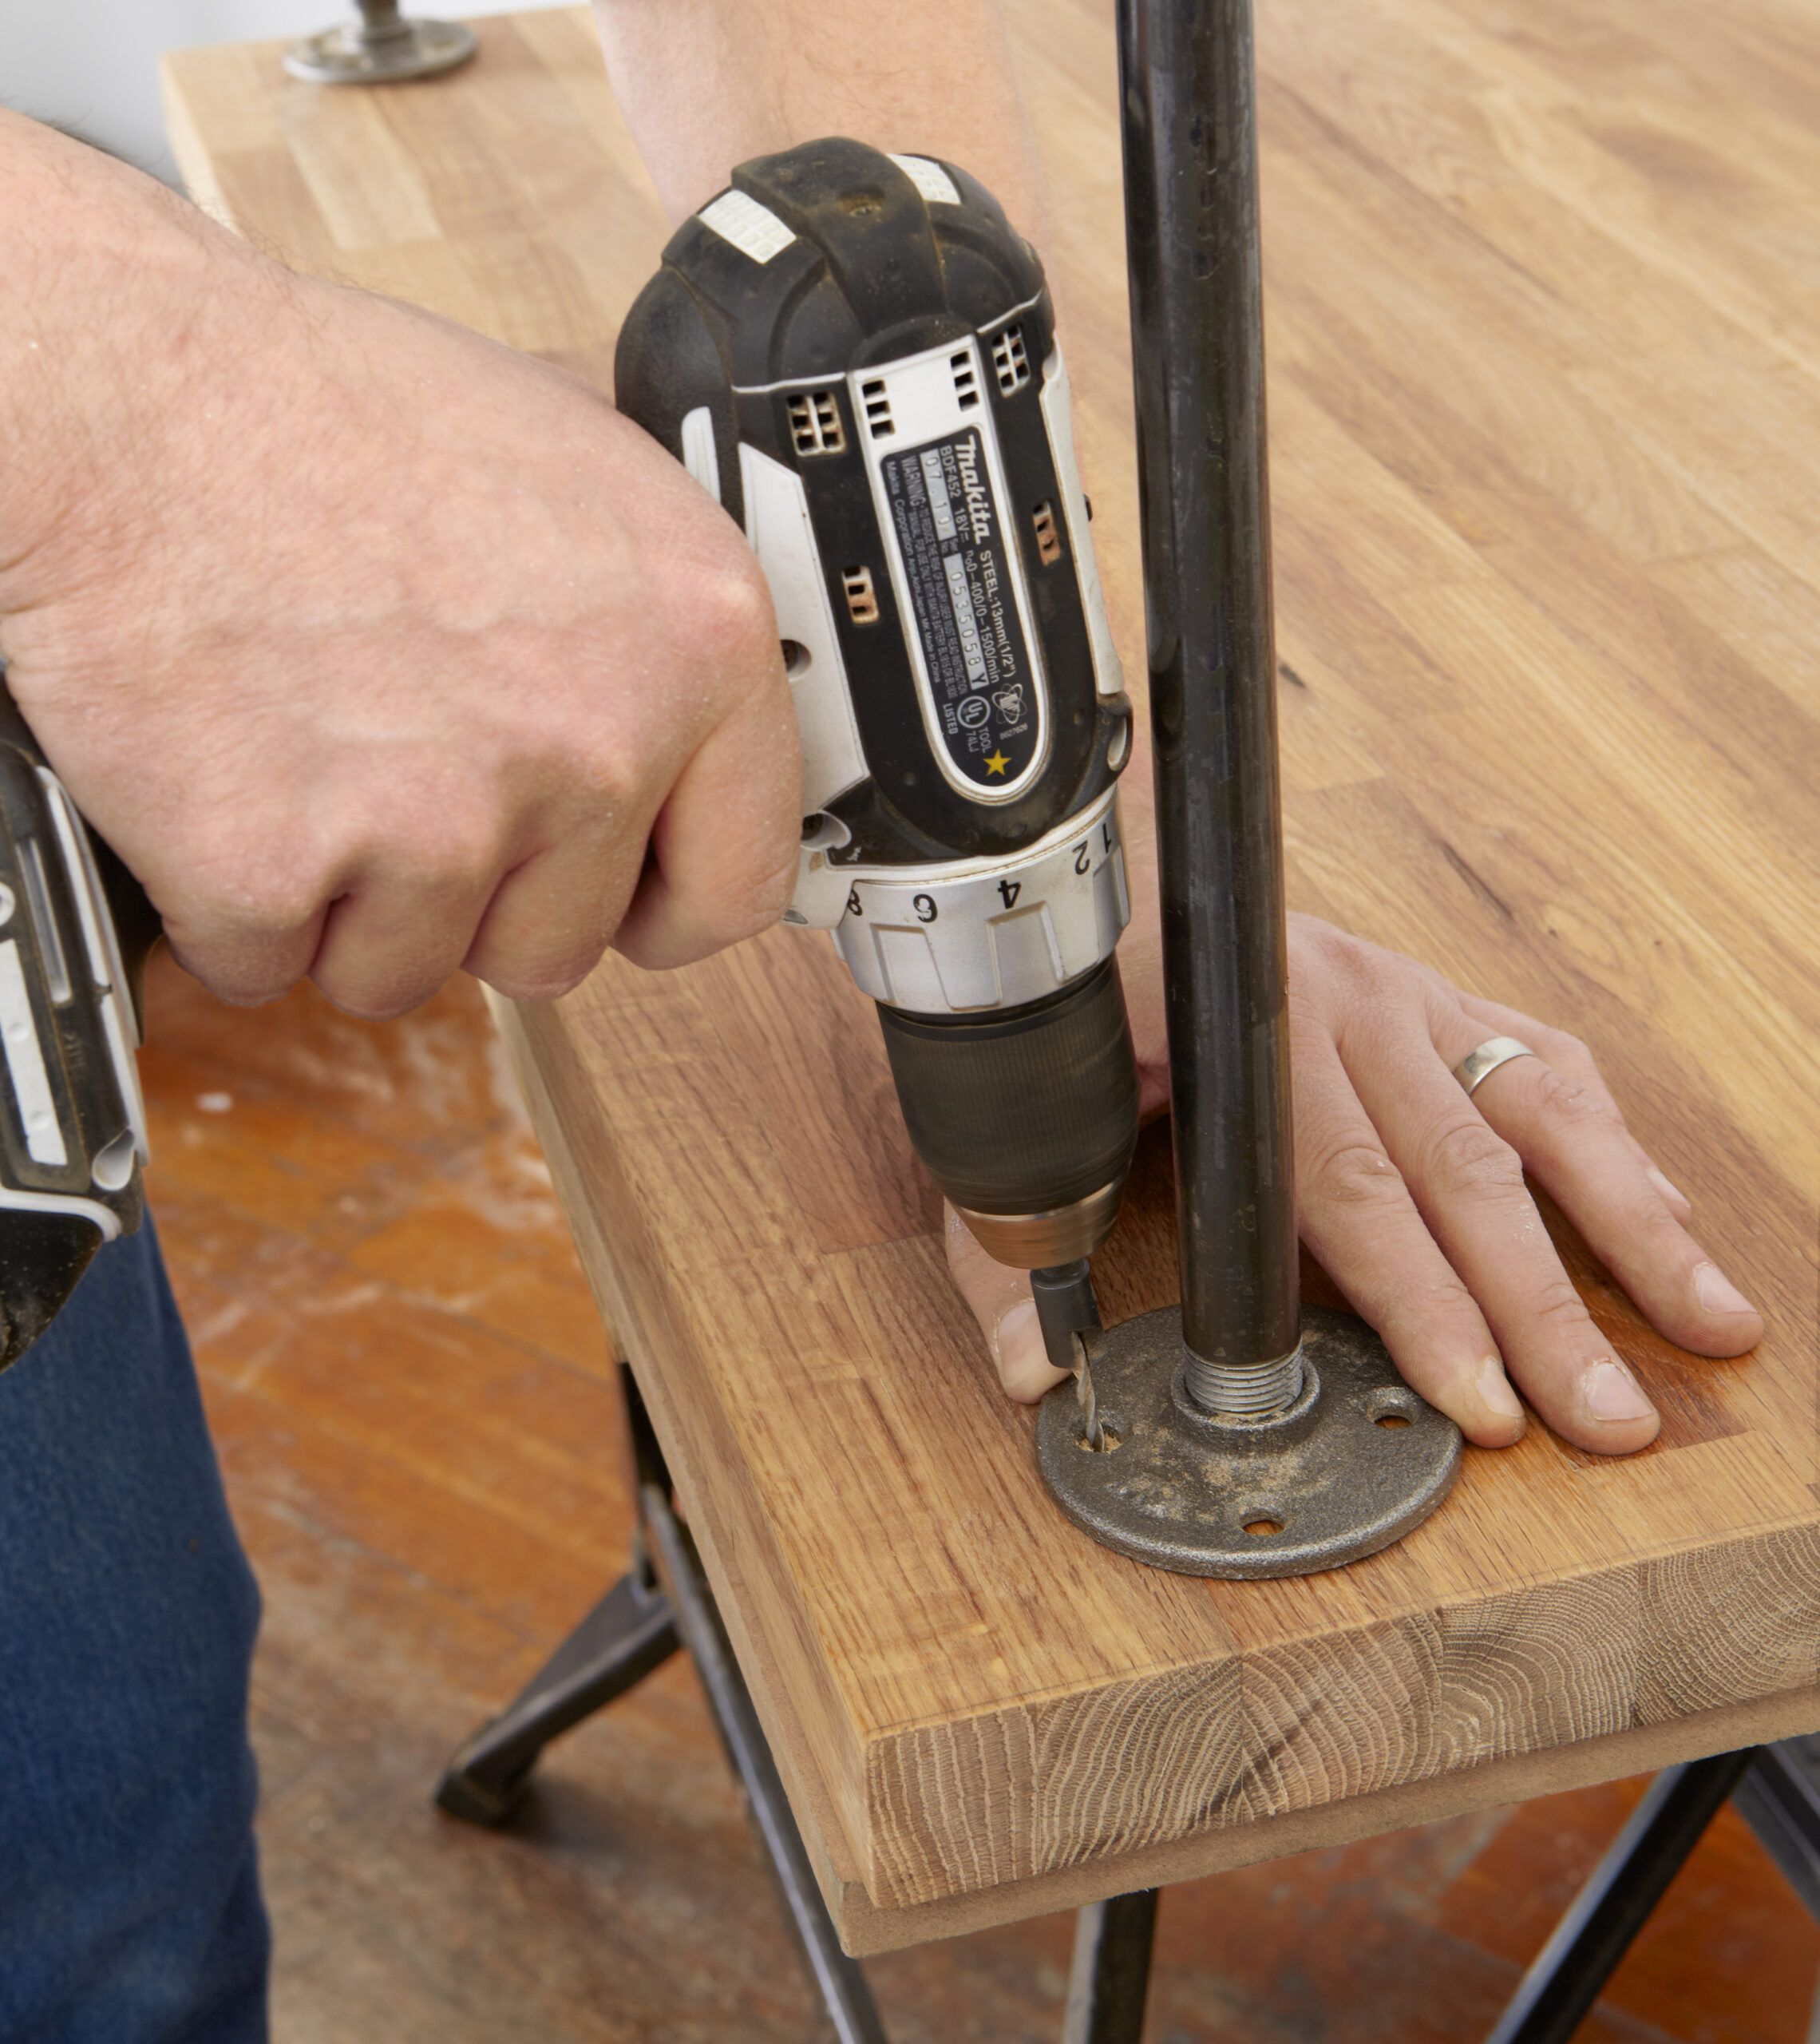
Use a ⅛-inch bit to drill pilot holes 1 inch deep in the openings in the flanges, as shown. Drive flat-head screws through the flange holes into the butcher block.
Step 15: Attach the Countertop
Lay the top counter on the upper flanges and use your combo square to align the flanges underneath it. Make pilot holes in the openings in each flange. Drive flat-head screws into all four holes on each flange to secure the countertop.
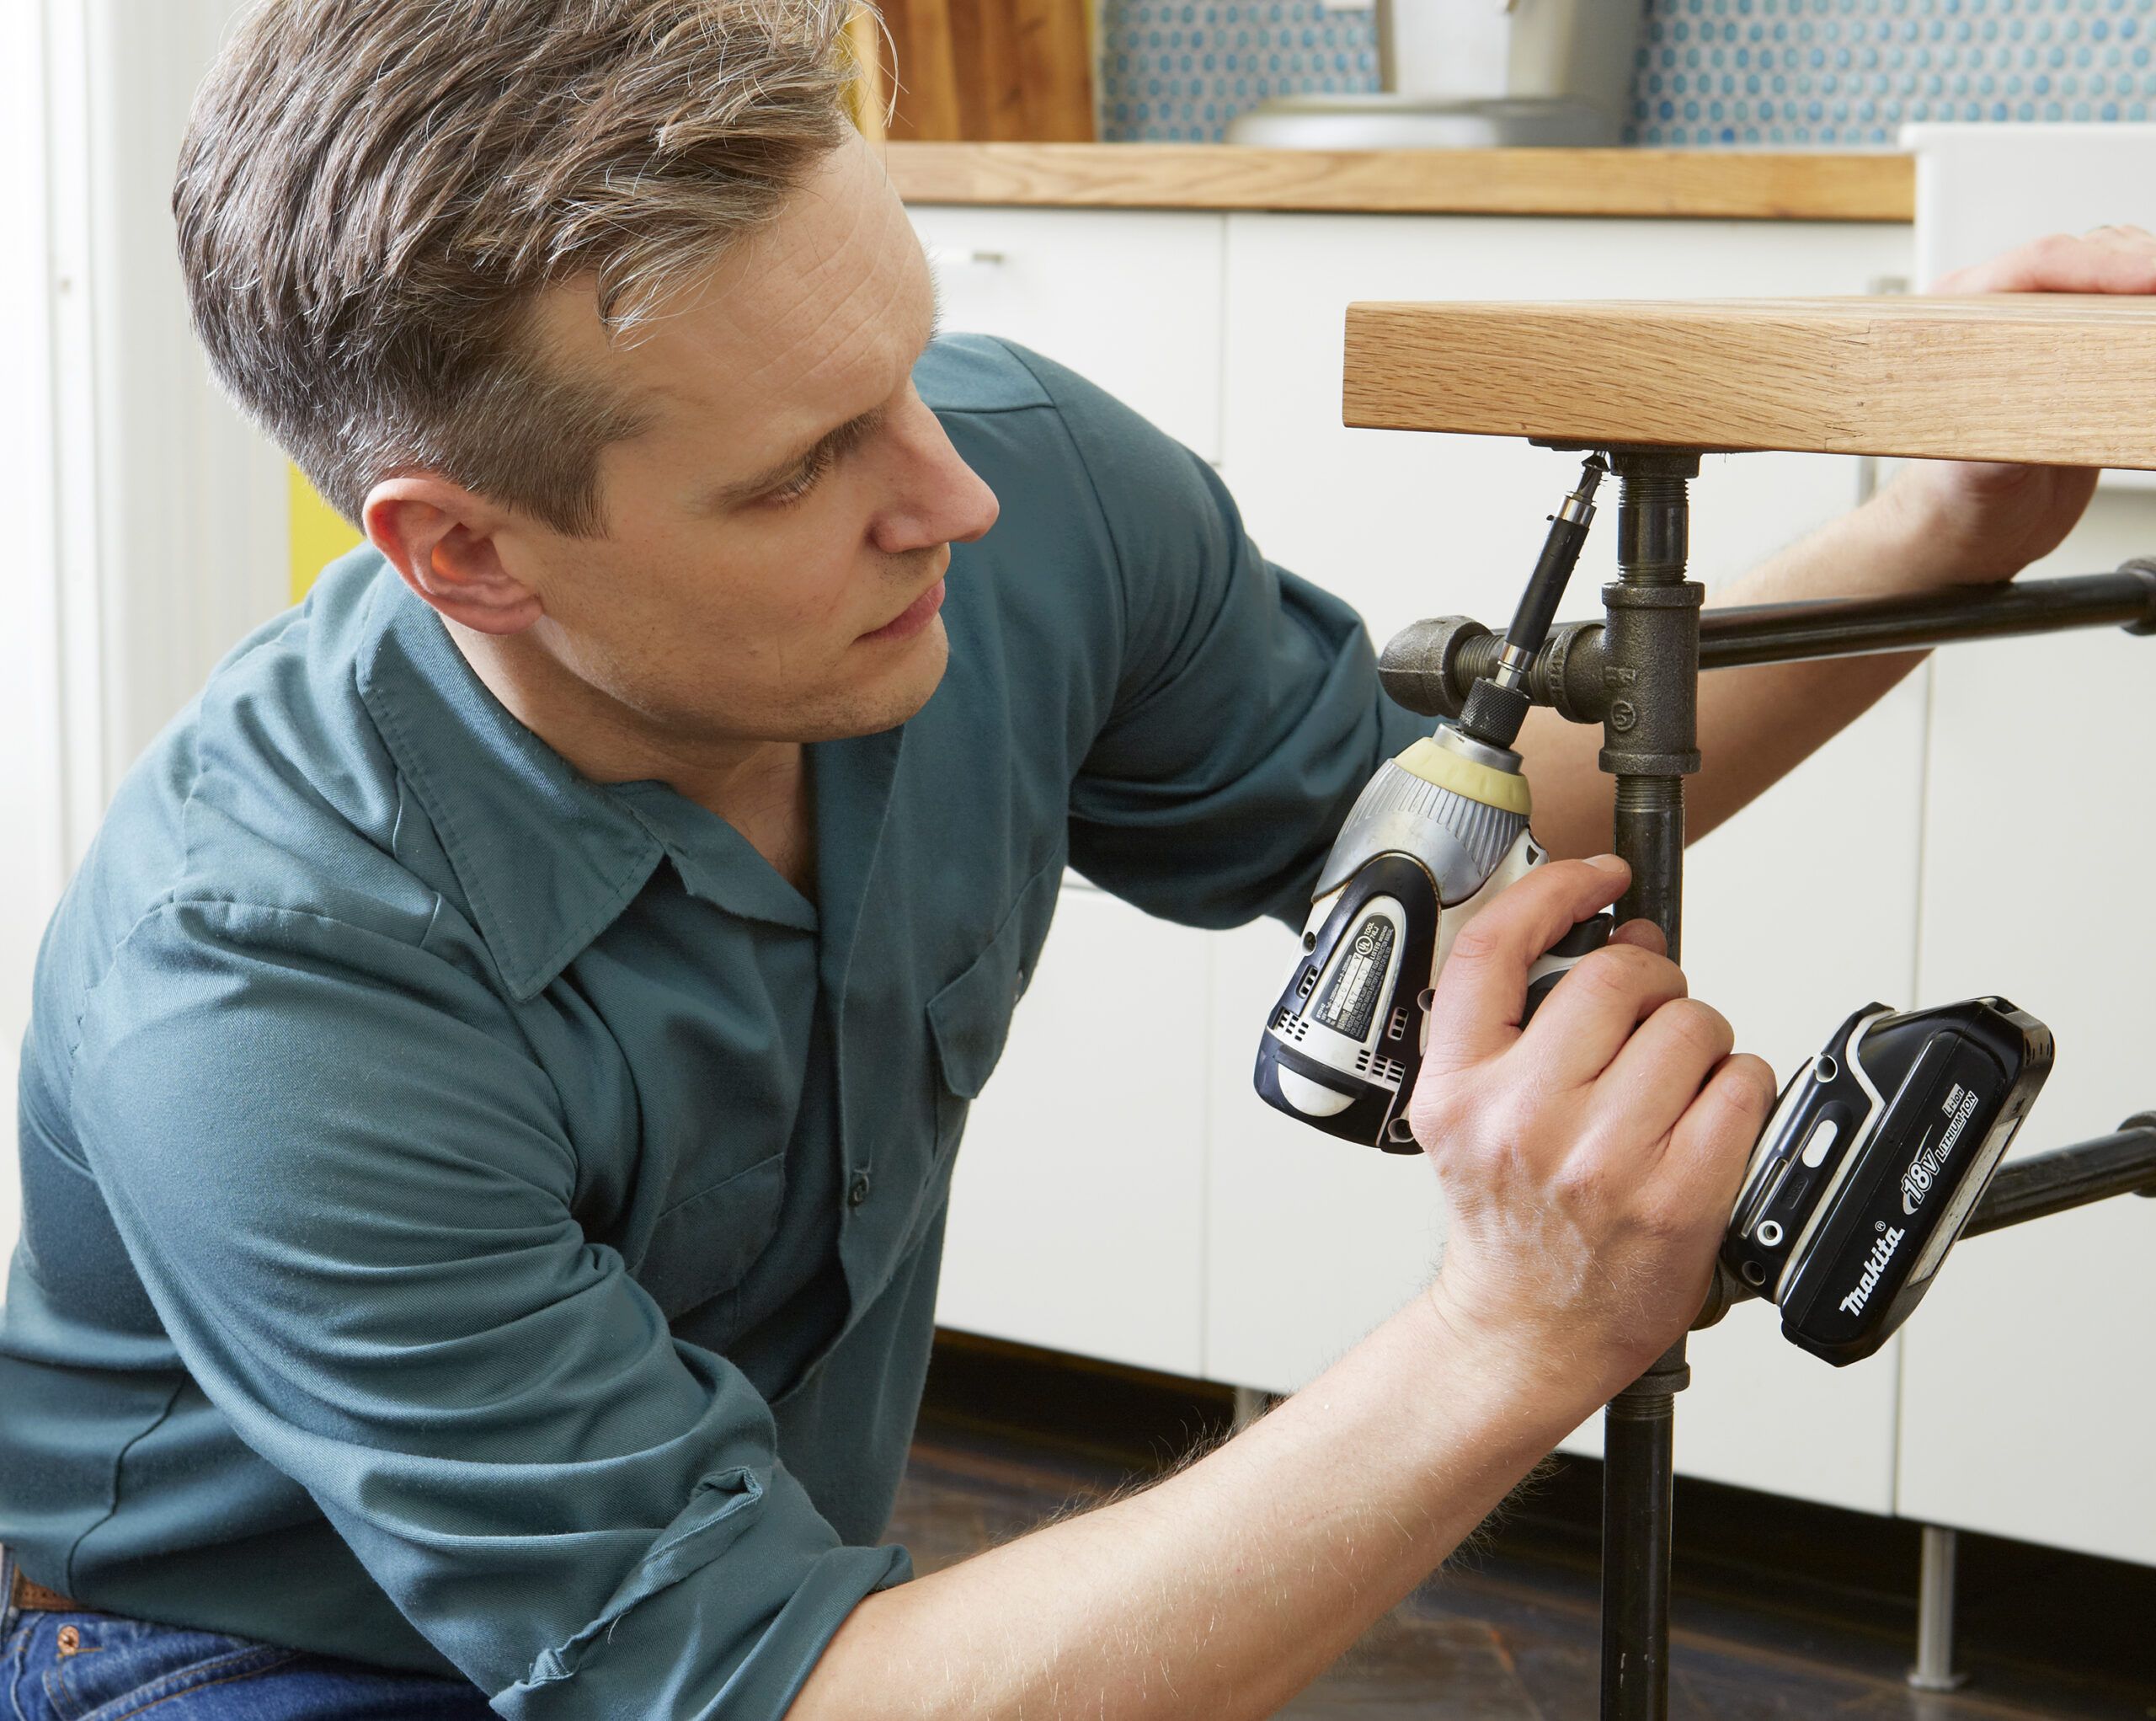
Step 16: Attach the Casters

Tilt the assembled island onto one end. Mark the position of the holes in a caster. Use a ⅛-inch bit to drill pilot holes at your marks. Secure the caster with 1-inch No. 10 pan-head screws. Repeat the process with the other three casters.
Tip: Make the job of driving wood screws into hardwood easier by coating their threads with beeswax or candle wax.
Step 17: Oil the Wood
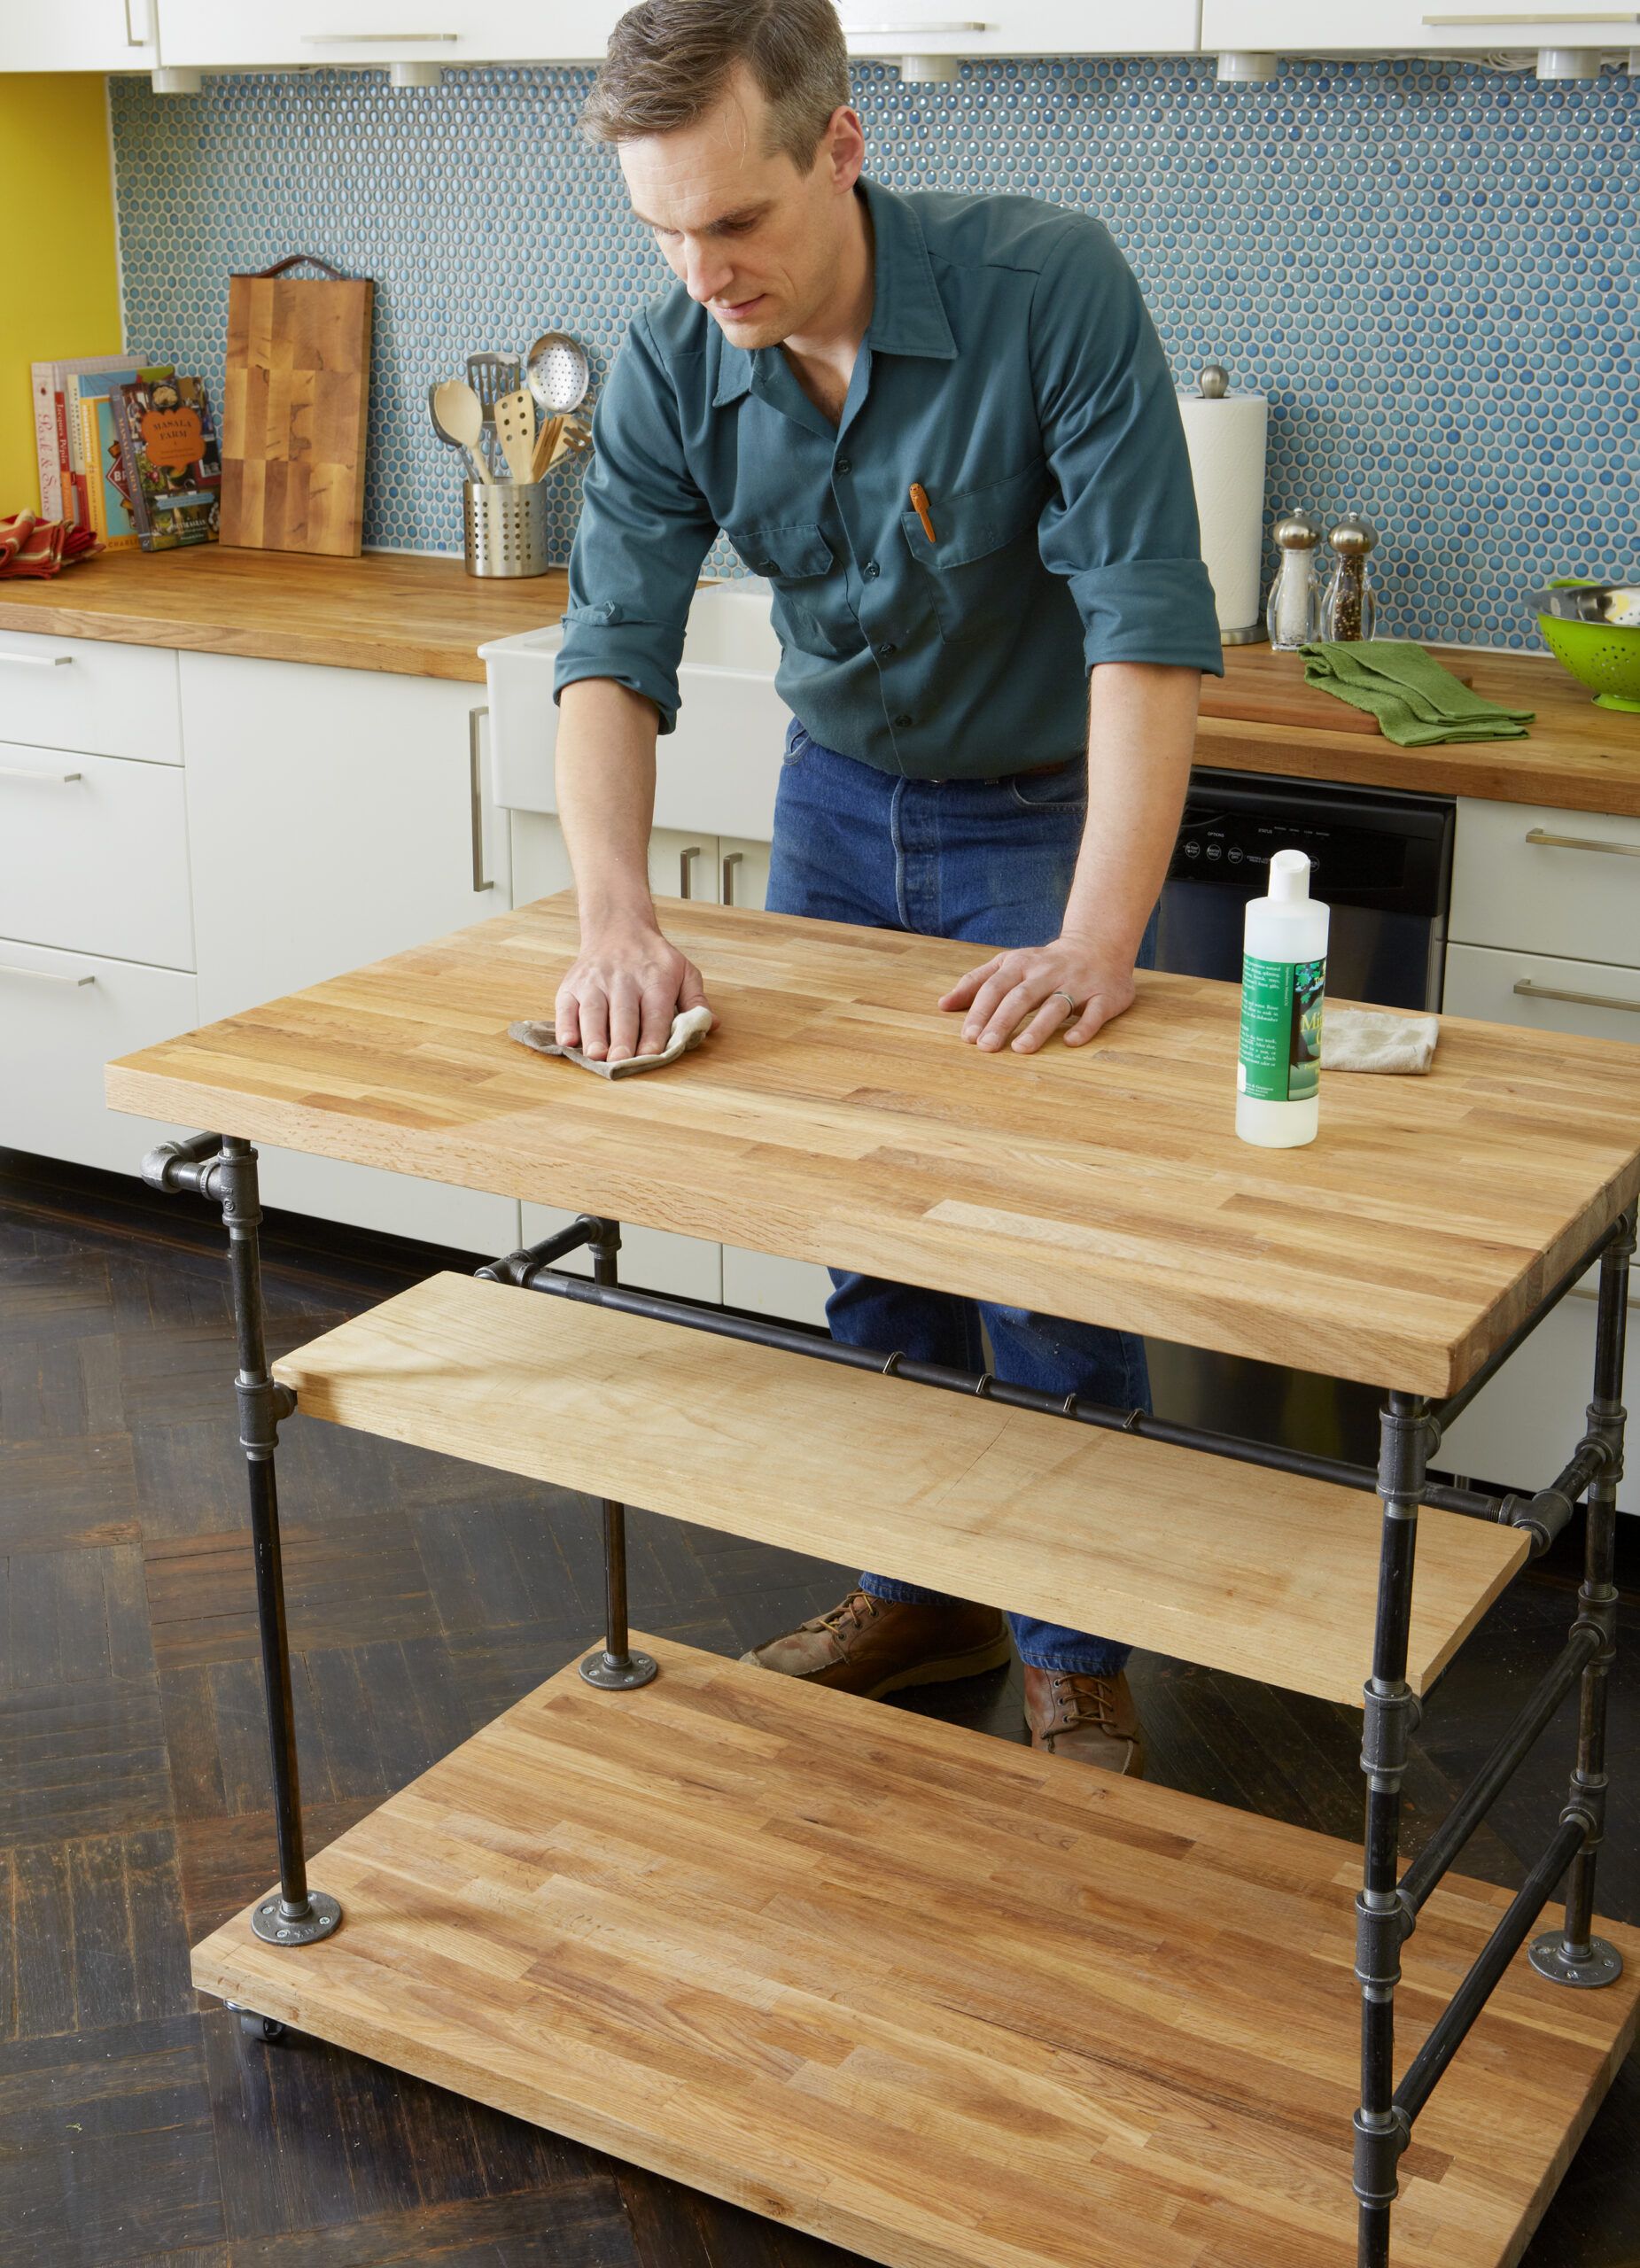
Set the island back up on its casters. Pour mineral oil on a clean, dry cloth and wipe it over the countertop and the cut edges. Oil the shelf and set it in place on the shelf rungs. Allow the oil to soak into the wood for an hour, then apply another coat. Wipe off any excess oil, and you’re ready to start cooking.