Arch Arrival
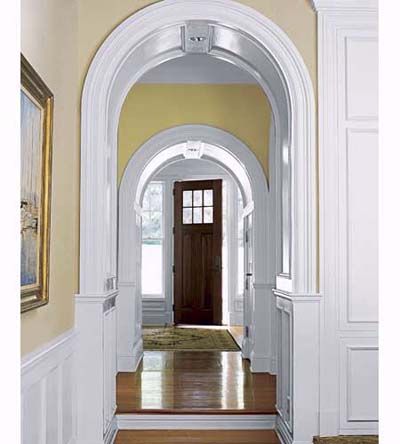
Architectural trim is a defining feature in any home, whether the interior is formal or casual. And historically, it was the door casing that set the tone—from the graceful arched profiles in a Georgian to the stocky symmetrical surrounds in a Craftsman.
Today, a variety of period profiles can suit a new home—as long as the scale and proportions are right—and restore original detail that’s been lost from an old one. Best of all, almost any style casing can be built from standard stock molding. “Even elaborate profiles are often just a lot of simple, inexpensive shapes pieced together,” says This Old House master carpenter Norm Abram.
Here, a pair of elegant arched casings help unify extensive trimwork and frame the perspective toward the front door in a new home designed by Greenwich, Connecticut, architect Jay Haverson.
Smooth Transition
Door casings are both decorative and utilitarian, enhancing the look of the door while also concealing the transition between the wall and the jamb. Victorian-era designs from the late 1800s were often made from fluted boards butted up against corner blocks, which were either plain or had carved details. These casings were symmetrical, meaning that the boards were the same thickness on the inside edge as the outside, with a uniform pattern across their faces.
Deep Thoughts
Also popular were tapered casings that were typically made by building up several profiles, working from the jamb outward and joining the head and leg pieces with mitered cuts. Tapered casings were common in Federal and Italianate homes, as well as in the later Greek Revival and Colonial Revival styles that emphasized depth in decoration.
Ripple Effect
The wide, rippling profile shown has a versatile style that would work equally well in an 1880s Victorian-era house or in a new Colonial Revival. Made of seven stock pieces of varying sizes that are nailed together one course at a time, the casing is built up starting at the door jamb’s inside edge.
Soft Edges
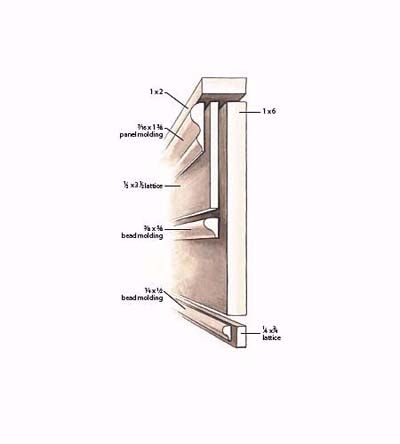
Smooth 1×2 boards and lattice are used to form the steps while curved end-bead and panel moldings soften the edges. Built-out casings like this can appear larger and have more weight in a room when stained. Painting the trim to complement the wall color gives it a lighter, more subtle look.
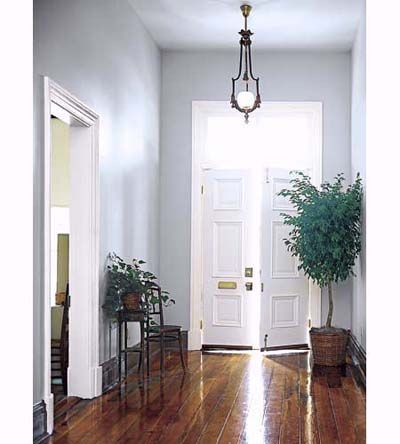
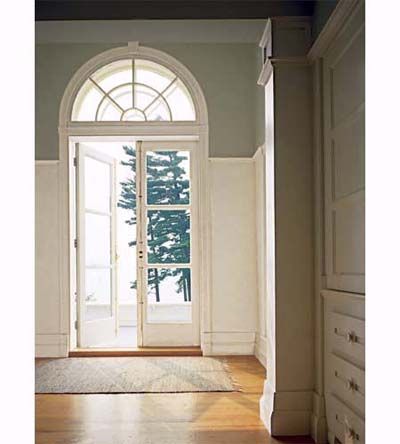
Great Heights
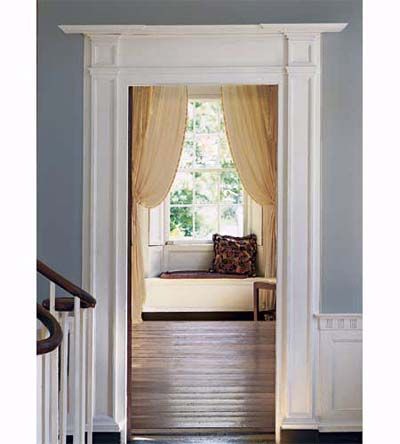
Home builders are bringing America’s ceilings back to their lofty 19th-century heights. But unfortunately they aren’t always including the thick, over-the-door trim that once helped accentuate a room’s soaring proportions by drawing the eye up, as in this grand entrance.
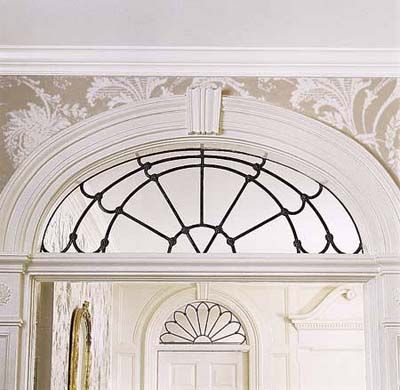
Fit for the Gods
Among the most decorative door entablatures were those in Georgian- and Federal-style houses built around 1800, as well as in later Greek Revivals. These often had pedimented tops patterned after those on ancient temples, as well as stacked moldings with dentil, interlocking Greek key, or beaded designs.
Tall Order
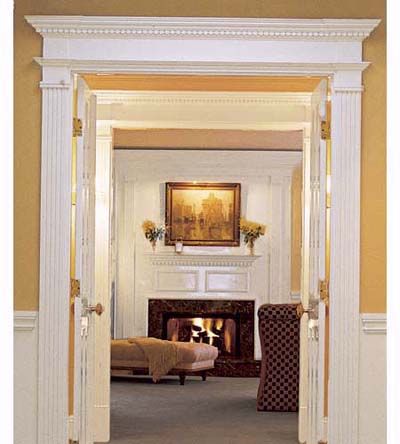
Perched above fluted pilasters, the top of the door surround shown left follows the three-part order of a classical entablature. Rake molding represents the architrave, which is positioned above the opening and on top of pilaster legs.
Stepping Out
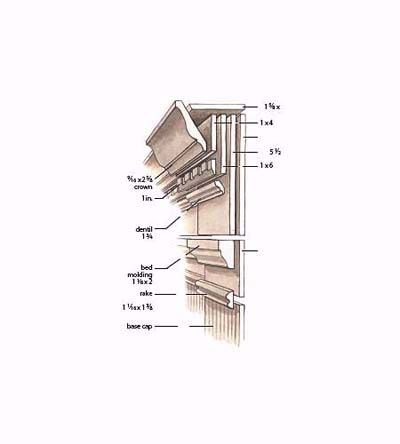
A 1×10 placed above creates the frieze, which is stepped out on the ends with an additional 1x block (shown at right). The frieze serves as a base for bed, dentil, and crown moldings used here to form a sophisticated cornice—the last element of a formal entablature. The built-out ends of the entablature are wrapped with mitered returns (not shown).
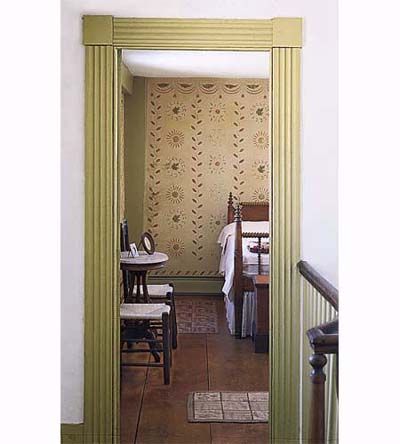
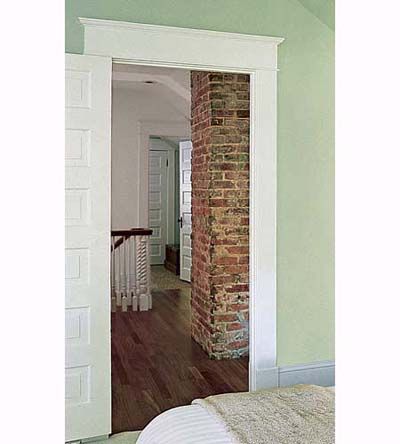
Window Dressing
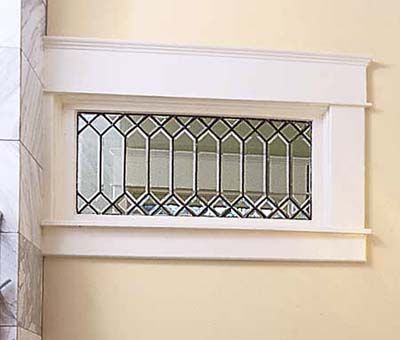
To create symmetry in a room, the proportions and profiles on your window casings should match—or at least complement—those on your door surrounds. This is easy enough, considering windows share the same head and leg casings as doors. The only difference is that windows have a fourth side, a bottom ledge consisting of the stool (or sill) and the apron. The stool is basically a shelf that extends out into the room, and beyond the width of the legs by an inch or so. The stool can be finished in several ways—for instance, with a simple square cut (as on the Arts and Crafts?style casing shown above) or with a rounded edge for a graceful return. The apron runs directly under the stool and is usually cut flush with the leg casings’ outer edges.
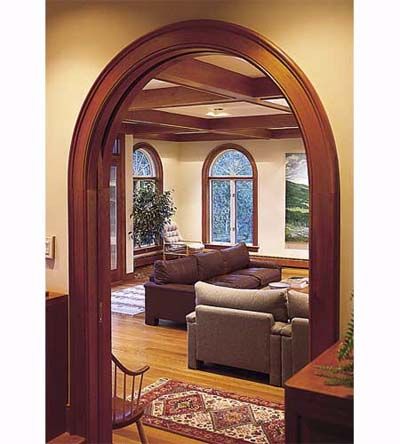
Arch of Triumph
The archway is making a comeback. “People are putting them into new houses because there’s a renewed interest in the richness of detail and sense of permanence that traditional building styles convey,” says Arlene Sloan, an architect in Santa Rosa, California.
Case in Point
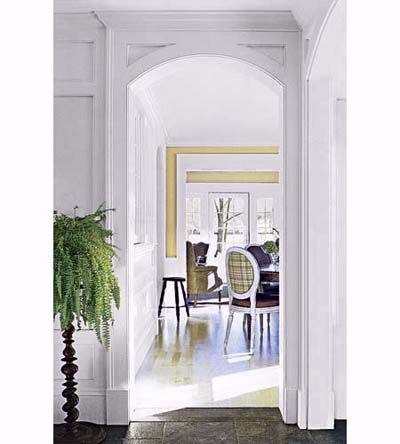
In the late 1700s, classical arched casings graced Georgian-style houses, often surrounding fanlight transoms that were positioned over square doorways to soften their severe angles.
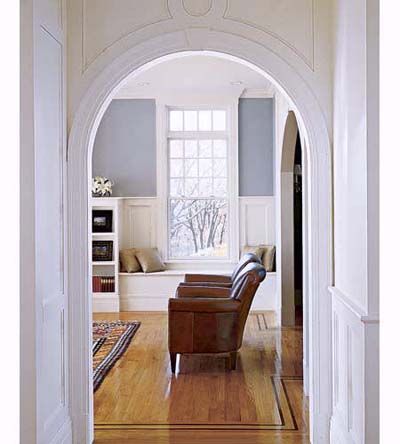
Tall and Curvy
During the Victorian era, intricately detailed Italianate houses were defined by their tall curved-top doors and arched windows.
On a Mission
And in the 1920s, interior arches in Mission-style manses echoed the Spanish-influenced barrel-tile roofs and undulating parapets on their exteriors.
Keep It Simple
In the past, trimming out an archway meant forcing straight wooden moldings to bend through a series of complicated kerf cuts. Today, kits simplify the trim process and also include the jamb, so you can easily turn a square opening into a curved one.
Create a Curve
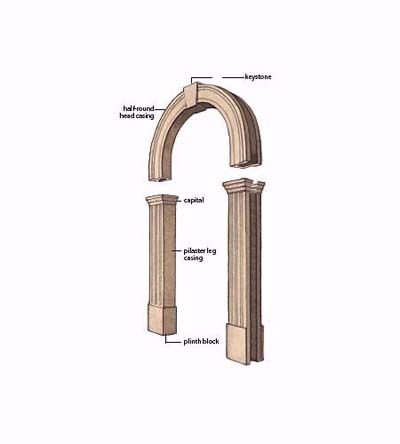
This three-piece kit from CurveMakers ($500 at curvemakers.com) approximates the look of the half-round archway shown above with a keystone on top and fluted pilasters on the sides. The head and leg casings cup the top and sides of the passageway. A supplied template helps you create a curve in your existing square opening.
Be Flexible

Another way to easily trim an arch is with flexible polymer molding—it is cheaper than custom wood curves; cuts with standard woodworking tools; is paintable and stainable; and won’t rot, warp, or crack. Some products such as Flex Trim (shown) are even tooled to simulate wood’s natural grain. Here are TOH general contractor Tom Silva’s tips for building with bendable profiles:
Use only what you need
Yes, it’s cheaper than custom wood curves, but flexible moldings still cost more than most straight profiles (about $8.50, compared with $1.15 a linear foot for a simple pine profile). So use it only where you need bending action.
Measure twice
Companies stock many standard arch sizes, but for a custom job, you’ll need to create a template of your arch by tracing its outline onto kraft paper. To match the curve to existing leg casing, send the company a molding sample with the template.
Fasten tight
Flexible molding can droop over time. So in addition to polyurethane construction adhesive, use plenty of trim screws—at least one every 16 inches.
Lay it on thick
Since flexible moldings don’t absorb stain like wood, you’ll need more coats to get a good match. Instead of brushing it on, Tom suggests using a spray-on finish, which helps prevent streaking. Gel stain applied with a rag also works well.